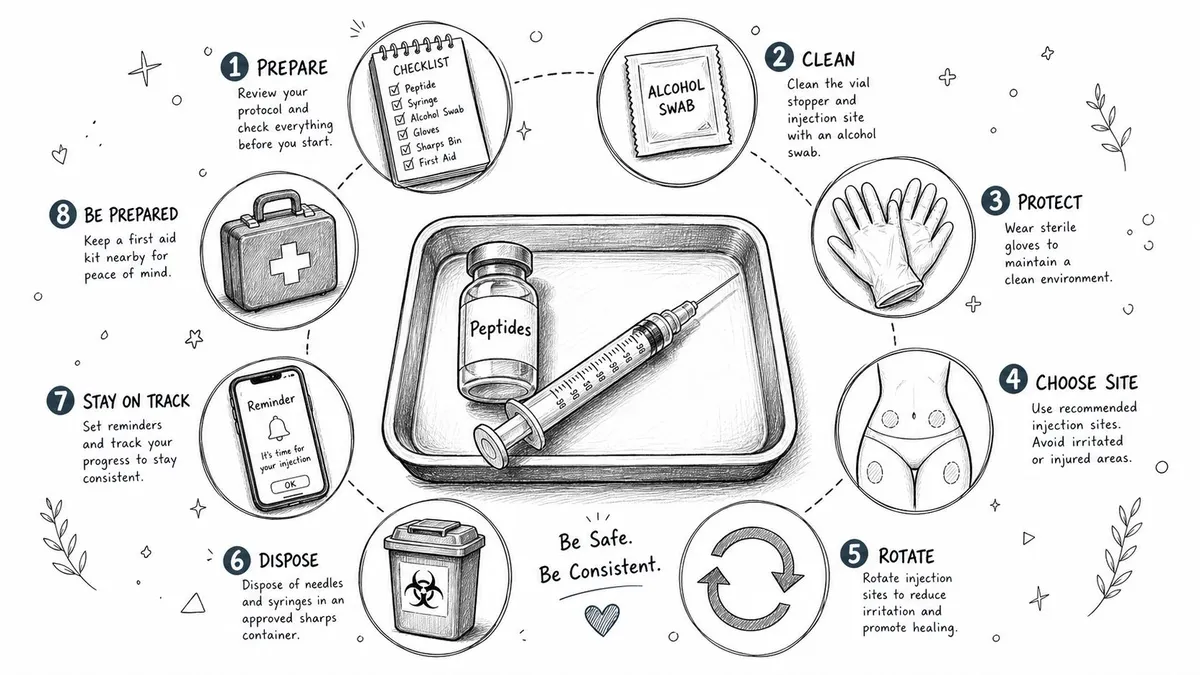
You have the vial out. The alcohol pads are on the counter. You’re about to draw a dose, and the part that usually gets skipped isn’t the injection itself. It’s everything around it. Most errors happen before the needle ever touches skin: a rushed setup, a compromised vial, a syringe that doesn’t match the dose, a clean-looking surface that isn’t a clean preparation area.
That’s why a real injection safety checklist has to be more than generic advice. The World Health Organization notes that unsafe injections remain a major source of bloodborne infection, accounting for approximately 33% of hepatitis B infections, 39% of hepatitis C infections, and 2.5% of HIV infections globally in its injection safety guidance (WHO injection safety aide-memoire/injection-safety/aidememoire-injection-safety.pdf?sfvrsn=80eaf05d_5)). In practice, the safest routine is the one that removes guesswork and makes each step repeatable.
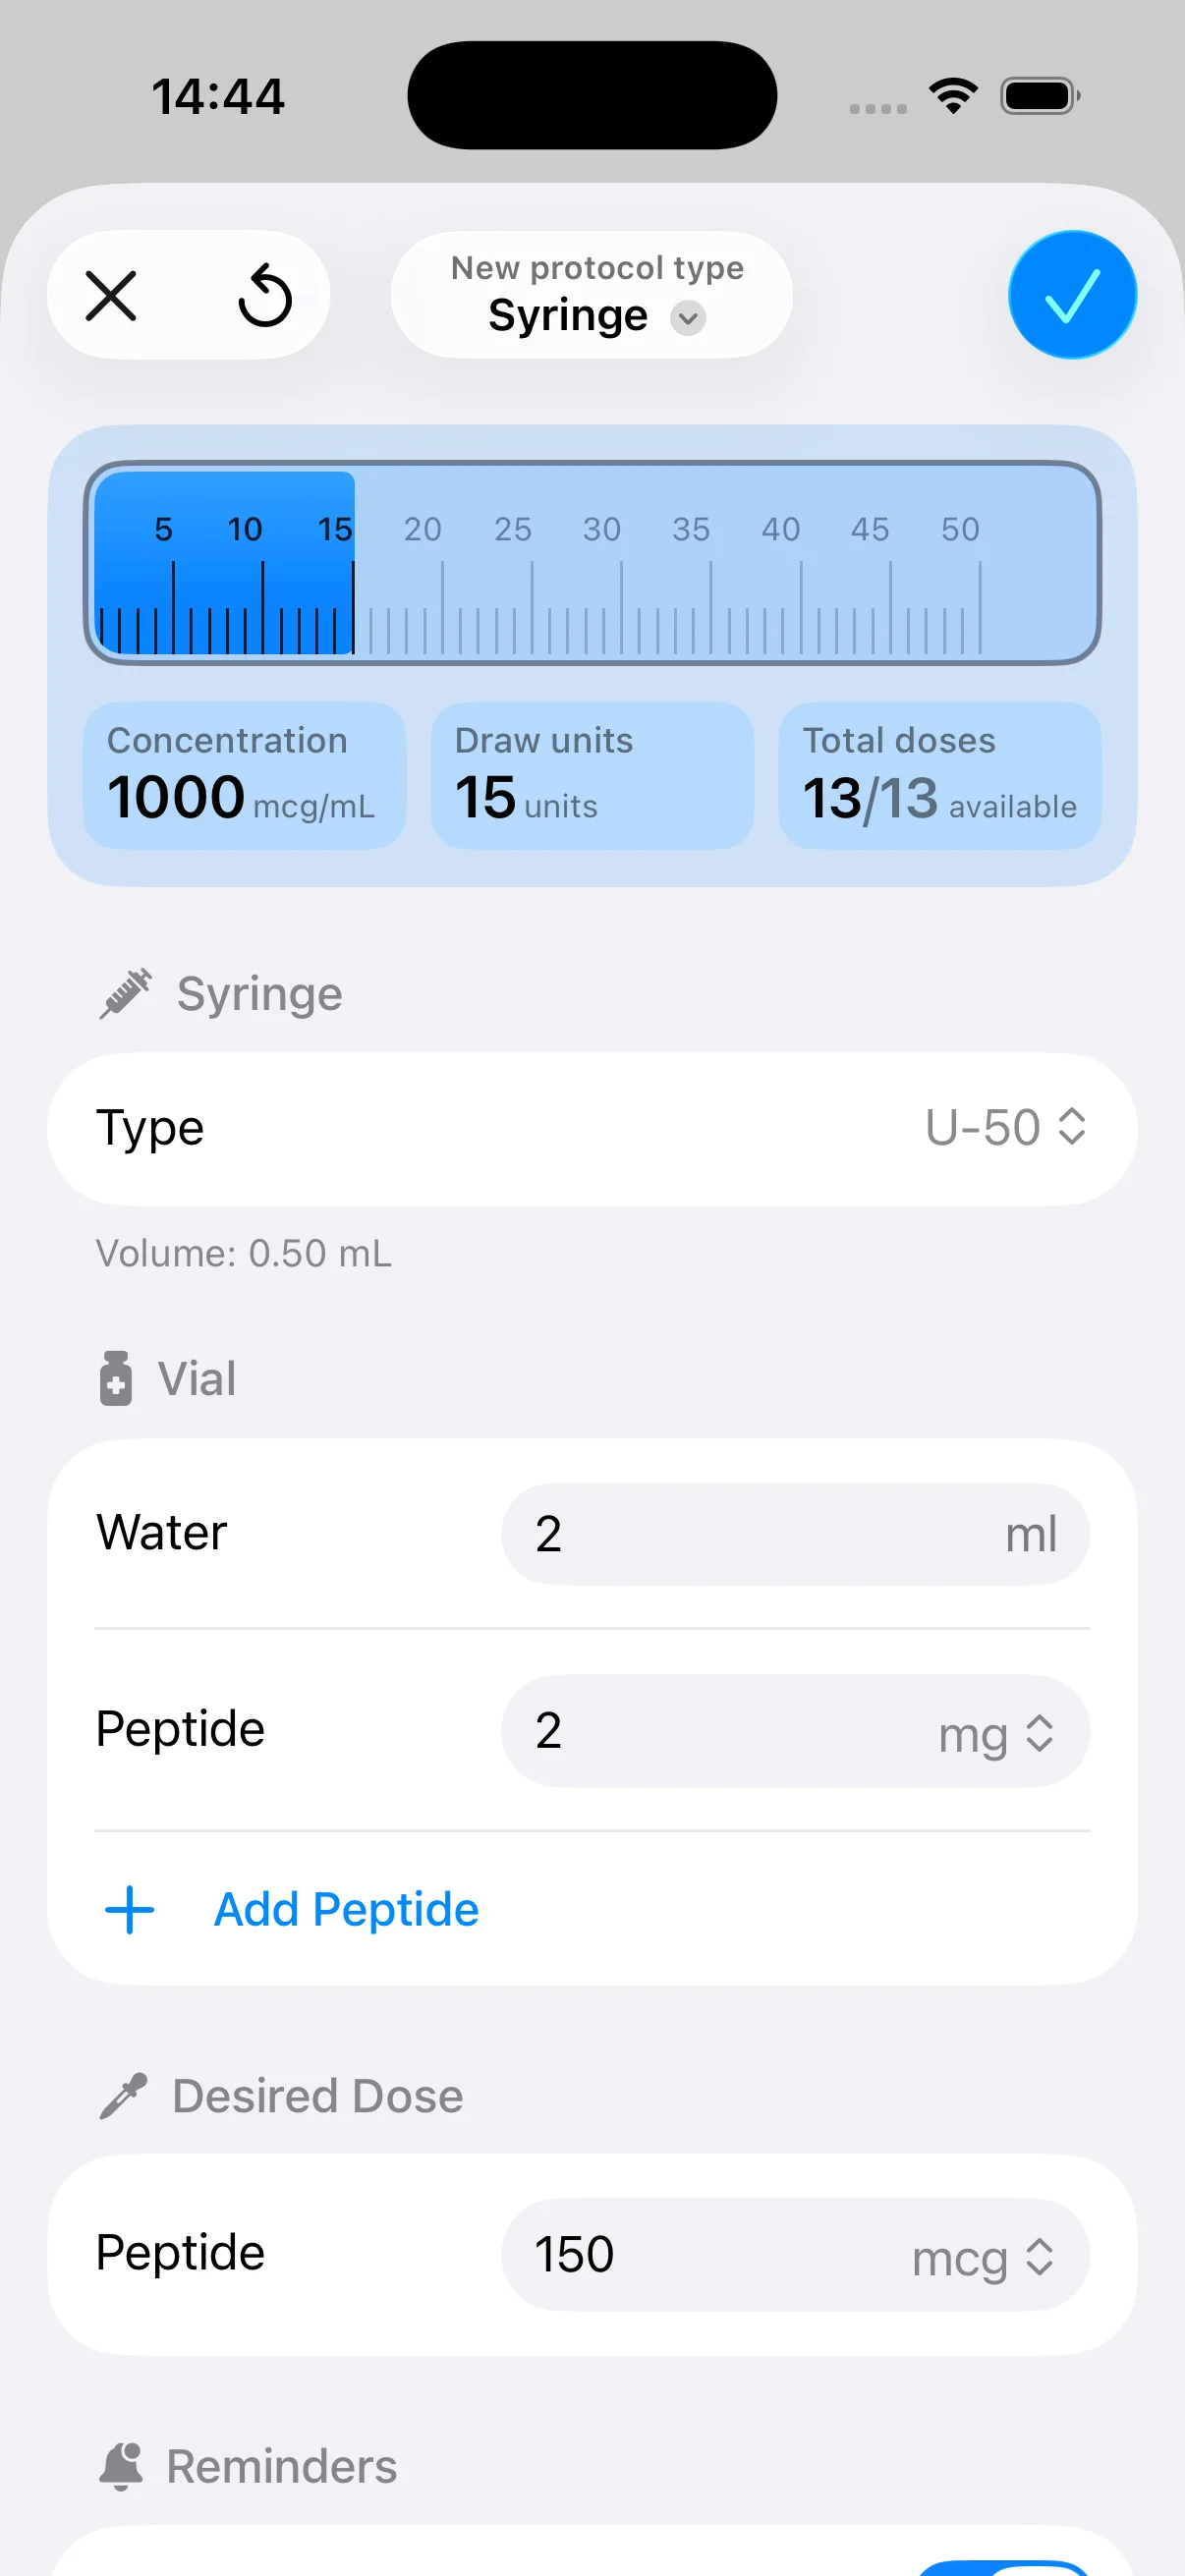
For peptide users, that means treating every dose like a procedure. Verify the tools. Control the environment. Handle the vial correctly. Prepare the site the same way every time. Document what you did. Tools like PepFlow can help by keeping dose calculations, schedules, reminders, and notes in one place, but the app only works if the physical routine is equally disciplined.
Table of Contents
- 1. Sterile Needle and Syringe Selection
- 2. Vial Integrity and Sterility Verification
- 3. Hand Hygiene and Preparation Area Sanitization
- 4. Vial Septum Cleansing with Alcohol Pad
- 5. Sterile Needle Insertion Technique and Vial Handling
- 6. Injection Site Selection and Skin Preparation
- 7. Proper Needle Insertion at Injection Site and Injection Technique
- 8. Post-Injection Site Care and Observation
- 8-Point Injection Safety Checklist Comparison
- Make Safety Your Standard Operating Procedure
1. Sterile Needle and Syringe Selection
The first checkpoint is simple. Use a sterile, single-use needle and syringe that fits the dose you’re giving. If the syringe markings are too large for the volume you need, dosing errors become more likely even before sterility issues enter the picture.
For subcutaneous peptide injections, many people prefer insulin syringes or small-volume syringes that allow cleaner measurement. BD Ultra-Fine insulin syringes and standard tuberculin syringes are common examples because the markings are easier to read for small doses. The best choice depends on the volume you’re drawing, the concentration in the vial, and whether you need a fixed needle or a detachable setup.
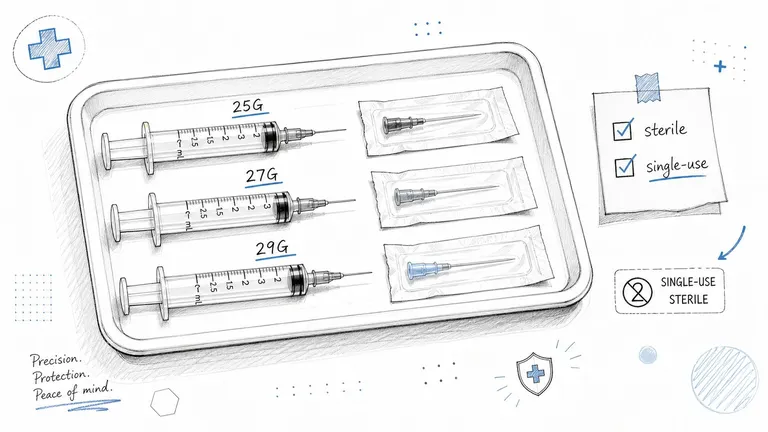
Match the device to the dose
The CDC’s clinical guidance is clear that needles, cannulae, and syringes are sterile, single-use items and must be discarded after one patient (CDC clinical guidance for safe injection practices). In a home setting, that translates into a practical rule: once a syringe has been opened and used for a draw or injection, it’s done. Changing the needle doesn’t turn the syringe back into a sterile device.
- Check packaging first: Don’t use any syringe or needle with torn paper, broken seals, moisture exposure, or crushed protective caps.
- Choose a readable barrel: Small-volume syringes reduce visual guesswork. If you’re measuring tiny amounts, oversized barrels make precision harder.
- Keep your math visible: Leave your PepFlow dose screen open while drawing so you’re matching the planned units, not relying on memory. If syringe markings confuse you, this guide on how to read insulin syringes is worth reviewing before your next prep session.
Practical rule: The “best” syringe isn’t the thinnest or smallest one. It’s the one that lets you measure the intended dose accurately without hesitation.
A common real-world mistake is buying a large box of mixed supplies and assuming they’re interchangeable. They aren’t. A syringe that works well for bacteriostatic water transfer may not be the one you want for final administration.
2. Vial Integrity and Sterility Verification
Before you swab anything, inspect the vial itself. If the container, stopper, or solution looks questionable, stop there. No cleaning step can fix a compromised vial.
Patient safety frequently succumbs to wishful thinking. People see a tiny crack near the shoulder of the glass, faint cloudiness, or a stopper that looks rough after repeated punctures and convince themselves it’s probably fine. It isn’t worth the gamble.
What to inspect before you draw
Use bright, direct light. Hold the vial upright, rotate it slowly, and inspect both the contents and the container. With lyophilized peptides, look at the cake before reconstitution. After mixing, inspect the liquid again before every draw.
- Check the glass body: Hairline cracks, chips, or leakage mean the vial should be discarded.
- Inspect the stopper: A torn, gouged, or unstable rubber septum increases contamination risk with every access.
- Look at the solution: Unexpected cloudiness, discoloration, visible particles, or stringy material are reasons not to use it.
- Verify identifying details: Record the batch label, expiration date, and reconstitution date in PepFlow or your dose log so you can trace what you used on a given day.
A realistic example: someone stores a reconstituted vial in the refrigerator door, where movement and temperature fluctuation are more likely. A week later the solution looks slightly different, but there’s no certainty about when that changed. When the visual baseline wasn’t documented at the start, it becomes much harder to judge whether the vial is still suitable for use.
If a vial makes you pause and inspect it twice, that hesitation is useful information. Don’t override it.
The safest habit is to inspect when the vial arrives, when it’s reconstituted, and before every subsequent dose. That pattern catches problems early and keeps “maybe okay” out of your process.
3. Hand Hygiene and Preparation Area Sanitization
A lot of contamination starts with hands, clutter, and surfaces that look clean but aren’t set up for medication prep. The CDC says medications should be drawn up in a designated clean medication preparation area away from sinks in its clinical safety material (CDC injection safety and clean preparation area guidance). That matters even more in non-clinical settings, because most home environments weren’t designed for sterile handling.
The practical version is straightforward. Don’t prep next to food, dirty dishes, toiletries, gym gear, pet supplies, or a bathroom sink. Choose one area and make it boring, uncluttered, and easy to clean.
Build a designated clean zone
Wash your hands thoroughly with soap and water, dry them with a clean towel or disposable paper product, then sanitize if that’s part of your routine. After that, don’t touch your phone, face, hair, door handles, or anything outside the prepared field.
For the surface, use a disinfecting method you can repeat every time. Many people use 70% isopropyl alcohol on a clean wipe or another appropriate surface disinfectant, then allow the area to air-dry fully before laying out supplies.
- Clear first, then disinfect: Cleaning around clutter isn’t the same as cleaning the surface.
- Set out only what you need: Syringe, needle, vial, alcohol pads, gauze, and sharps container should all be within reach.
- Protect the clean sequence: Once your hands and area are ready, avoid interrupting the setup.
If you want a practical contamination-control routine for home prep, PepFlow’s guide on how to prevent contamination is useful because it focuses on repeatable handling habits rather than just listing supplies.
The WHO also notes that in many developing countries, up to 70% of injections are administered unnecessarily, often due to patient demand or lack of training among health-care workers (WHO injection safety aide-memoire). The lesson for self-administration is broader than the number itself. Training and process matter. People don’t stay safe by trying harder. They stay safe by following the same clean sequence every single time.
4. Vial Septum Cleansing with Alcohol Pad
The rubber stopper is easy to underestimate because it’s small and looks protected. But every vial access depends on that surface being clean at the moment the needle passes through it. One careless puncture defeats several careful steps that came before it.
Use a fresh alcohol pad for each vial access. Scrub the septum with firm pressure. Don’t give it a quick tap and move on.
Clean the stopper like it matters
A proper scrub should cover the full surface you might puncture, not just the center point you plan to hit. Circular motion works well if you maintain pressure and clean the area instead of just spreading moisture around.
Then wait for it to air-dry. Don’t wave it dry. Don’t blow on it. Don’t touch it to test whether it’s ready.
A simple example from practice: multi-use vials often get handled carefully on the first draw and casually on later draws. By day three or day five, the user is rushed, the stopper gets a half-second wipe, and the vial goes right back into rotation. That’s exactly when shortcuts creep in.
Field note: The alcohol scrub only works if you give it contact time and let it dry on its own.
The CDC also specifies that if multi-dose vials are used, they should be accessed only with sterile needles and syringes and kept away from immediate patient treatment areas to protect sterility in facility settings (CDC multi-dose vial handling guidance). For self-administration, the home equivalent is to avoid handling the vial over a sink, next to an open toilet lid, or on a crowded bedside table.
If you want a concise external reference on stopper cleaning technique, this overview of evidence-based scrub the hub technique explains the logic clearly.
5. Sterile Needle Insertion Technique and Vial Handling
A clean stopper doesn’t help much if the needle technique is sloppy. The goal is controlled entry with minimal septum damage, minimal needle contamination, and minimal hesitation.
Hold the vial securely. Keep the stopper facing up. Bring the needle in deliberately rather than poking around for position after contact. Every extra movement increases the chance of dulling the needle, enlarging the stopper opening, or shaving rubber into the vial.
Reduce coring and repeated puncture errors
Coring is one of those problems people notice too late. If you see a rubber fragment in the solution or in the syringe, the draw is finished. Don’t try to salvage it.
These habits reduce avoidable problems:
- Approach with alignment: Line up the syringe before the needle reaches the stopper so you’re not correcting mid-entry.
- Stabilize the vial: A rolling vial leads to awkward angles and repeat punctures.
- Use a fresh entry point when possible: Reusing the exact same hole weakens the stopper and makes contamination more likely over time.
- Withdraw smoothly: Twisting and rocking the needle on the way out causes more stopper damage.
There’s another issue that deserves more attention in home use: pre-drawn syringes. Current guidance emphasizes new sterile syringes and immediate discard after use, but there isn’t a standardized consumer checklist that defines a maximum safe time window for a pre-drawn peptide dose sitting in variable home temperatures. The National Academies discussion of injection safety underscores the importance of sterile handling, while consumer-facing protocols leave this “hang-time” question poorly defined (National Academies discussion on injection safety context).
That uncertainty should make your practice more conservative, not less. Draw when you’re ready to inject. Don’t build a casual habit of filling syringes in advance and leaving them around capped for convenience.
6. Injection Site Selection and Skin Preparation
Good site selection makes injections more predictable and less irritating over time. Bad site selection shows up as repeated tenderness, bruising, hard areas, and a pattern of “that spot always hurts.” Most of that is preventable.
For subcutaneous injections, common areas include the abdomen, thigh, and upper arm. What matters most isn’t finding one favorite location. It’s rotating through an organized pattern so tissue gets recovery time.
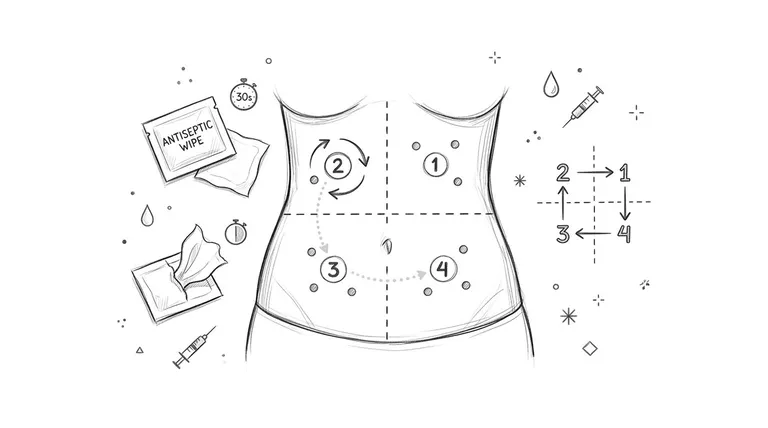
Rotation prevents avoidable irritation
Before choosing the site, inspect the skin. Don’t inject through redness, swelling, broken skin, bruising, or areas that still feel firm from a prior dose. Then clean the site with an alcohol swab or appropriate antiseptic and let it air-dry completely.
A practical rotation system beats memory every time. Divide the abdomen into zones, or alternate between abdomen, thigh, and upper arm on a set pattern. The key is consistency.
- Check the previous site first: If yesterday’s site is still irritated, don’t force the rotation plan there anyway.
- Clean and then hands off: Once the skin is prepped, don’t touch it again before injection.
- Log the exact location: Use PepFlow’s injection site rotation guide and your own notes to avoid repeatedly drifting back to the same easy spot.
Many users think they’re rotating because they switch “left side” to “right side.” In practice, they’re still hitting the same small area over and over.
The trade-off here is convenience versus tissue health. The abdomen is often easiest, but easy isn’t always best if it becomes your only site.
7. Proper Needle Insertion at Injection Site and Injection Technique
This is often the primary focus, but technique only works well when the earlier steps were clean. By the time the needle reaches skin, you shouldn’t still be deciding on the dose, the site, or the angle.
For a subcutaneous injection, the motion should be confident and controlled. A hesitant approach usually hurts more and increases the chance of a partial or awkward insertion.
A visual demonstration can help if you’re refining your mechanics:
Consistency beats speed
Pinch the skin if that helps isolate subcutaneous tissue for your body type and needle length. Insert at the appropriate angle for your setup, then depress the plunger steadily instead of forcing the solution in quickly.
The CDC classifies core safe injection practices as Category IA recommendations, including aseptic technique to avoid contamination and never administering medications from a syringe to multiple patients, even if the needle is changed (CDC core safe injection recommendations). For self-injection, the takeaway is straightforward: one prepared syringe, one person, one use, one disposal.
Here’s what works better in practice:
- Commit to the insertion: A smooth single motion is better than stopping midway.
- Inject at a steady pace: Slow plunger pressure reduces tissue stress and leakage at the site.
- Pause briefly before withdrawal: A short hold after the plunger is fully depressed can help limit tracking back through the puncture channel.
- Withdraw on the same line: Pulling out at a different angle can irritate tissue unnecessarily.
If you’re using PepFlow, log the dose immediately after administration while the details are still fresh. Time, site, and any unusual sensation are easier to record in the moment than later that night.
8. Post-Injection Site Care and Observation
The injection isn’t over when the needle comes out. Post-injection observation is where you catch small problems before they become larger ones. It’s also where patterns become visible, especially if one site, one vial, or one technique keeps producing irritation.
If there’s a tiny bead of blood, apply light pressure with sterile gauze. Don’t rub the area. Don’t massage it to “help it absorb.”
Watch the site after the routine is over
A useful habit is to check the site immediately, then again later the same day, and again the next day. You’re looking for changes, not perfection: increasing redness, warmth, swelling, drainage, unusual pain, or delayed firmness.
- Document what you see: A short note like “mild redness, gone by evening” is more useful than relying on memory.
- Use photos when needed: If a site reaction seems unusual, a time-stamped photo gives you a baseline for comparison.
- Escalate persistent concerns: Ongoing redness, warmth, swelling, drainage, or worsening pain should be reviewed by a clinician.
The CDC’s guidance also warns that single-dose vials must never be used for more than one patient or combined for later use, and it highlights a 2012 meningitis outbreak linked to contaminated multi-dose vials that affected 751 patients across 23 states (CDC outbreak example and vial safety guidance). That’s a facility-level example, but the principle carries over cleanly: contamination problems may not be obvious at the moment of injection. Observation and disciplined handling are what catch them early.
For disposal practices after the injection, this overview of official sharps disposal guidelines is a useful reminder that used needles and syringes should move directly into an appropriate sharps container, not into household trash or onto a countertop “for later.”
8-Point Injection Safety Checklist Comparison
| Procedure | Implementation Complexity 🔄 | Resource Needs & Efficiency ⚡ | Expected Outcomes & Impact 📊 | Ideal Use Cases 💡 | Key Advantages ⭐ |
|---|---|---|---|---|---|
| Sterile Needle and Syringe Selection | Moderate 🔄🔄, gauge/length selection, matching volume | Moderate resources (single-use supplies) ⚡⚡ | High, precise dosing, reduced infection risk 📊📊📊 | Frequent microdose protocols; home/self-injection requiring accuracy | Accurate microdose delivery; prevents reuse infections; regulatory alignment |
| Vial Integrity and Sterility Verification | Low 🔄, visual inspection protocols | Very low (inspection time, light) ⚡⚡⚡ | Moderate–high, catches visible compromise, prevents use of damaged vials 📊📊 | Receiving shipments; pre-draw safety checkpoint, multi-dose monitoring | Low-cost safeguard; documents batch/expiry; prevents obvious contamination |
| Hand Hygiene and Preparation Area Sanitization | Low 🔄, standard hand/surface protocols | Very low (soap, sanitizer, wipes) ⚡⚡⚡ | High, large reduction in contamination and bloodstream/site infections 📊📊📊 | Every injection prep: clinic, home, point-of-care settings | Proven, low-cost infection control; easy to implement and enforce |
| Vial Septum Cleansing with Alcohol Pad | Low 🔄, brief scrubbing and air-dry step | Very low (single-use alcohol pads) ⚡⚡⚡ | High, greatly reduces vial-entry surface bioburden 📊📊📊 | Every vial puncture, especially multi-dose vials | Fast, inexpensive; significantly lowers contamination at entry point |
| Sterile Needle Insertion Technique and Vial Handling | High 🔄🔄🔄, fine motor skill, angle control | Moderate (training, practice vials) ⚡⚡ | High, prevents coring/particulates and preserves vial integrity 📊📊📊 | Healthcare providers, trainees, frequent self-injectors | Protects solution integrity; reduces septum damage and aerosolization |
| Injection Site Selection and Skin Preparation | Moderate 🔄🔄, site mapping and antisepsis | Low (antiseptic pads, documentation) ⚡⚡⚡ | High, fewer local complications and consistent absorption 📊📊📊 | Long-term injection regimens; rotation-dependent protocols | Prevents lipohypertrophy; improves comfort and pharmacokinetic consistency |
| Proper Needle Insertion at Injection Site and Injection Technique | High 🔄🔄🔄, angle, speed, dwell time control | Low–moderate (practice, instruction) ⚡⚡ | High, correct tissue deposition, reduced trauma and variability 📊📊📊 | All injectors; training for lean patients or complex protocols | Ensures consistent absorption; reduces pain, bruising, and dosing errors |
| Post-Injection Site Care and Observation | Low 🔄, brief care and monitoring steps | Very low (gauze, time for checks) ⚡⚡⚡ | Moderate, early detection of infections and adverse reactions 📊📊 | Post-dose monitoring; clinical trials; routine home follow-up | Enables early intervention; documents site trends and complications |
Make Safety Your Standard Operating Procedure
A strong injection safety checklist does more than reduce obvious errors. It turns a variable task into a stable routine. That matters because self-administration usually happens in ordinary places, on ordinary days, when you’re busy, distracted, or tempted to cut corners. Safety has to survive real life, not just ideal conditions.
The most reliable routines share a few traits. They use the same clean prep area each time. They rely on sterile single-use equipment without exceptions. They inspect the vial before use, scrub the septum properly, rotate sites methodically, and document what happened immediately after the dose. When something looks off, the routine stops instead of pushing forward.
That’s where tools can help. PepFlow is useful because it supports the operational side of safer injections: dose calculations, protocol scheduling, reminders, time-stamped logging, and notes on site rotation or post-injection observations. It won’t make an unsafe technique safe, but it can remove the mental clutter that leads people to rush, forget, or improvise.
There’s also an important trade-off to acknowledge. A more meticulous routine takes longer. It asks you to pause, inspect, clean, confirm, and record. But the time you spend preventing contamination, tissue irritation, or dosing mistakes is time you don’t spend managing avoidable problems later.
In healthcare settings, the WHO emphasizes that structured checklists and monitoring systems are necessary because injection-associated infections remain unacceptably high where safety systems are weak (WHO injection safety monitoring guidance/injection-safety/aidememoire-injection-safety.pdf?sfvrsn=80eaf05d_5)). The home version of that lesson is simple: if you don’t have a consistent system, you don’t have a reliable process.
Treat every injection the same way, even when the dose is familiar. Especially then. Familiarity is when shortcuts tend to sneak in. If your checklist becomes automatic, your margin of safety gets wider with every dose, not narrower.
For anyone building a more formal routine around medication prep and documentation, this template for facility operations is a useful model for thinking in procedures rather than one-off tasks.
PepFlow helps turn a careful injection routine into a repeatable one. If you want cleaner dose calculations, structured peptide schedules, reminders, and quick logging for sites and observations, PepFlow is a practical companion for staying organized without adding more manual math to the process.