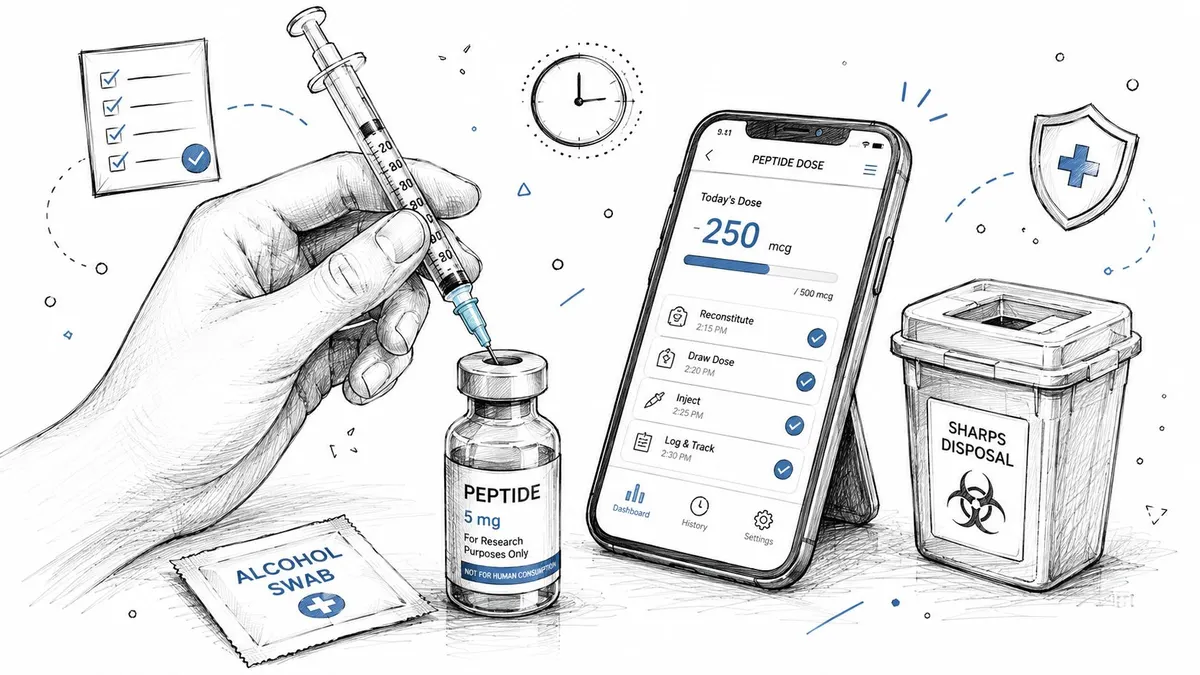
You’ve got the vial, the syringe, the alcohol swabs, and a surprisingly loud internal monologue. One part of you is hopeful. Another part is worried you’ll mess up the math, contaminate the vial, or inject in the wrong place.
That mix of caution and curiosity is normal. Most first-time problems with peptide injections don’t come from the injection itself. They come from small avoidable errors: rough reconstitution, shaky dose conversions, poor site rotation, or inconsistent timing.
Learning how to use peptide injections safely isn’t about acting fearless. It’s about using a repeatable process that removes guesswork. When the workflow is clean, the experience gets much less intimidating.
Table of Contents
- Your First Peptide Injection A Guide to Getting Started
- Peptide Preparation and Dosing Calculation
- Mastering Subcutaneous Injection Technique
- Your Step-By-Step Injection Workflow
- Scheduling Cycles and Ensuring Adherence with PepFlow
- Risk Management and When to See a Doctor
Your First Peptide Injection A Guide to Getting Started
The first injection usually feels bigger than it is. People stare at the vial like it’s advanced lab equipment, when in reality the process is manageable if you slow it down and stop improvising.
The trap is rushing because you want to “just get it over with.” That’s when people misread insulin syringes, blast bacteriostatic water directly onto the powder, or inject into the same irritated spot twice because they didn’t track the last dose. None of that means you’re bad at this. It means the process needs structure.
Practical rule: Treat your first few injections like a checklist, not a test of confidence.
If you’re new, focus on four things only:
- Clean handling: Start with sterile supplies, a clean vial top, and a clean injection site.
- Gentle preparation: Reconstitute the peptide carefully so you don’t damage the powder or cloud the solution.
- Accurate dosing: Use the exact prescribed amount instead of estimating by eye or doing rushed math.
- Repeatable timing: Injections work better in real life when your schedule is predictable enough to follow.
That last point matters more than most beginner guides admit. People obsess over the perfect injection angle, then miss doses, lose track of rotation sites, or forget whether they already injected that morning. Good outcomes usually come from boring consistency.
If you approach this like an experienced practitioner would, you don’t try to be clever. You build a routine that’s easy to repeat when you’re tired, busy, or distracted. That’s how the process becomes calm.
Peptide Preparation and Dosing Calculation
A calm injection starts before the needle ever touches skin. The prep stage is where people contaminate a vial, weaken the solution with rough handling, or turn a simple dose into guesswork because they did the math too fast.
Start by checking four things together. Confirm the peptide amount in the vial, the diluent you are using, the total volume you plan to add, and the dose you were told to take. If any one of those is unclear, stop and sort it out before you draw anything.
For reconstitution, technique matters because peptides are delicate once you start handling them. Some storage and reconstitution guidance notes that poor handling and storage can lead to loss of potency or inconsistent use patterns, especially outside tightly controlled clinical settings, as discussed in this storage and reconstitution guide. In practice, that means adding bacteriostatic water slowly against the inside wall of the vial, letting the powder dissolve on its own, and storing the mixed vial cold and protected from light. If you want a visual refresher, this step-by-step peptide reconstitution guide shows the sequence clearly.
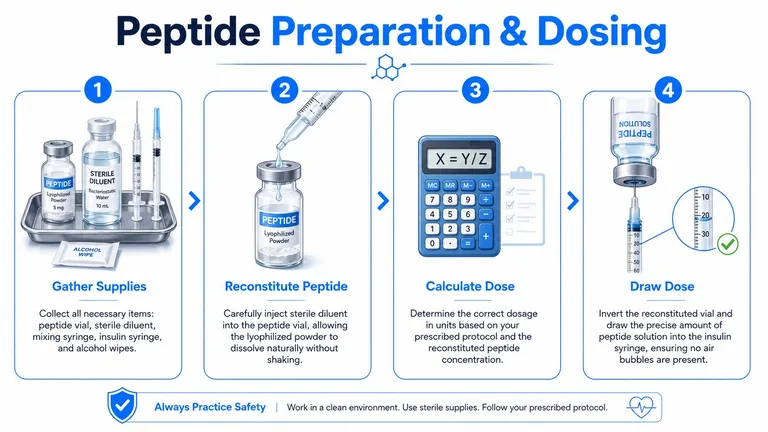
A clean reconstitution routine looks like this:
- Gather supplies before opening anything. Peptide vial, bacteriostatic water, a mixing syringe, an insulin syringe, and alcohol wipes.
- Swab both vial tops. Clean rubber stoppers every time, even if the vial is new.
- Add the water slowly. Let it run down the vial wall instead of spraying directly onto the powder.
- Let the vial sit if needed. Gentle swirling is fine. Shaking is not.
- Store it correctly after mixing. Refrigerate if your product instructions call for it, keep it away from light, and never freeze unless the manufacturer specifically says otherwise.
Beginners rarely struggle with the concept of dosing. They struggle with conversions.
The prescription may be written in micrograms, while the insulin syringe is marked in units. Once the vial is reconstituted, the only number that matters is the concentration you created. A peptide dose should be calculated from your vial concentration after reconstitution, not copied from a forum post or someone else’s syringe photo.
That step causes a lot of preventable mistakes. I see people reuse old math from a previous vial, forget they changed the reconstitution volume, or round a draw amount because it looks close enough. Small errors repeated over weeks can change the whole cycle.
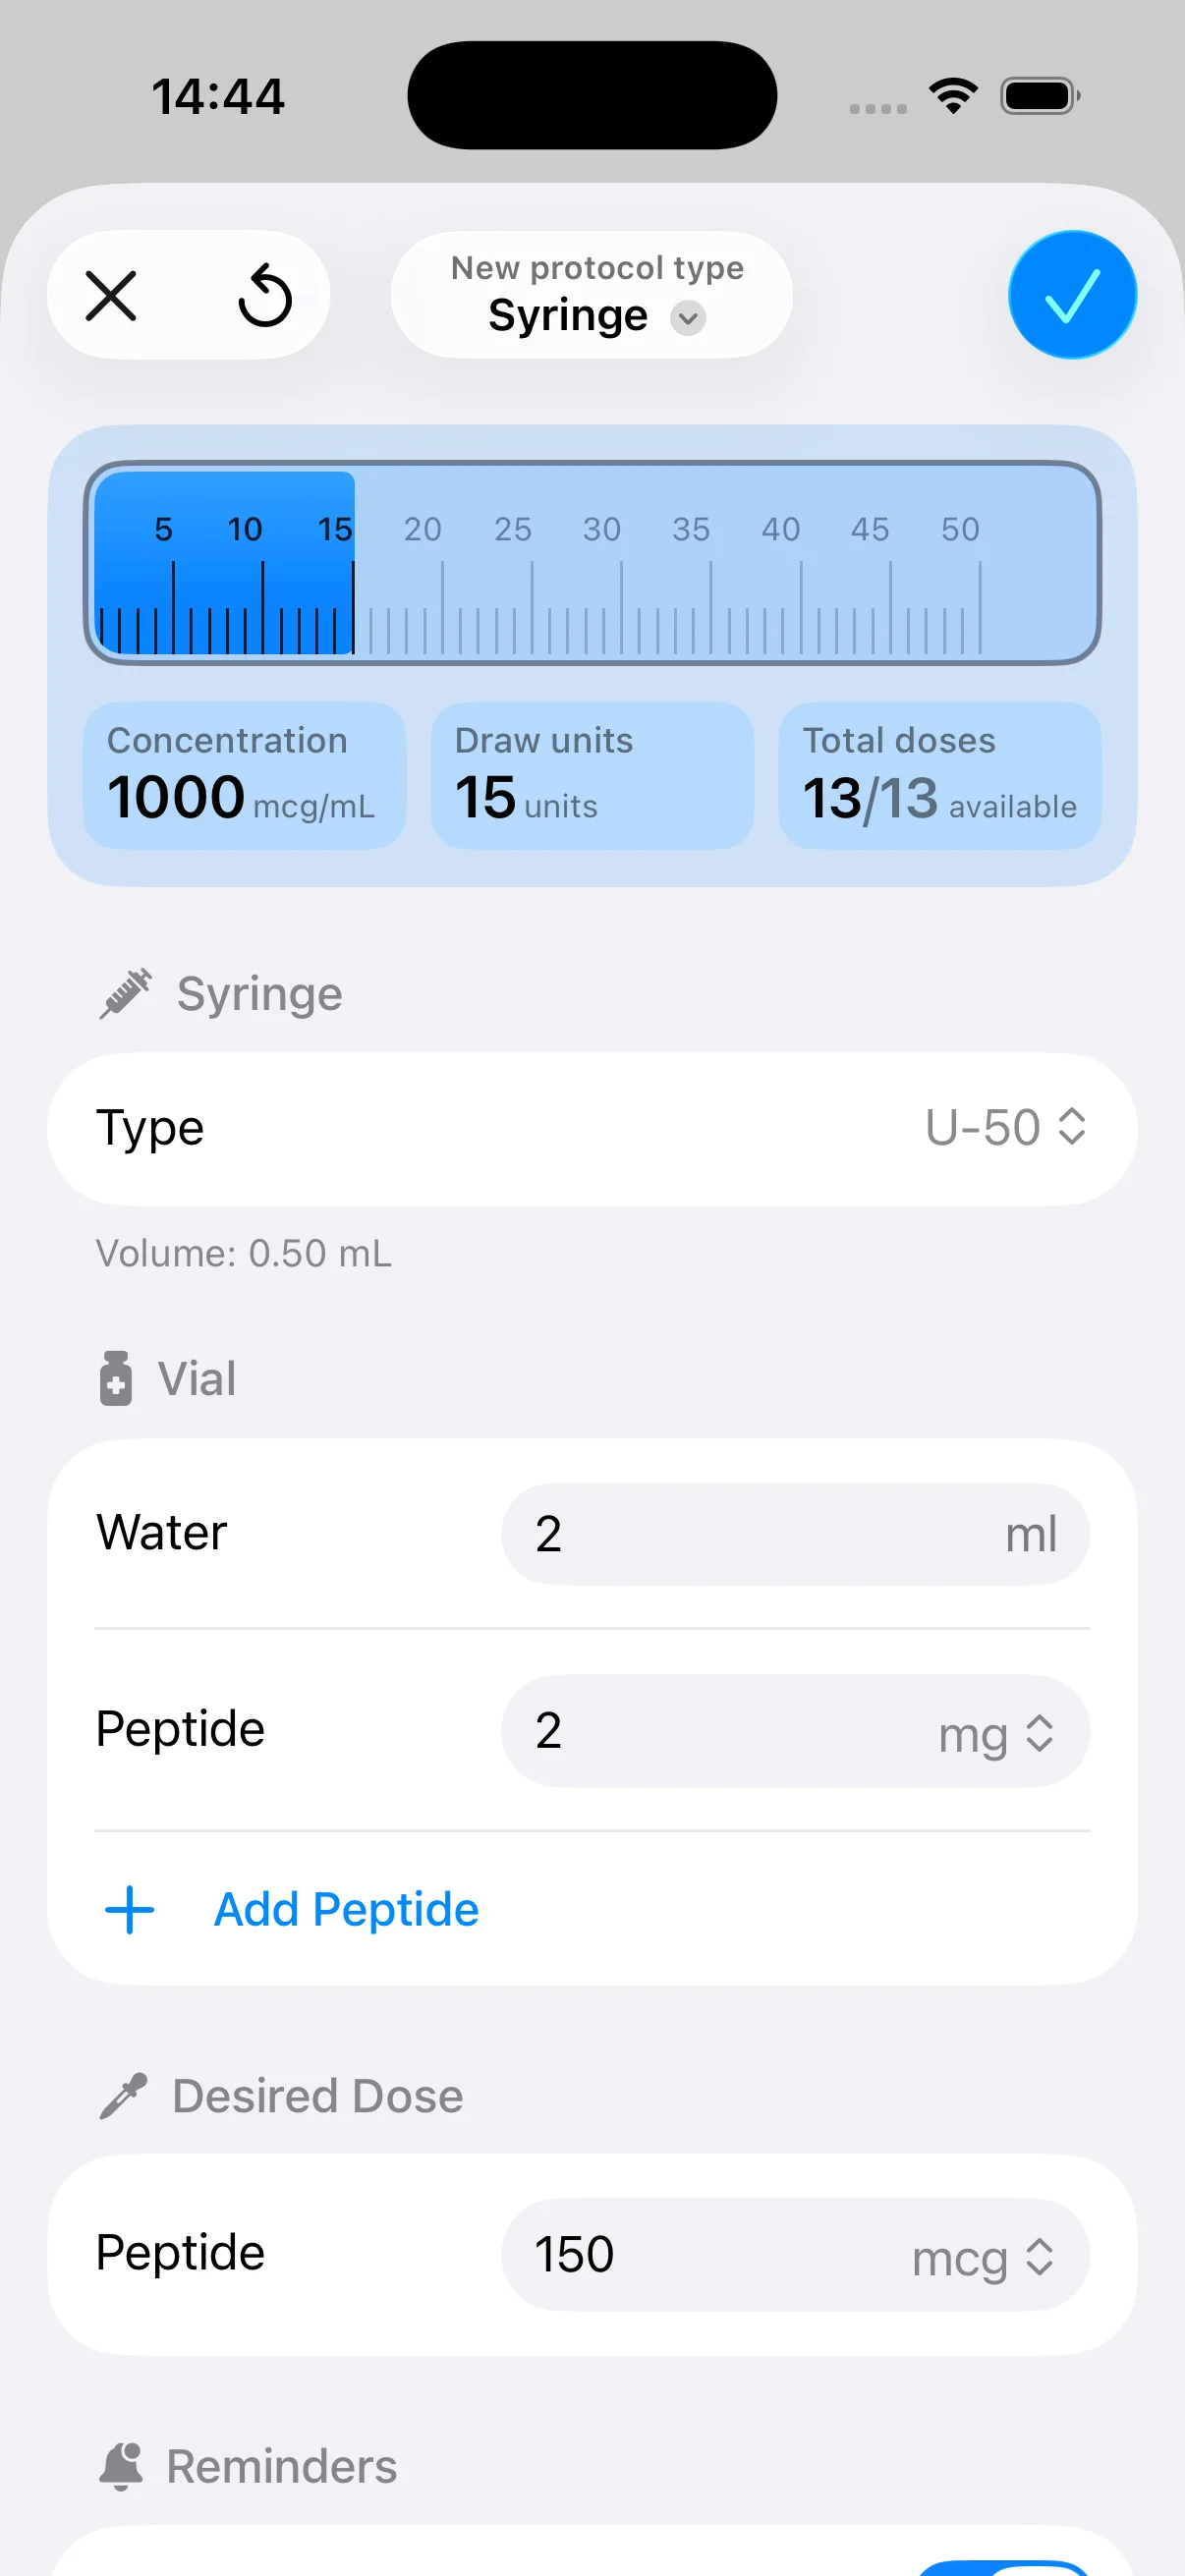
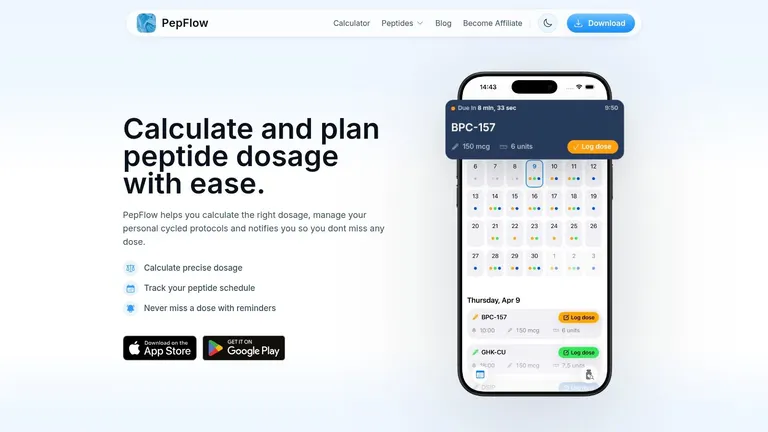
A dosing tool helps most in this exact step. PepFlow lets you enter the vial amount, reconstitution volume, and target dose, then converts that into a practical draw amount you can use consistently. That matters less because the math is hard, and more because humans get sloppy when they are tired, rushed, or halfway through a cycle.
Keep these habits:
- Use one confirmed concentration for each vial. Write it down as soon as you reconstitute.
- Recalculate every time the vial setup changes. New vial, new math.
- Record the draw amount you will pull. Do not rely on memory at the sink.
- Label the vial if needed. Date mixed, total volume added, and intended dose can prevent mix-ups later.
Avoid these habits:
- Estimating by eye
- Using saved screenshots from a different protocol
- Copying syringe units without checking concentration
- Doing mental math right before injecting
Good prep is not about being obsessive. It is about making the right dose easy to repeat. That is the difference between a one-time careful injection and a routine you can follow accurately for weeks.
Mastering Subcutaneous Injection Technique
You have the dose calculated, the syringe filled, and then the part that makes beginners hesitate starts. The question is usually not the peptide. It is whether the needle is going in the right place, at the right angle, without causing unnecessary pain.
For most peptide protocols, the goal is a subcutaneous injection. That means placing the medication into the fatty layer just under the skin, not into muscle. For self-injection, that route is usually simpler, easier to repeat, and more comfortable than trying to go deeper. If you want a useful comparison of injection basics across another common injectable medication, these safe Mounjaro administration techniques show many of the same handling principles.
Choose a site you can repeat and rotate
The abdomen and outer thigh are the two sites beginners use most often for a reason. They are easy to reach, easy to see, and practical for self-injection.
The problem is consistency. A lot of people start with good intentions, then default to the same easy spot before work or before bed. After several injections, that area can get sore, mildly swollen, or feel unusually firm. People sometimes assume the peptide is the issue when the problem is in fact repeated use of the same small patch of tissue.
Use a simple rotation pattern:
- Left abdomen
- Right abdomen
- Left outer thigh
- Right outer thigh
Then keep spacing between injections within each zone. Do not inject right next to yesterday’s spot.
This is one place where a tracking tool matters in real life. PepFlow is useful not because site rotation is complicated, but because routines get sloppy over time. If you are already using it for dose logging, record the site too. That removes one more memory-based error from the process.
If syringe markings still make you second-guess yourself, this guide on how to read insulin syringes can clear that up before technique becomes the next source of stress.
How to make the injection cleaner and less irritating
Good subcutaneous technique is mostly about control. The needle should go in with a steady motion, the plunger should be pressed smoothly, and the site should be left alone afterward.
A practical sequence looks like this:
- Clean the skin and let it dry fully.
- Pinch a small fold of skin if you need a clearer target.
- Insert the needle at a steady 90-degree angle.
- Press the plunger in one smooth motion.
- Withdraw the needle calmly.
- Apply light pressure if needed. Do not rub the site hard.
Rushing causes problems. So does hovering.
Many first-time users push the needle in too slowly because they are nervous. That usually creates more discomfort, not less. A controlled, decisive insertion is often easier than a hesitant one.
Used needles belong in a proper sharps container. Do not recap casually and do not toss them into household trash.
Common Subcutaneous Injection Sites Pros and Cons
| Site | Pros | Cons |
|---|---|---|
| Abdomen | Easy to reach, easy to see, convenient for self-injection | Easy to overuse, especially if it becomes your default |
| Outer thigh | Accessible and straightforward for many users | Can feel more sensitive during walking or training |
| Alternating abdomen zones | Simple for building a rotation habit | Users may still inject too close to a previous spot |
| Alternating thigh zones | Useful when the abdomen is irritated or unavailable | Harder for some users to keep spacing consistent |
The best site is usually the one you can reach comfortably, inspect clearly, and rotate without guessing.
Your Step-By-Step Injection Workflow
The moment that throws first-time users is usually not the needle. It is the pause right before it, when the vial is open, the syringe is in your hand, and you start wondering if you missed a step. A good workflow prevents that kind of hesitation because every action has a fixed place.
The routine that keeps the process clean
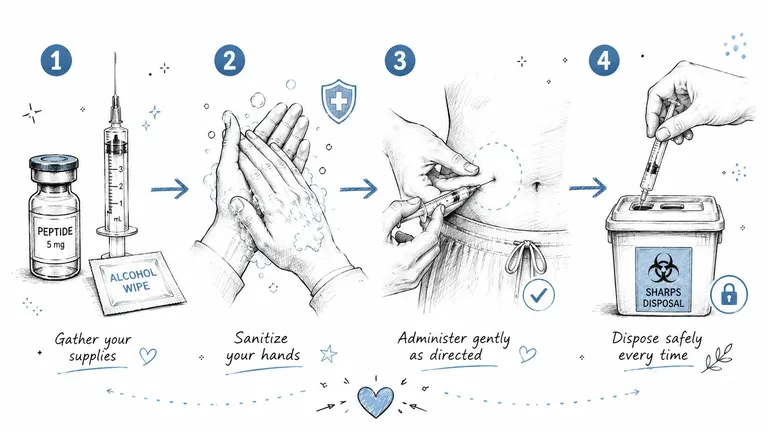
A safe injection session starts before the needle touches your skin. Get everything in reach first: vial, new sterile syringe, alcohol swabs, and your sharps container. If you have to open cabinets or hunt for supplies halfway through, you increase the odds of contamination, dosing mistakes, or dropping something you now need to replace.
Then run the same sequence every time.
- Wash and stage your supplies: Clean hands well and set up on a clear surface with good lighting.
- Sanitize the vial top: Wipe the rubber stopper with alcohol and give it time to dry.
- Draw the prescribed dose: Use a new sterile syringe and check the amount before you move on.
- Prepare the site: Clean the skin and let the alcohol dry fully.
- Give the injection: Use the subcutaneous technique you already practiced, with a calm, committed motion.
- Dispose of the syringe right away: Put the used needle straight into a sharps container.
No improvising.
The trade-off is simple. Taking an extra 30 seconds at setup feels tedious, but it is much easier than troubleshooting a missed dose, a bent needle, or a syringe left on the counter while you second-guess what happened. This is also the point where a tracking tool helps. If you want a system for reminders and logging after the injection is done, use a routine scheduling app for peptide cycles so the process does not depend on memory alone.
What a single injection should feel like
A proper home injection is usually quiet and predictable. You should know your dose, your site, and your disposal plan before you uncap the needle. That level of structure lowers anxiety because there are fewer decisions to make in the moment.
If you are also using GLP-1 medications, Trim offers a useful comparison point for safe Mounjaro administration techniques. The mechanics are not identical in every case, but the safety habits are consistent.
For a visual demonstration, this short walkthrough helps reinforce what a calm injection pace looks like:
The goal is a process that feels controlled enough to repeat accurately, even on a busy morning. That is how users reduce avoidable mistakes over time.
Scheduling Cycles and Ensuring Adherence with PepFlow
Consistency beats intensity
Most therapeutic peptides require subcutaneous injection for optimal bioavailability, and consistency with the prescribed dosing frequency matters over the course of a cycle (clinical discussion of peptide dosing consistency). That sounds obvious until real life gets in the way.
People rarely fail because they forgot how to inject. They fail because routines drift. Travel, late nights, social events, and plain forgetfulness break timing long before technique breaks down.
That’s why adherence tools matter more than motivation. If your plan lives only in your head, you’ll eventually miss doses, lose track of start dates, or wonder whether you already injected this morning.
Build a routine you can actually follow
A workable cycle system needs three parts:
- A schedule you can live with: Daily, alternating days, or another clinician-directed rhythm only works if it fits your actual week.
- Reminders that interrupt forgetfulness: Push notifications or calendar prompts help when routine alone isn’t enough.
- A record of what happened: Logging each injection makes troubleshooting easier if results or side effects become confusing.
PepFlow fits well in the workflow. It’s an iOS app built for peptide dosing and scheduling, so you can configure protocols, set timing, and log injections instead of relying on notes apps or memory. If you want a closer look at how reminder-based planning works, this routine schedule app guide gives a practical view of building repeatable habits around dosing.
The best protocol on paper won’t help if your real schedule keeps breaking it.
If consistency is a weak point for you in general, not just with injections, Habit Huddle’s practical goal consistency system is a useful companion read because the same behavior principles apply here. Small routines beat heroic intentions.
A good cycle plan is boring in the best way. You know what day you’re on, what dose is due, and what happened last time. That reduces friction, and less friction usually means better adherence.
Risk Management and When to See a Doctor
Expected reactions versus red flags
Injectable peptides are generally considered safe under medical direction, but the most common side effects include skin irritation, fatigue, headaches, and gastrointestinal issues such as nausea or diarrhea, according to a peptide safety overview for beginners (beginner guide to peptide therapy safety). Mild injection-site irritation isn’t unusual. What matters is whether it resolves or keeps escalating.
The bigger safety issue is immunogenicity. A therapeutic peptide safety assessment describes a documented risk that the immune system may recognize synthetic or recombinant peptides as a threat and produce neutralizing antibodies, with the potential for serious complications including systemic anaphylaxis (therapeutic peptide immunogenicity assessment).
Watch your pattern, not just a single moment. Mild redness that fades is very different from a worsening reaction, systemic symptoms, or repeated unusual responses after dosing.
Why medical oversight matters
The American Medical Association notes that there is currently insufficient statistically significant clinical evidence to recommend dosing frequencies or confirm long-term safety for newer non-FDA-approved peptides sold in the grey market, where contamination and unverified sourcing are additional concerns (what doctors want patients to know about injectable peptides).
That’s why physician consultation isn’t a box to tick. It’s part of risk control.
Talk to a doctor before starting, and get medical attention promptly if you notice symptoms that feel systemic, severe, or out of proportion to a normal injection response. This is especially important if you have allergies, underlying medical conditions, are pregnant, or are breastfeeding.
This guide is not medical advice. It’s a practical handling guide. The decision to use any peptide protocol belongs in a conversation with a qualified clinician who understands your health history.
If you want less guesswork in the day-to-day process, PepFlow helps organize vial math, dosing schedules, reminders, and injection logs in one place so your protocol stays accurate and easier to follow over time.