Reference Guide
Peptide Reconstitution Guidelines
Educational purposes only
A practical guide to planning a reconstitution, choosing a workable concentration, mixing a vial carefully, and documenting the result so future draws stay consistent.
Before you start
Reconstitution means adding diluent to a lyophilized vial so the peptide can be measured as a liquid. The goal is not to chase an arbitrary water volume. The goal is to create a concentration that is easy to document, easy to draw, and easy to repeat.
Start from the exact product in front of you. Confirm the vial amount, the intended diluent, and any storage language before you decide how much liquid to add.
Checklist
Planning your mix
The most useful way to plan a mix is to work backward from readability. Start with the vial amount, think about the doses you are trying to measure, and choose a total diluent volume that makes those draws straightforward on your syringe.
In simple terms, final concentration equals the total peptide amount in the vial divided by the total liquid volume you add. Once that concentration is clear, converting a target dose into syringe volume becomes much easier.
This is where most of the real planning happens. The vial strength, the amount of diluent, the unit your dose is written in, and the syringe scale you use all change whether the final mix feels obvious or awkward later.
Formula
Final concentration = total peptide in the vial ÷ total liquid added.
- Write the vial amount in one unit system and keep it there until the concentration is documented.
- Choose the total liquid volume based on future draw clarity, not on habit or copied forum screenshots.
- Calculate the resulting concentration before the first draw so syringe units never become guesswork.
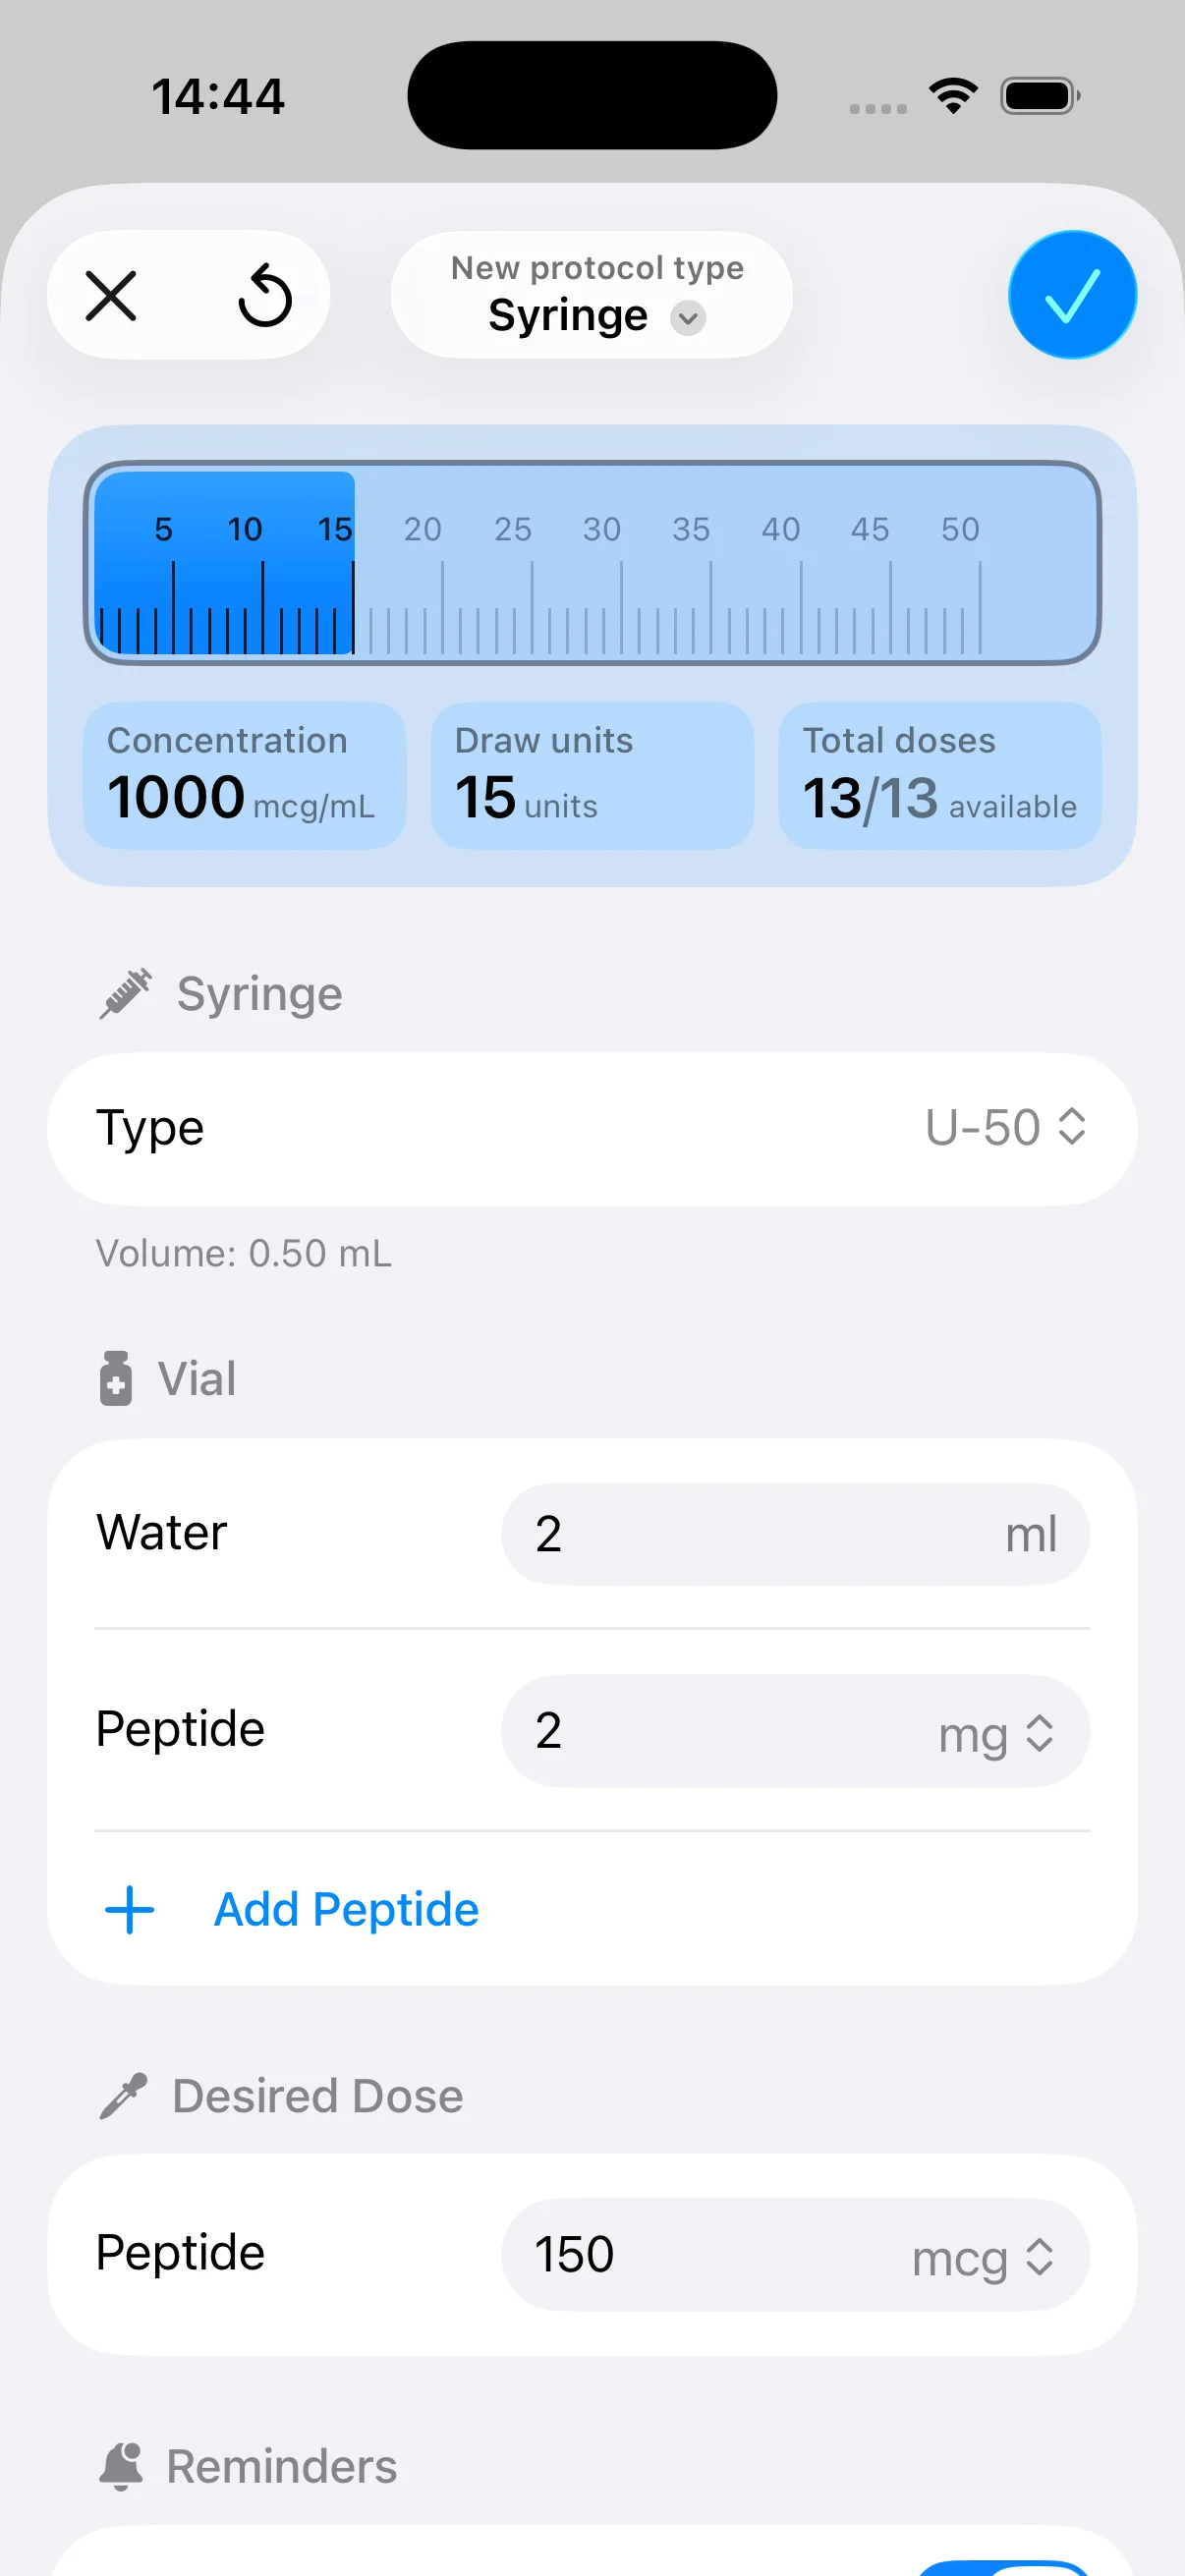
- Use a tool such as the PepFlow peptide calculator when you need to translate that concentration into syringe pull units.
Vial amount
A 5 mg vial and a 10 mg vial can use the same water volume but create very different final concentrations.
Total diluent volume
Adding more liquid makes each draw larger for the same dose. Adding less liquid makes the vial more concentrated.
Target dose unit
Dose plans written in mg, mcg, or units are easy to misread unless you convert everything to one final concentration.
Syringe scale
A concentration that looks clean on a U-100 insulin syringe may feel awkward or imprecise on a different device.
Mixing the vial
Once the plan is set, the handling goal is to keep the vial clean and the solution inspectable. Slow, deliberate mixing makes it easier to see whether the powder dissolves normally and whether the final solution looks uniform.
Mix gently rather than trying to speed the process up. Letting the diluent run down the glass and swirling or rolling the vial keeps the solution easier to inspect and easier to repeat.
- Clean the vial stopper and your work surface, then use a fresh syringe and needle for the diluent.
- Draw the full diluent amount you planned rather than estimating the volume mid-process.
- Inject the liquid slowly against the inner glass wall instead of blasting directly into the powder bed.
- Let the vial settle, then swirl or roll it gently until the solution looks evenly mixed.
- Pause if you see unusual discoloration, persistent particles, or anything that does not match the product guidance.
Why gentle handling helps
A slow mix keeps the process easier to inspect and easier to repeat later. It also reduces the chance of turning a simple concentration problem into a messy handling problem.
Label and store
The reconstitution is only half the job. The other half is making sure future-you can tell exactly what is in the vial without redoing the math from memory.
Label everything before the vial goes back into storage. A written mix date, total liquid added, and final concentration remove the guesswork the next time you need to draw from it.
Label Every Vial With
Store With The Original Guidance
Mistakes to avoid
Most reconstitution errors come from mismatched assumptions: wrong vial strength, wrong unit conversion, or no written record of the final mix. Keeping each of those explicit removes most of the friction.
Copying a water volume without checking vial strength
Two protocols can mention the same peptide but use different vial sizes, blends, or routes. Always start with the exact product in your hand.
Confusing mg, mcg, and syringe units
Milligrams and micrograms describe the amount of peptide. Syringe units describe volume. They only line up after concentration is calculated.
Treating the first mix as a memory task
Once several vials are open, it becomes easy to forget what was mixed with what. Labeling removes that uncertainty immediately.
Shaking the vial to speed things up
Foaming, splashing, and rough handling make it harder to inspect the vial and can work against a careful, repeatable process.

Keep It Organized
Turn reference ranges into saved formulas, reminders, and repeatable schedules.
PepFlow helps you keep concentrations, dose math, and planned injections in one place so you do not have to rebuild the protocol every time a new vial is mixed.