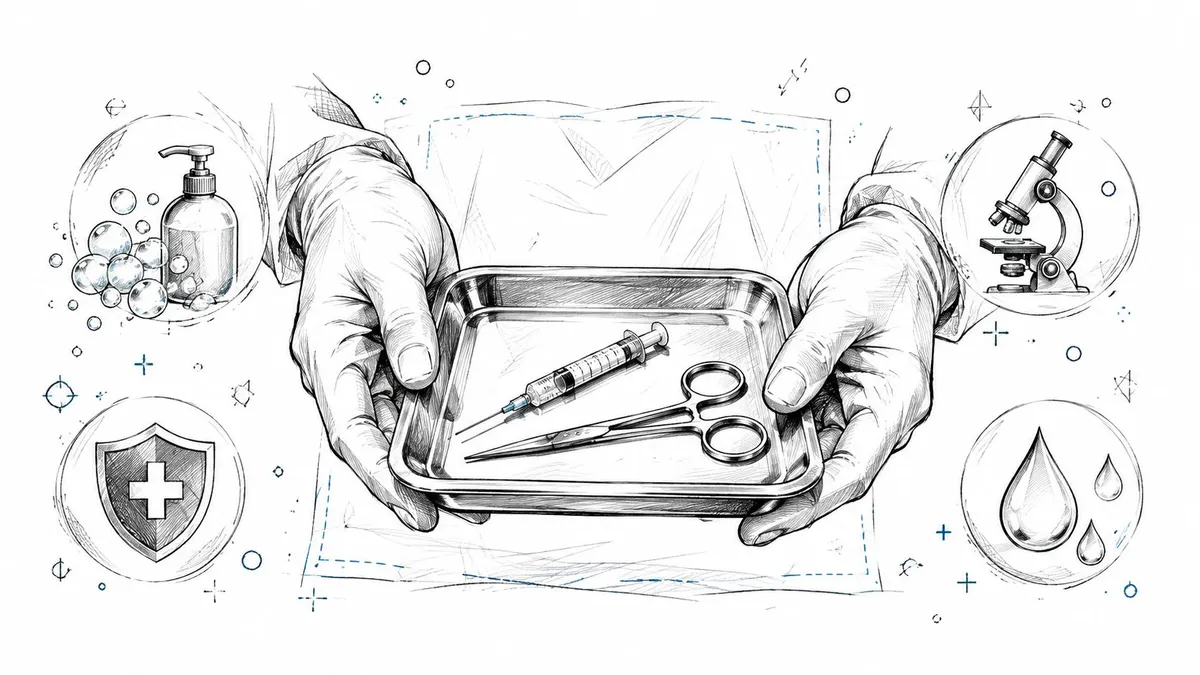
You’re about to prepare an injection, wound dressing, or invasive procedure. The supplies are laid out, your hands are clean, and the surface looks spotless. Then a simple question appears: Is clean enough, or does this need sterile technique?
That distinction matters because an invasive procedure can carry microorganisms from hands, skin, air, clothing, or nearby surfaces into a body site that normally protects itself from them. Sterile technique controls that risk through a coordinated process, not one reassuring wipe or a pair of gloves.
Table of Contents
- Understanding Sterile Technique Beyond Basic Cleanliness
- Sterile Technique vs Aseptic Technique Explained
- Core Principles That Make Sterile Technique Work
- Timing and Boundary Problems Most Guides Ignore
- Where Sterile Technique Applies in Real Practice
- Risks of Poor Technique and Red Flags to Watch For
- Building Consistent Sterile Practice Habits
Understanding Sterile Technique Beyond Basic Cleanliness
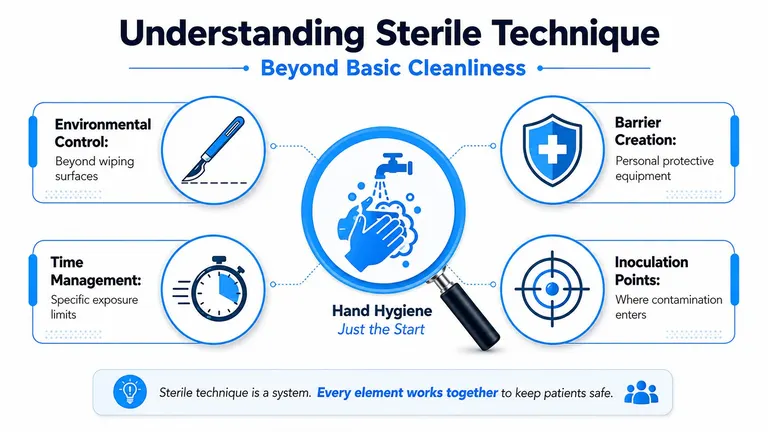
Washing your hands and disinfecting a work surface are important starting points, but they don’t create a sterile field by themselves. Sterile technique is a controlled aseptic process designed to eliminate or minimize all microorganisms in and around a sterile field during an invasive procedure. Nursing and perioperative guidance identifies it as a standard of care for surgical procedures, invasive wound management, and central line care (NCBI Bookshelf guidance on sterile technique).
Think of the process as a chain of barriers. Hand hygiene reduces what can transfer from your hands. Sterile gloves prevent direct contact between skin and sterile materials. Sterile drapes define a protected working area, while sterile instruments and solutions prevent contaminated items from reaching the procedure site. Each barrier has a job, and the barriers work together.
Clean is not the same as sterile
A clean surface may still contain microorganisms. Sterile technique aims for a much higher level of control because the procedure may enter normally sterile body sites, such as the intravascular system or spinal canal. The concern isn’t whether a tray looks tidy. The concern is whether a microorganism can travel from an uncontrolled source into a vulnerable site.
That cause-and-effect model helps explain why small actions matter. Touching a sterile item with an unsterile glove, allowing a sleeve to pass over the field, or leaving supplies exposed creates a possible transfer route. The correct response isn’t to guess whether contamination occurred. You treat the item or area as contaminated and correct the breach.
A coordinated process, not a single step
A reliable setup includes the environment, timing, barriers, instruments, and the behavior of everyone nearby. If you’re learning how to reduce handling errors during home preparation, this guide to preventing contamination can provide practical background, while the Colorado Cultures sterile technique guide offers another plain-language explanation of the foundational principles.
The key question is always, “What could transfer microorganisms into the procedure?” Once you ask it, sterile technique becomes easier to reason through. You reduce unnecessary contact, control the environment, protect the field, and stop immediately when a barrier may have failed.
Sterile Technique vs Aseptic Technique Explained
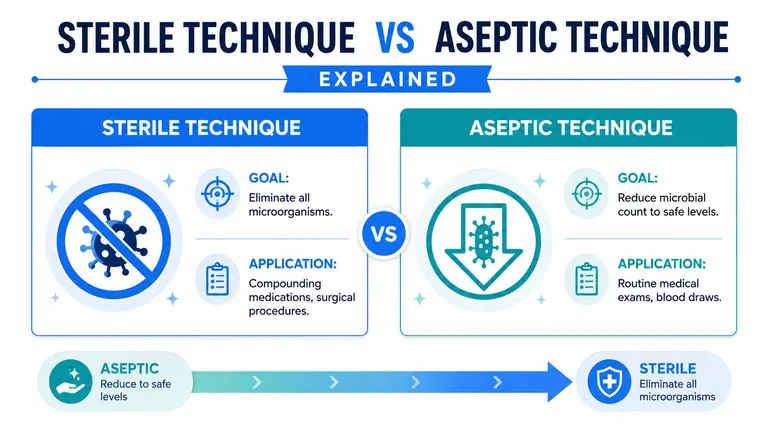
People often use aseptic technique and sterile technique as if they mean exactly the same thing. They’re closely related, but the practical distinction is the level of microbial control required for the procedure.
Aseptic technique focuses on preventing contamination and reducing microbial presence to a safer level. Sterile technique applies a stricter standard. It aims to eliminate or minimize all microorganisms in and around the sterile field, using sterilized supplies, sterile barriers, and continuous field management.
| Technique | Primary goal | Typical application |
|---|---|---|
| Aseptic technique | Reduce microbial presence and prevent transfer | Routine examinations, blood draws, and other procedures where a fully sterile field isn’t required |
| Sterile technique | Eliminate or minimize microorganisms around an invasive field | Surgical procedures, invasive wound management, central line care, and other high-risk procedures |
Match the technique to the procedure
A routine blood draw still requires careful hand hygiene, appropriate skin preparation, and controlled handling of equipment. However, the surrounding workspace isn’t managed in the same way as a surgical sterile field. The procedure and its risks determine how much control is necessary.
Sterile technique becomes essential when an instrument, catheter, medication, or other material may enter tissue, a body cavity, the bloodstream, or another normally protected site. Surgical procedures and central line care are clear examples. Invasive wound management also requires attention to sterile barriers and field boundaries.
The distinction prevents two opposite mistakes. Using a casual clean approach for a procedure that requires sterility can expose the patient to avoidable contamination. Treating every low-risk task as though it requires a complete surgical field can create unnecessary complexity and handling, which may introduce its own opportunities for error.
A useful decision rule is simple: the more directly the procedure crosses the body’s protective barriers, the more rigorously you must control microorganisms. Follow the protocol issued by the responsible clinician or facility rather than trying to upgrade or downgrade the technique based only on convenience.
For a visual walkthrough of the difference, use the embedded educational video below.
Core Principles That Make Sterile Technique Work
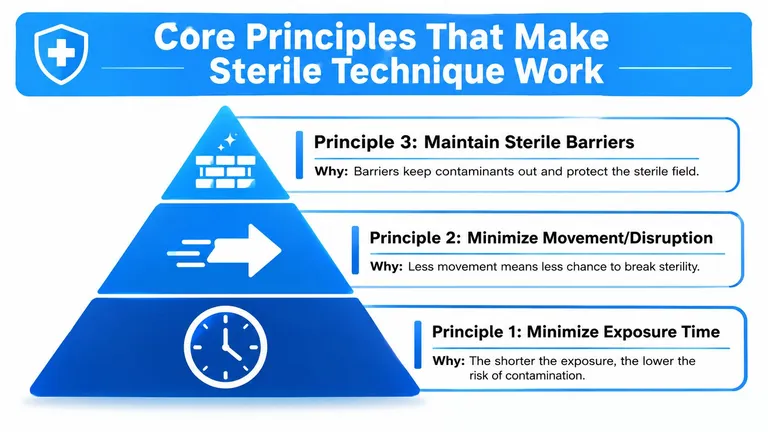
Sterile technique works because it interrupts routes of microbial transfer. The rules may look detailed, but each one answers a practical question: How could microorganisms move from a person, surface, instrument, or the environment into the procedure?
Build barriers from the start
Hand hygiene comes first because hands touch equipment, packaging, clothing, and nearby surfaces. Even after cleaning, hands must be kept away from sterile surfaces unless they’re protected by sterile gloves and used according to the procedure.
Sterile drapes define the field. Sterile instruments and solutions provide materials that can safely contact the procedure site. Protective clothing and gloves reduce transfer from skin and clothing. No single barrier carries the entire responsibility.
Practical rule: If a barrier has been touched, torn, wetted, or exposed outside the accepted field, don’t rely on appearance. Replace it or follow the applicable clinical protocol.
Protect the field itself
A sterile field isn’t just any surface covered with a sterile drape. It’s a controlled area whose contents and boundaries remain known and monitored. Items enter the field through an appropriate sterile transfer, and people avoid reaching across it or placing unsterile objects inside it.
Only the portions designated as sterile count as sterile. That means you need to know the field’s limits before you begin, not after an incident occurs. Keep sterile items in view, minimize unnecessary movement, and don’t allow the field to become an unattended staging area.
Control exposure and movement
Environmental control supports the barriers. Guidance from the Association of periOperative Registered Nurses states that fields should be prepared as close as possible to the procedure time, doors should remain closed as much as possible, personnel movement should be minimized, and contamination should be corrected immediately (AORN sterile technique quick view).
Exposure gives environmental contamination more opportunity to settle on the field. Movement and room traffic disturb the environment and increase the number of possible contact events. Prepare deliberately, keep the working area quiet, and handle only what the procedure requires.
When you understand these mechanisms, you don’t need to memorize an isolated response for every unusual event. Ask whether the action increased exposure, disrupted a barrier, or created a new transfer route. Then correct the problem before proceeding.
Timing and Boundary Problems Most Guides Ignore
The most common timing mistake is preparing a sterile field early because the room, patient, or operator isn’t ready yet. Covering the field can sound like a reasonable solution, but guidance treats covering as a backup for an unexpected delay, not a convenient way to extend the field’s usable life.
Prepare the field as close as possible to the procedure time. A covered field still has an exposure history, and the cover itself can become a source of contamination during placement or removal. If a delay occurs, follow the facility’s protocol. Don’t assume that covering automatically restores sterility.
Know which areas count
Sterility applies only to specifically designated parts of the patient area, drapes, instruments, and supplies. Areas near the edges of a drape, surfaces below waist level, and areas outside direct monitoring are treated as contaminated in the referenced clinical guidance (NCBI Bookshelf overview of sterile fields).
This boundary rule creates several practical consequences:
- Edges aren’t working surfaces: Don’t place sterile instruments near the edge because the fabric looks clean.
- Below-waist areas aren’t controlled: An item that drops below the accepted sterile level is no longer treated as sterile.
- Unseen areas create uncertainty: If you turn away and can’t monitor the field, you can’t confidently verify that it remained protected.
- Moisture changes the risk: Wet drapes can allow microorganisms to move through material, so moisture requires correction under the applicable protocol.
- Tears are not cosmetic defects: A tear can open a route between an unsterile surface and the protected area.
When you’re unsure, stop
A suspected breach is enough to pause. You don’t need proof that contamination occurred before taking corrective action. Replace the compromised drape or item, reestablish the field, and restart the affected step according to clinical instructions.
AORN guidance also emphasizes one sterile field per patient and careful handling by scrubbed personnel (AORN guidance on sterile technique in the operating room). These details matter because workflow shortcuts often happen during delays, interruptions, and room traffic. A field that was technically correct at setup can become unreliable when people stop monitoring its boundaries.
Where Sterile Technique Applies in Real Practice
In an operating room, sterile technique governs the entire relationship between the patient, the surgical team, the instruments, and the field. Staff prepare the field near the procedure time, restrict unnecessary movement, control doors and traffic, and respond immediately when an item or surface may have become contaminated.
The same logic appears in central line care and invasive wound management. The exact supplies and sequence vary, but the question remains constant: what will contact a normally protected site, and how will the team prevent microbial transfer before that contact occurs?
Clinical and technical environments
Laboratory and procedural settings also depend on controlled handling. Workers separate sterile materials from contaminated materials, limit unnecessary contact, and keep their hands and tools within the appropriate workflow. Sterilization is a separate process from wiping a surface. If you’re comparing equipment preparation methods for body modification, this piercing and tattoo sterilisation guide provides useful context about autoclave-based instrument processing.
At home, the environment is less controlled, so preparation discipline becomes even more important. A person preparing a prescribed injection should use the instructions supplied by the clinician and medication manufacturer, clean the workspace, organize materials before opening them, avoid interruptions, and use fresh sterile equipment as directed.
Home preparation needs strict limits
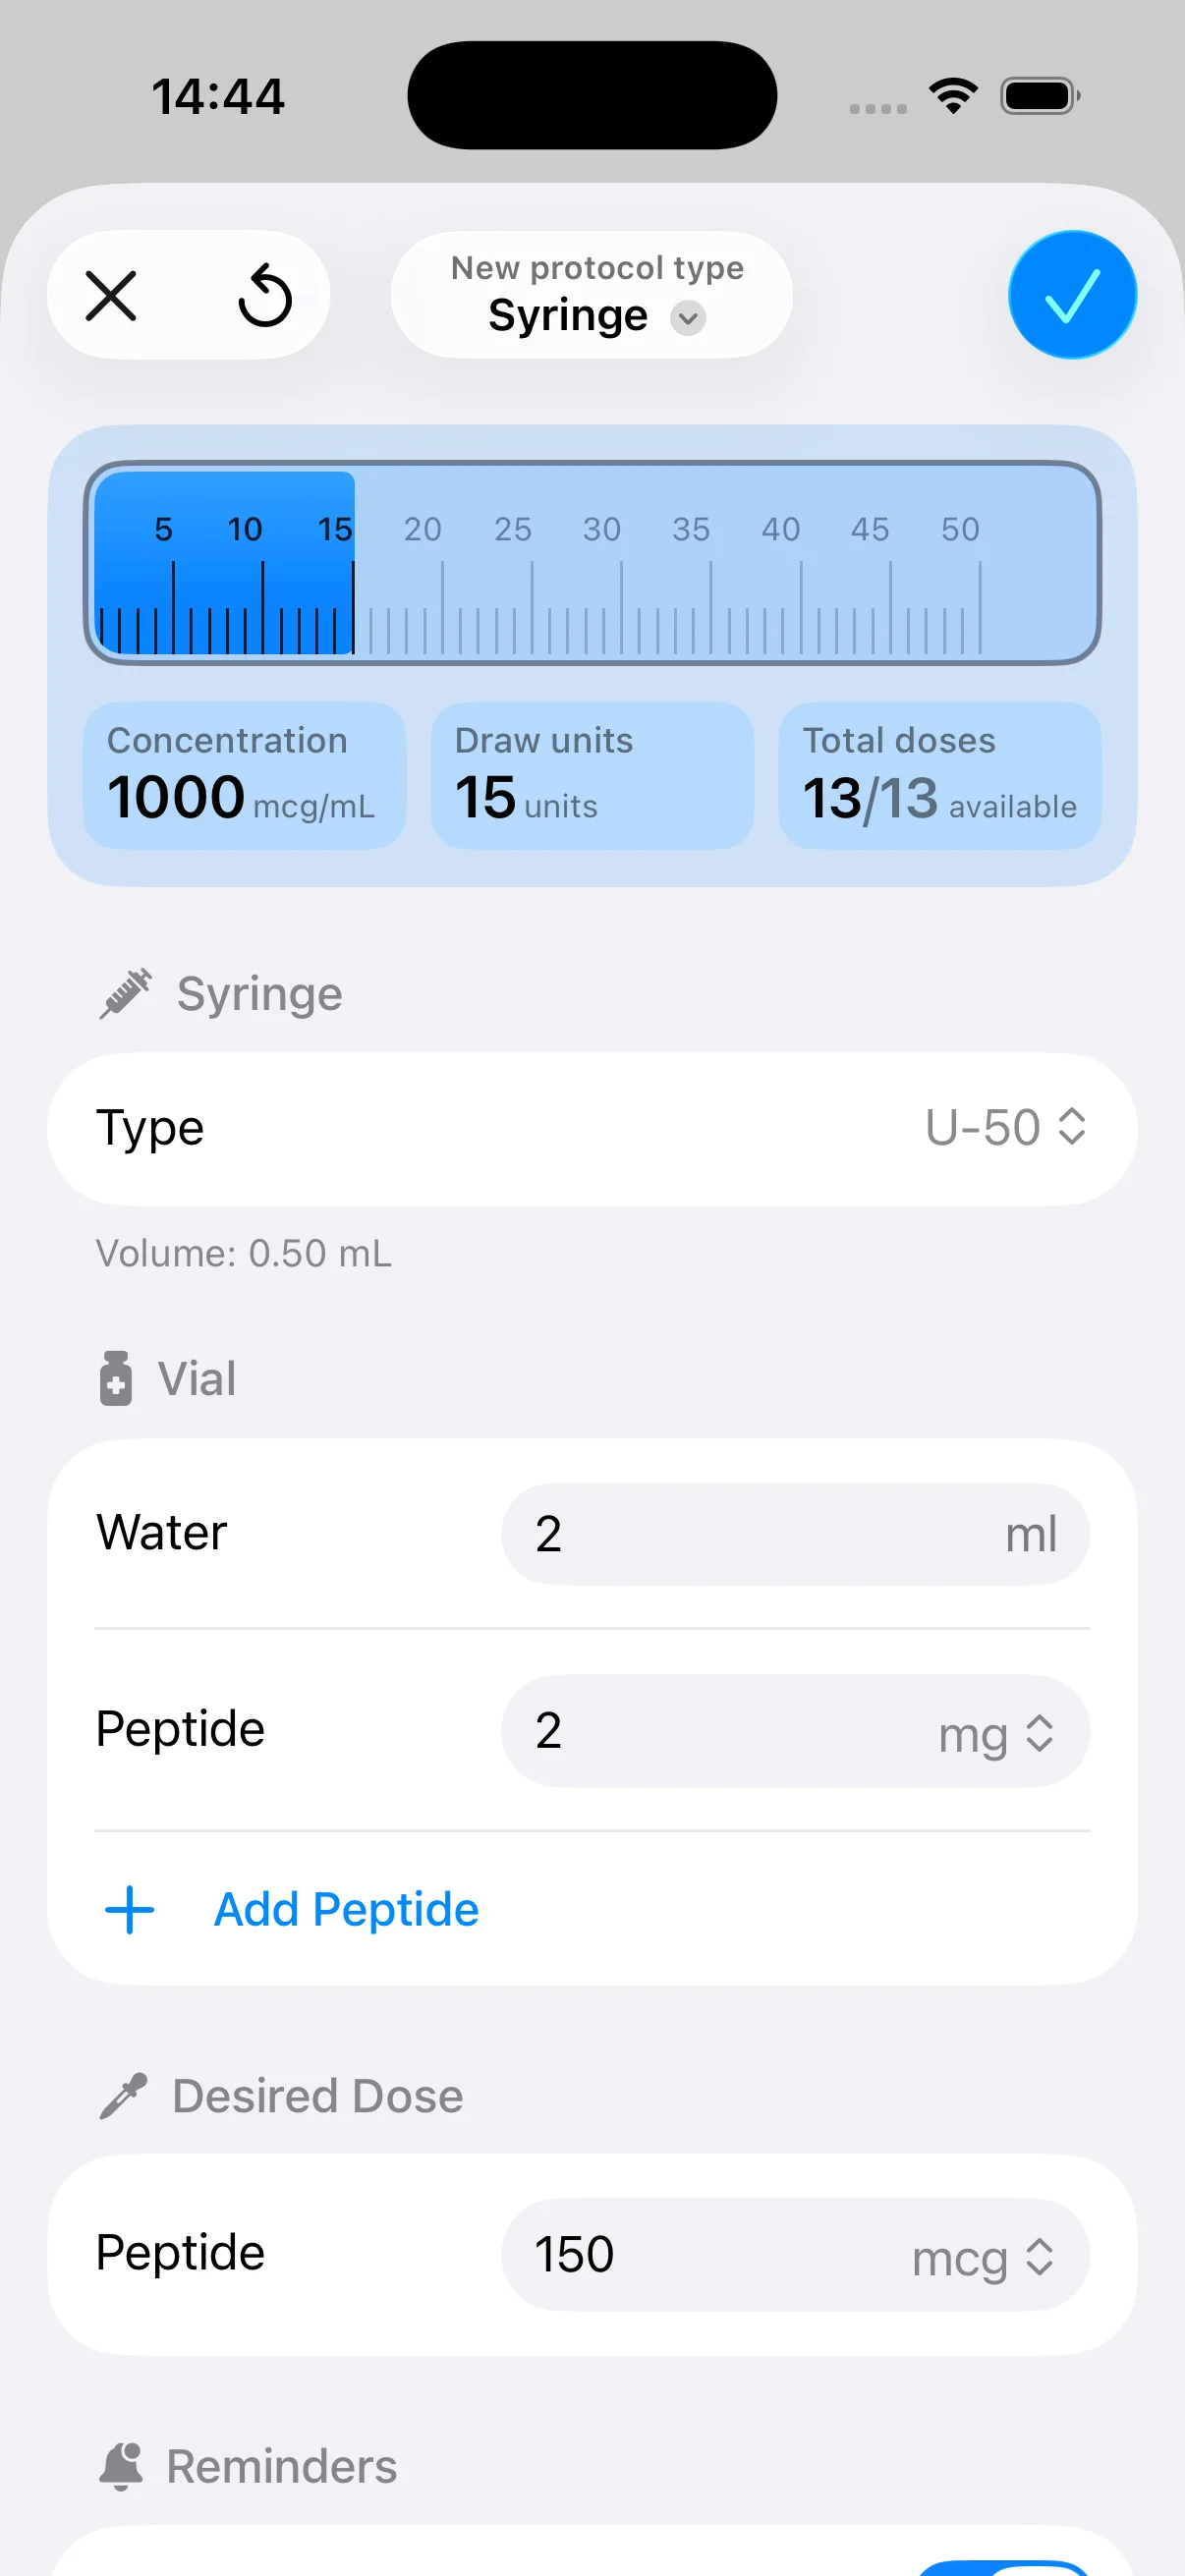
People who prepare peptides or other injectable products at home can confuse a clean counter with a sterile field. The counter is only the environment. Sterile syringes, needles, vial handling, hand hygiene, timing, and the avoidance of unnecessary contact all contribute to reducing contamination risk.
Preparation also involves more than arithmetic. A calculator or protocol app can reduce distraction from manual calculations and help organize a routine, but it can’t sterilize supplies or determine whether a field has been breached. PepFlow can calculate practical injection measurements and manage protocol schedules and reminders, while its peptide mixing guide provides preparation-oriented information. Users still need clinician-approved instructions and safe handling practices.
Keep the roles separate. Workflow tools support planning and consistency. Clinical protocols determine what sterile technique requires.
Risks of Poor Technique and Red Flags to Watch For
A break in sterile technique can introduce microorganisms into a wound, injection site, bloodstream, or another protected body area. The consequence may begin locally, with pain, redness, swelling, warmth, or drainage, and can progress to a broader infection with fever, chills, or feeling unwell. The risk comes from the transfer event, whether it involved a hand, instrument, drape, surface, moisture, or uncontrolled exposure.
Watch for the events that make contamination plausible:
- Moisture on a drape: Treat wet material as compromised because moisture can create a path through the barrier.
- A torn or displaced barrier: Replace the affected drape or material rather than smoothing it and continuing.
- Turning away from the field: If you couldn’t monitor the area, you can’t confidently confirm its continued sterility.
- Reaching across the field: Reposition yourself or ask for assistance instead of passing an unsterile sleeve or object over sterile supplies.
- Uncertain contact: If an item may have touched an unsterile surface, remove and replace it.
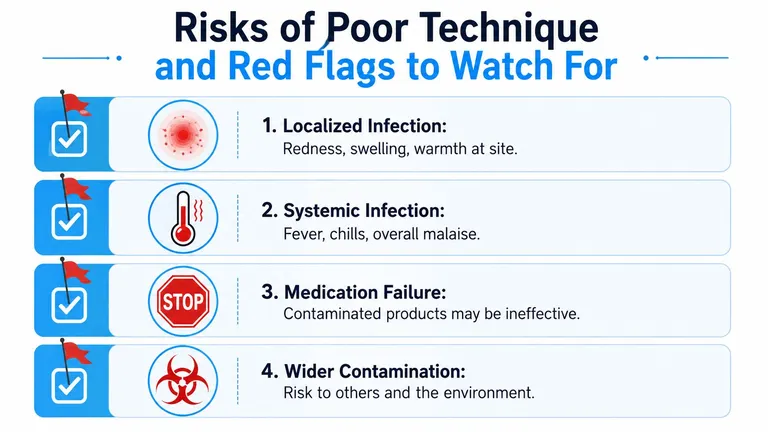
When you can’t establish that the field stayed sterile, pause and correct the uncertainty before continuing.
The safest response is conservative. Stop the procedure, identify what may have been compromised, replace the contaminated material, and restart the relevant step under the applicable protocol. Don’t try to rescue a questionable item by wiping it or assuming that contamination was unlikely.
For personal injection routines, a structured injection safety checklist can help you verify preparation steps before you begin. If symptoms such as worsening redness, swelling, warmth, severe pain, drainage, fever, chills, or general deterioration develop after an invasive procedure, contact a qualified healthcare professional promptly.
Building Consistent Sterile Practice Habits
Reliable sterile technique starts before the package opens. Choose a clean, controlled workspace, remove unnecessary objects, gather every approved supply, and arrange the sequence so you won’t need to search, reach, or leave the field once preparation begins.
Use a repeatable mental check:
- Environment: Is the workspace controlled, quiet, and free from avoidable traffic?
- Timing: Are you preparing close to the procedure rather than creating an early field?
- Barriers: Are hand hygiene, gloves, drapes, instruments, and solutions appropriate for the procedure?
- Boundaries: Which surfaces are sterile, and which areas must remain untouched?
- Response: What will you replace if moisture, contact, tearing, or uncertainty occurs?
Practice builds judgment, but practice should follow professional instruction. Healthcare workers should use facility policies and current perioperative guidance. People preparing injections at home should obtain hands-on instruction and individualized directions from a licensed clinician, especially when the product, route, or equipment differs from what they’ve previously used.
Sterile technique isn’t a performance you complete once. It’s a habit of noticing transfer routes, controlling exposure, and correcting uncertainty early. Tools that organize schedules can support consistency, but they should remain separate from clinical decision-making and professional medical advice.
PepFlow helps organize peptide dosing schedules, calculate practical measurements from prescribed amounts, and maintain routine reminders without replacing clinical guidance. Visit PepFlow to explore a planning tool that can support more consistent preparation habits alongside your clinician’s sterile technique instructions.