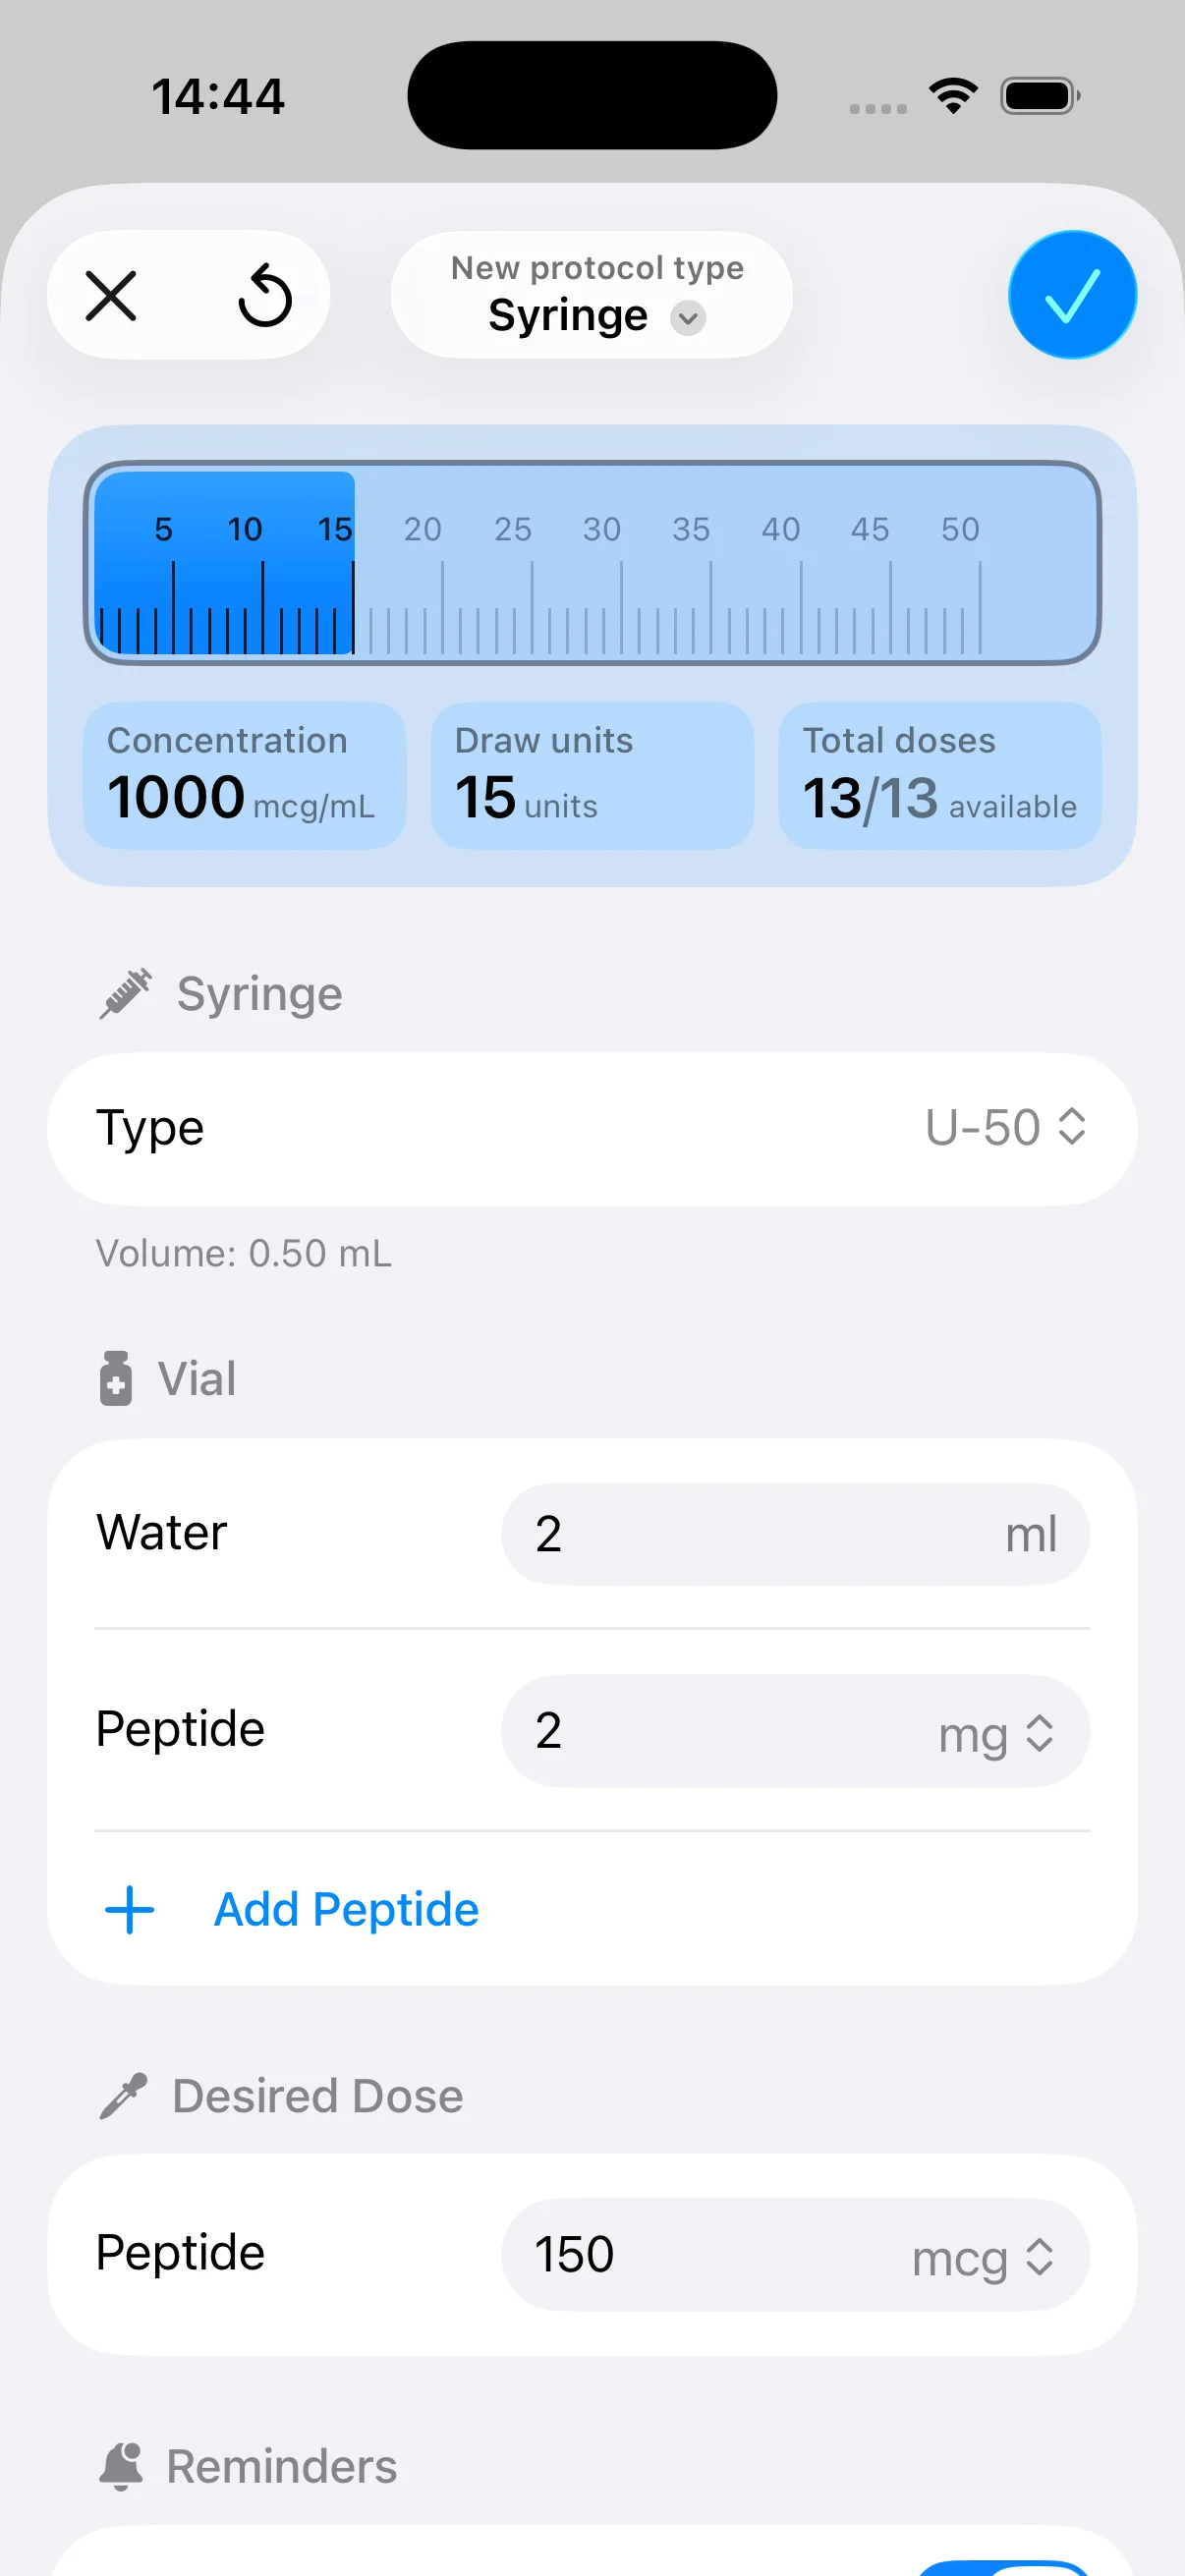
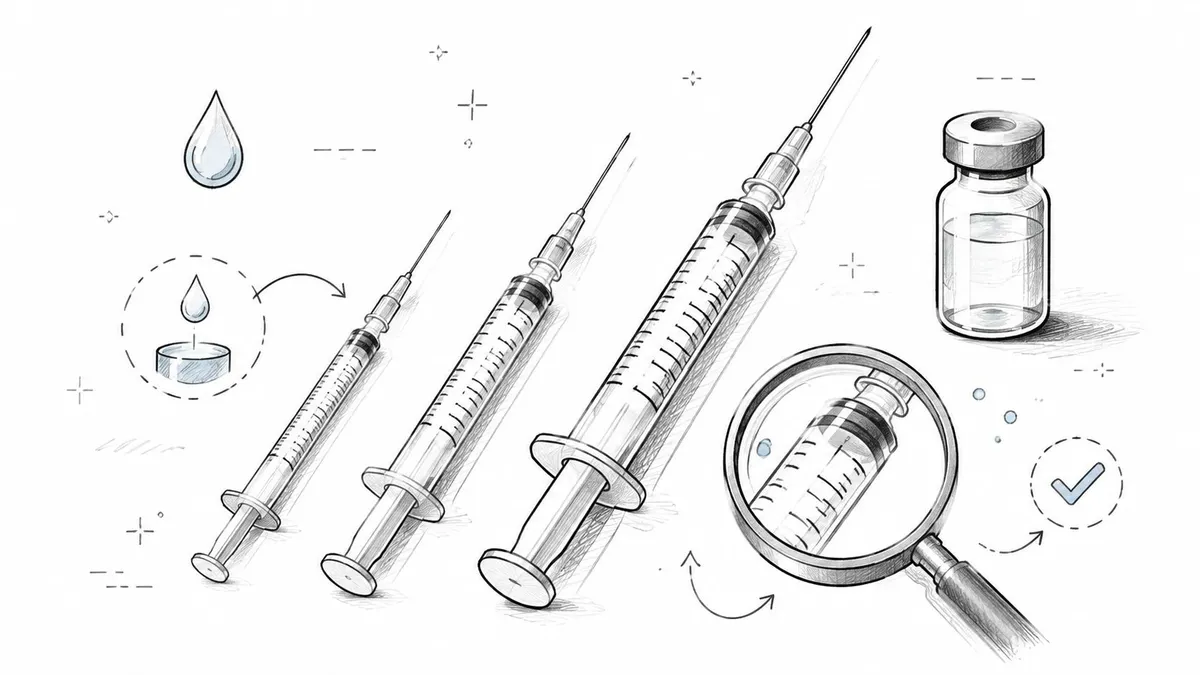
You’re standing at the pharmacy counter, insulin in one hand and a small box of syringes in the other, trying to make sense of markings that don’t look like the numbers on your prescription. That moment matters, because with insulin, the syringe isn’t just a container. It’s the measuring tool that decides whether the dose you planned is the dose you give.
The main types of syringes for insulin differ in concentration scale, barrel capacity, and needle design. A good fit makes the dose easier to read and the injection easier to handle. A bad fit can turn a routine shot into a dosing mistake, especially if the syringe and vial don’t match.
If you’re unsure whether the box in front of you is the right one, ask a pharmacist or diabetes clinician before you inject. For people who need extra support outside clinic hours, house call diabetes support can also be a useful option to keep in mind when questions come up at home.
Table of Contents
- Why the Right Insulin Syringe Matters More Than You Might Think
- The Basic Anatomy of an Insulin Syringe
- U-100 vs U-40 and Why Concentration Changes the Math
- Matching Barrel Capacity to Your Prescribed Dose
- Choosing Needle Length and Gauge for Comfort and Consistency
- Drawing and Reading an Accurate Dose Step by Step
- Availability, Supply Risk, and Regional Differences to Watch For
- Safe Use, Disposal, and a Quick Daily Routine
Why the Right Insulin Syringe Matters More Than You Might Think
A new patient often notices the wrong thing first, the package size, the needle cap, or the number of lines on the barrel. The safer question is simpler, which scale is this syringe built for, and does it match the insulin in the vial? U-100 syringes are marked for insulin that contains 100 units per millilitre, while U-40 syringes are marked for 40 units per millilitre (product information).
That difference looks minor until the dose is measured out. One U-40 unit equals 0.025 mL, while one U-100 unit equals 0.01 mL, so the same volume carries 2.5 times as many units in a U-100 system (product information). If the syringe scale and insulin strength do not match, the dose can shift by a lot. In practice, that means the label matters more than barrel shape or needle color.
What usually confuses people first
The box may look ordinary even when the calibration is not. A syringe is not just a syringe, because the markings are tied to a specific insulin concentration. That is why the safest habit is to check the vial, the syringe, and the prescription together before the first fill.
Practical rule: if the concentration on the vial and the scale on the syringe don’t match, stop and verify the pairing before injecting.
The right fit also makes the dose easier to read. Smaller-capacity barrels have tighter spacing between marks, which helps when the prescribed dose is low. Larger barrels may be easier to find in stock, especially if a pharmacy is substituting from what is available, but the markings are less fine, so the reading can feel less exact. That matters when someone is traveling, switching pharmacies, or dealing with regional supply differences. If the syringe you normally use is unavailable, confirm the replacement with a pharmacist or diabetes care professional before you inject. For extra help outside clinic hours, house call diabetes support can also be useful at home when questions come up.
The Basic Anatomy of an Insulin Syringe
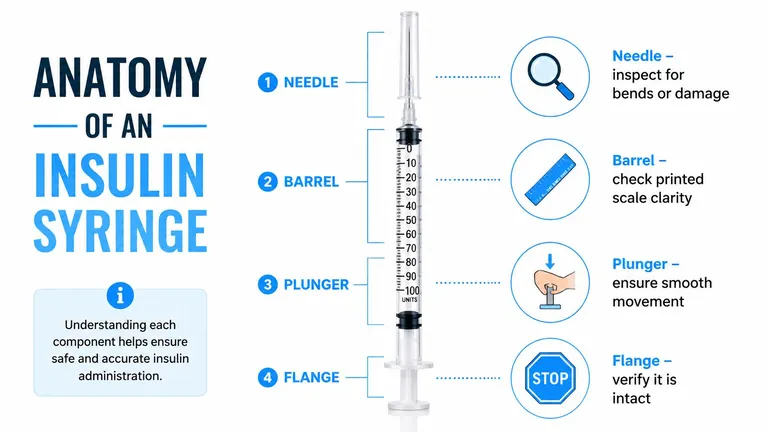
An insulin syringe looks simple, but each part has a job. Once you can name the parts, it’s easier to spot a damaged syringe, read the scale correctly, and understand where dose errors happen. The basic pieces are the barrel, plunger, needle, and flange.
Barrel, plunger, and needle
The barrel is the clear tube that holds the insulin. The printed scale on it shows units, and the spacing changes with the syringe capacity. The plunger slides inside the barrel, and the rubber stopper at its tip is what moves the liquid when you draw up or push out insulin.
The needle has a hub that connects to the syringe and a thin hollow tube that carries the insulin through the skin. Gauge describes thickness, and a higher gauge number means a thinner needle. Length is measured in millimetres, so a needle can be short and thin, or longer and a little sturdier depending on the design.
The goal is not to memorize jargon. It’s to know exactly where the dose is measured and where insulin leaves the syringe.
What to inspect before use
Look for a straight needle, a clean printed scale, and a plunger that moves smoothly. If any part is bent, cloudy, cracked, or loose, don’t use it. That simple check catches a lot of avoidable problems before they start.
Another term you’ll hear is dead space. That’s the tiny amount of insulin that can remain in the needle and hub after the injection, especially when devices are changed or mixed. It’s one reason syringe design and attachment style matter, not just the line markings.
U-100 vs U-40 and Why Concentration Changes the Math
The biggest source of confusion is concentration, not appearance. A U-100 syringe and a U-40 syringe can look similar at first glance, but they’re calibrated for different insulin strengths, and the math is not interchangeable. U-100 contains 100 units per mL, while U-40 contains 40 units per mL (product information).
Why the wrong pairing is dangerous
A U-100 syringe is built to read doses for U-100 insulin. If it’s used with U-40 insulin, the volume drawn up is interpreted on the wrong scale, and the result can be a much larger delivered dose than intended. The reverse mistake goes the other way, and the person can receive less insulin than prescribed.
This is why concentration should be checked on the vial and on the syringe packaging every time, especially after a pharmacy switch or travel refill. Never rely on the barrel shape, because the outside of the syringe doesn’t tell you the calibration. If the concentration changes, the dose markings need to be rechecked with a clinician or pharmacist instead of converted by guesswork.
| Feature | U-100 insulin | U-40 insulin |
|---|---|---|
| Concentration | 100 units per mL (product information) | 40 units per mL (product information) |
| Syringe scale | U-100 syringe markings match this strength (product information) | U-40 syringe markings match this strength (product information) |
| Risk if paired wrong | Can create a serious dosing error | Can create a serious dosing error |
| Common use | Widely used in routine human diabetes care | Still used in some veterinary and a few international settings |
For people trying to convert or sanity-check a dose, this insulin unit conversion guide can help with the underlying math, but it should never replace professional verification when the insulin concentration changes.
Matching Barrel Capacity to Your Prescribed Dose
Once the concentration is right, the next question is barrel size. With U-100 syringes, the three common capacities are 0.3 mL, 0.5 mL, and 1 mL, which correspond to 30, 50, and 100 units on the barrel (product information). The smallest barrel isn’t always the smallest physical syringe, but it usually gives the finest spacing between marks for low-dose work.
Which barrel makes reading easiest
A 0.3 mL syringe is usually the clearest choice when the prescribed dose is small, because the graduation spacing is tighter. A 0.5 mL syringe fits moderate doses while still keeping the marks relatively easy to read. A 1 mL syringe makes sense when the dose is higher, but the lines are spaced farther apart, so small changes are harder to judge at a glance.
Practical rule: choose the smallest barrel that still comfortably holds your full dose.
That rule matters because reading error often comes from crowded or overly sparse markings, not from the insulin itself. The wrong barrel can make a correct dose harder to see, especially when the number is low and every line counts. U-40 syringes follow the same basic logic, but they’re seen more often in veterinary or international settings.
| Barrel Size | Max Units | Graduation Spacing | Best Dose Range |
|---|---|---|---|
| 0.3 mL | 30 units | Tightest spacing | Low-dose injections |
| 0.5 mL | 50 units | Moderate spacing | Mid-range doses |
| 1 mL | 100 units | Widest spacing | Higher-unit doses |
If you’re checking what a pharmacy has on hand, pharmacy stock levels via MedTrack can be useful context for availability, but your prescription and the insulin concentration still need to drive the choice.
Choosing Needle Length and Gauge for Comfort and Consistency
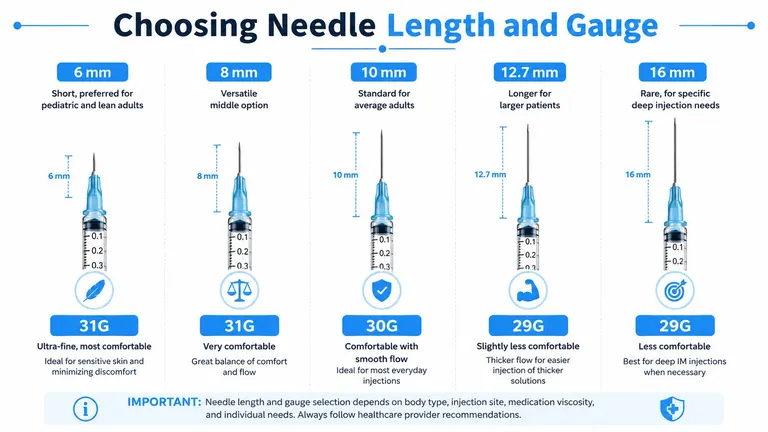
The needle has two practical numbers, length and gauge. Length affects how deep the needle reaches, while gauge affects thickness and, by extension, comfort and flow resistance. Contemporary insulin needles are commonly seen in lengths like 12.7 mm, 8 mm, and 6 mm, with gauges such as 27G, 29G, 30G, and 31G (needle design overview).
Shorter needles and thinner gauges
A higher gauge number means a thinner needle. That’s why 31G needles are often preferred by people who are needle-anxious or by those who want a gentler feel, even though thinner needles can draw a little more slowly. Shorter needles are often favored for subcutaneous delivery because they reduce the chance of going deeper than intended.
The practical tradeoff is simple. A short needle can improve consistency, especially when injecting into the arm or thigh without lifting a skin fold. A longer needle may still be appropriate in some situations, but the length should match the injection site and the technique your clinician taught you.
How people usually match the needle to the body and site
- Lean adults and many children: shorter needles are often easier to use, especially when the goal is reliable subcutaneous placement.
- Average adults using abdomen injections: mid-length needles can be comfortable and consistent when used correctly.
- Needle-anxious users: thinner gauges can feel less intimidating and may make the routine easier to stick with.
A useful detail from product guidance is that common market pairings run around 29G to 31G with 5 to 12.7 mm lengths, where comfort and ease of delivery are the main considerations (needle guidance). If you’re changing needle length, ask the clinician who prescribed the insulin whether the injection site or skin-fold method should change too.
Drawing and Reading an Accurate Dose Step by Step
Before the needle touches the skin, the dose has to be measured cleanly. That means a steady setup, a clear view of the scale, and no air trapped where insulin should be. A rushed draw-up is where a lot of small mistakes start.
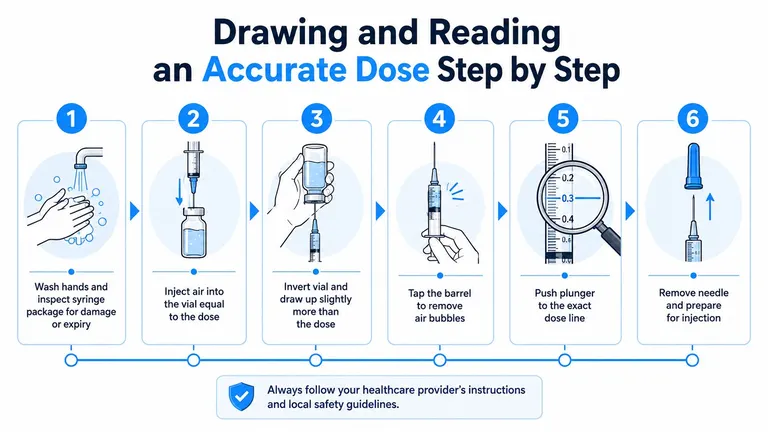
The sequence that helps keep the dose accurate
- Wash your hands and inspect the syringe package for damage or expiry.
- Draw air into the syringe equal to the prescribed dose.
- Insert the needle into the vial and push the air in.
- Turn the vial and syringe upside down so the needle points up.
- Pull back a little past the target line, tap out bubbles, then move the plunger until the top of the liquid sits exactly on the dose mark.
- Remove the needle and prepare for injection.
The important part is the final alignment. The top of the liquid, not the air pocket above it, should line up with the printed scale. If bubbles stay in the barrel, they take up space that should be insulin, and even a small bubble can shift the amount delivered.
Read the line at eye level, then check it again before you inject.
A second set of eyes can help when possible, especially if a dose looks unusual or the packaging changed. For a separate visual refresher on reading the barrel correctly, this insulin syringe reading guide walks through the scale without rushing the math. If the plunger feels sticky or the syringe doesn’t move smoothly, set it aside and use a different one.
Availability, Supply Risk, and Regional Differences to Watch For
The right syringe on paper is not always the syringe you can get today. That gap matters because insulin care is routine only when the supply is routine too, and some syringe types are easier to source than others. Regional habits also shape what appears in the pharmacy aisle, so a traveler can easily meet a packaging style they’ve never used before.
Why stock changes matter in real life
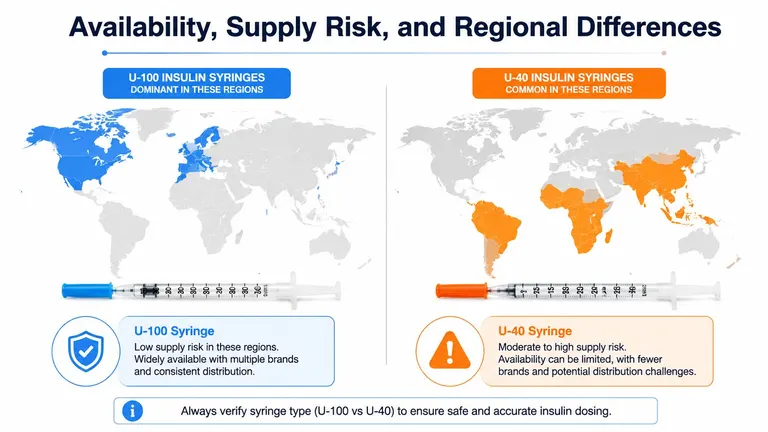
U-100 is dominant in many countries, while U-40 still appears in some veterinary and international settings (product information). That mix makes substitution risky, because people often assume a familiar-looking syringe is interchangeable. It isn’t, and the concentration mismatch can change the actual dose in a way that isn’t visible from the outside.
Recent supply notices from the NHS show that even standard insulin syringe products can face shortages, which means the exact barrel size or needle combination you prefer may not always be available (NHS supply notice). When that happens, pharmacies may need to offer a different length or gauge. That’s a practical reason to check the package, not just the prescription label.
What to confirm before you leave the pharmacy
- Concentration: make sure U-100 or U-40 matches the insulin you were given.
- Barrel volume: confirm the syringe size still fits your dose range.
- Needle length and gauge: check that the replacement still works for your site and technique.
If any of those three change, call the prescriber before you start using the new stock. A quick check now is safer than discovering a mismatch at the next injection.
Safe Use, Disposal, and a Quick Daily Routine
Accuracy and safety belong in the same habit. A good insulin routine doesn’t stop at measuring the dose correctly, it also protects the skin, the hands, and anyone who might handle the used needle later. The most reliable routines are the ones people can repeat without thinking too hard.
Start with a fast inspection. Make sure the syringe barrel isn’t cracked, the needle cap is seated, and the concentration on the box matches the vial. Then draw a bubble-free dose, check the plunger position at eye level, and inject with the same calm sequence every time.
A simple routine that holds up on busy days
- Check the label first: verify the syringe concentration and barrel size before you touch the vial.
- Use one needle once: insulin syringes are single-use, sterile devices designed for one injection (ISO 8537).
- Rotate injection sites: move across approved areas like the abdomen, thigh, upper arm, and buttocks to avoid repeated stress on one spot.
- Dispose of sharps safely: put used needles into a rigid sharps container or another approved container, then use a pharmacy or mail-back disposal route when available.
Never share syringes or needles. Even if the dose is your own, sharing creates avoidable infection risk and makes contamination more likely. If you want a one-page version of that routine, this injection safety checklist can be printed and kept with your supplies.
Daily check: correct concentration, smooth plunger, no bubbles, safe disposal.
A small routine like that takes less than a minute once it becomes familiar. It also makes the next refill easier to verify, because you’ll notice when something about the syringe, label, or fit has changed.
If you want a simple way to reduce syringe confusion, PepFlow can help you think through unit markings, concentration, and dose math before you inject. Visit PepFlow to keep your dosing routine organized, check your measurements, and make each refill a little easier to verify.