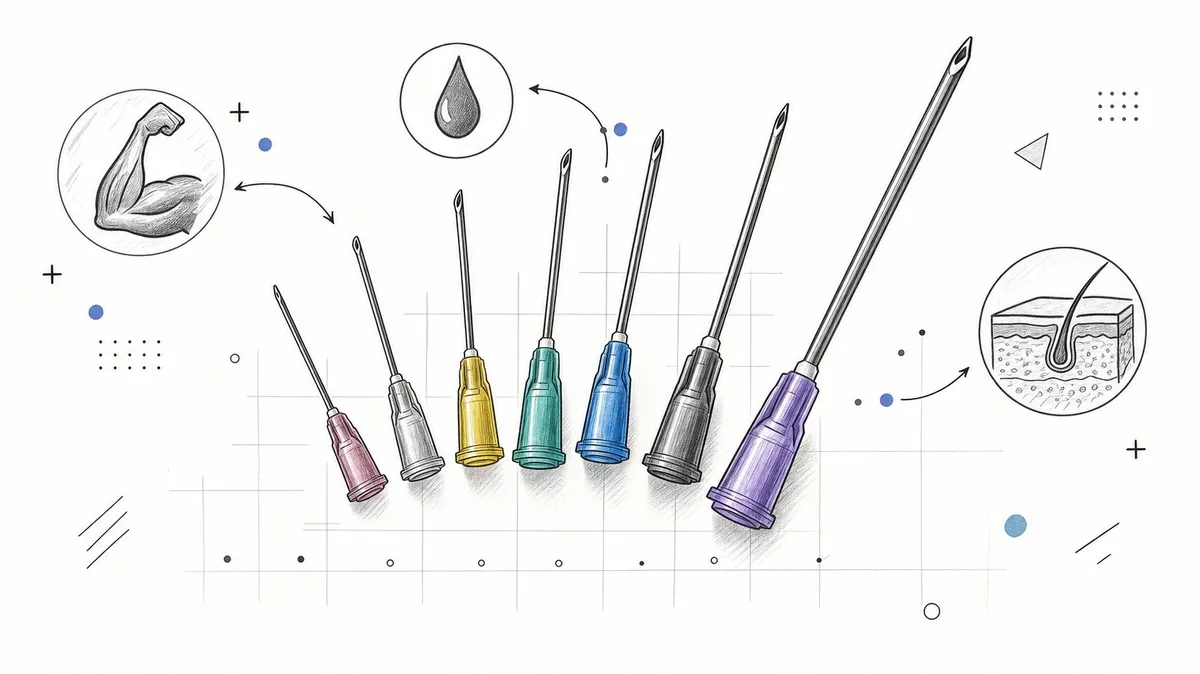
You’ve got the vial, the prescription, and a drawer full of needles that all look almost identical. Then you hit the label and see gauge, length, color, and maybe a line that says U-100 or pen needle, and the whole choice stops feeling simple. A good injection needle size chart clears that up by turning a confusing product listing into a practical choice you can compare with confidence.
Table of Contents
- Introduction to Injection Needle Size Charts
- How to Read Gauge Length and Color Codes
- Complete Injection Needle Size Chart Reference
- Intramuscular Subcutaneous and Intradermal Needle Selection
- Peptide Injections and Low Volume Dosing Considerations
- Pen Needles Versus Traditional Syringe Needles
- Safe Handling Site Selection and Disposal Practices
- Quick Reference Tools Cross References and Next Steps
Introduction to Injection Needle Size Charts
A needle chart is a lookup tool, not a shopping shortcut. It turns gauge, length, and color code into a practical choice for planning, training, and product comparison. That matters because two needles that look similar can behave differently once outer diameter, inner diameter, wall thickness, and route are part of the decision.
The chart should also do more than name a size. ISO 6009:2016 assigns color codes for single-use hypodermic needles from 0.18 mm (34G) to 3.4 mm (10G), which gives clinicians and manufacturers a consistent way to identify sizes across markets (CDC needle length and gauge guidance). Used well, a chart helps compare products across brands, match the needle to the route, and avoid assuming one size fits every injection.
That is where confusion usually starts. A person comparing a subcutaneous syringe with a pen needle listing may see numbers that look familiar, yet they are not the same product category. A clinician may need a route-specific lookup. A peptide user may be balancing comfort, precision, and low-volume delivery, including planning around PepFlow, without wanting to guess.
A good chart works like a decision tree. Start with the route, then check body size, viscosity, and product type. For peptide injections, low dead volume and fit matter just as much as gauge. For standard injection planning, a chart that links size, color, and use case is easier to read than a shelf full of near-identical packages.
Use the chart to narrow the field, then confirm the route and product label before you buy or inject.
How to Read Gauge Length and Color Codes
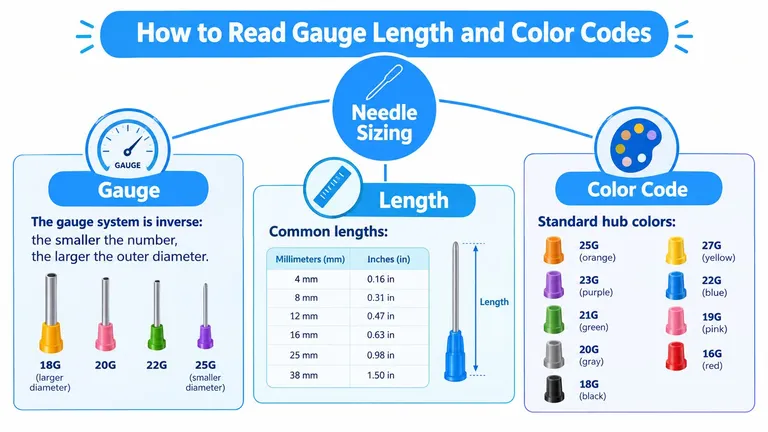
Start with the product label, then confirm the gauge, the length, and the hub color. That order keeps you from mixing up parts that serve different jobs. Gauge describes thickness, length tells you how far the needle reaches, and ISO color coding gives you a quick visual check when brand packaging is hard to compare.
The label often needs a second reading. A 25G needle is finer than a 22G needle, while a 16 mm length speaks to tissue reach rather than thickness. If you are holding a box with a color-coded hub, the color helps confirm you are looking at the same size the chart lists, especially when product names are similar.
What the hidden dimensions change
A chart that stops at gauge leaves out part of the picture. Inner diameter and wall thickness shape how easily fluid passes through the needle, and that changes flow, force, and dead volume. Manufacturer technical charts show how a fine needle can still differ in usable performance even when the gauge looks straightforward. A needle with a small nominal outer diameter may also have a limited internal bore, which matters most in low-volume dosing.
That is why a label should be read as a set of fields, not a single number. Gauge tells you relative thickness. Length tells you reach. Color helps with visual confirmation. Dead volume tells you how much liquid can remain in the needle after delivery, which becomes more relevant when each drop matters, such as in peptide work and other small-dose injections (Hamilton needle gauge chart).
A worked example makes this easier to use. A 25G 16 mm needle with an orange hub can be read as a finer needle, a medium-short length, and a color cue for quick verification. The chart does not ask you to guess from one feature. It asks you to match the label to the route, the fluid, and the body site before you choose.
Practical rule: If a chart shows only gauge, it is not enough for careful selection. Add diameter, length, wall, and dead volume when precision matters.
Route still decides the final check. A fine, short needle may fit one subcutaneous use and still be the wrong match for a deeper injection. The safest reading habit is simple, compare the label to the route, then confirm the size by gauge, length, and color before you buy or inject.
Complete Injection Needle Size Chart Reference
A master chart is most useful when it helps you compare, not memorize. The practical value of an injection needle size chart is that it lets you line up products from different brands and regions without guessing whether two labels mean the same thing. Gauge gives you a nominal thickness, diameter gives you the actual scale, and color codes offer a quick visual check.
The standardized color logic in ISO 6009:2016 covers a wide span of needles, from 34G to 10G. That range helps explain why “needle size” is not one simple category. A gauge number only becomes useful when you pair it with diameter, length, and intended use.
Master Gauge Diameter and Color Code Reference
| Gauge | Outer Diameter mm | ISO Color Code | Common Lengths |
|---|---|---|---|
| 34G | 0.18 mm standard range in ISO guidance | Standard ISO color coding applies | Varies by product |
| 10G | 3.4 mm standard range in ISO guidance | Standard ISO color coding applies | Special-purpose use |
For the gauges between those endpoints, manufacturer data varies and the practical details are not always presented the same way across products. That is why a chart should be read as a lookup tool, not as a promise that every intermediate gauge will be labeled identically in every catalog. In those cases, the safest approach is to check the package insert or product specification sheet for the exact needle, then confirm the route and device it is meant for.
The part many readers miss is that a chart can be technically correct and still incomplete for buying or planning. A gauge alone does not tell you how much liquid stays in the needle after delivery, and that matters in low-volume dosing. Dead volume becomes more relevant as dose size gets smaller, especially in peptide work and other applications where each drop counts.
Practical rule: If the chart only gives gauge, it is a starting point, not a final selection tool.
A good reference should also separate general needle sizing from device-specific sizing. Pen needles, syringe needles, and specialty products may share gauge language, but they do not always behave the same way in use. That is why a quick check should include the route, the fluid, and the body site before you choose a needle.
For cross-brand comparison, use the ISO logic first and the package details second. A color hub or printed label is only a confirmation cue. The actual fit still depends on diameter, length, wall design, and dead volume, which is why standardized charts are useful in procurement, training, and peptide-specific lookup work such as PepFlow planning.
Intramuscular Subcutaneous and Intradermal Needle Selection
A chart works best when you start with the route, not the needle box. Intramuscular, subcutaneous, and intradermal injections place fluid at different depths, so the right choice depends on tissue layer, product, and body size. Common clinical guidance places 22G to 25G in the intramuscular range and 23G to 25G in the subcutaneous range, with route and length matched to the site and formulation.
Route by route differences
Intramuscular injections have to reach muscle through the subcutaneous layer. Gauge matters, but length does the heavy lifting here. A short, fine needle may feel easier to use, yet it can miss the target layer if the medication needs deeper delivery. That is why route-specific length guidance matters as much as gauge, especially in adults with more subcutaneous tissue (CDC guidance).
Subcutaneous injections sit in fatty tissue, so a shorter needle can still deliver correctly. Clinical guidance often places this route in the 23G to 25G range, with the final choice shaped by viscosity, site, and patient factors. A gauge chart is not naming one universal winner. It is showing which choices fit the route.
Intradermal injections are shallower again. They are selected differently from IM or SC needles, and a subcutaneous needle does not automatically translate to this route. The key question is simple: how deep does the medication need to sit?
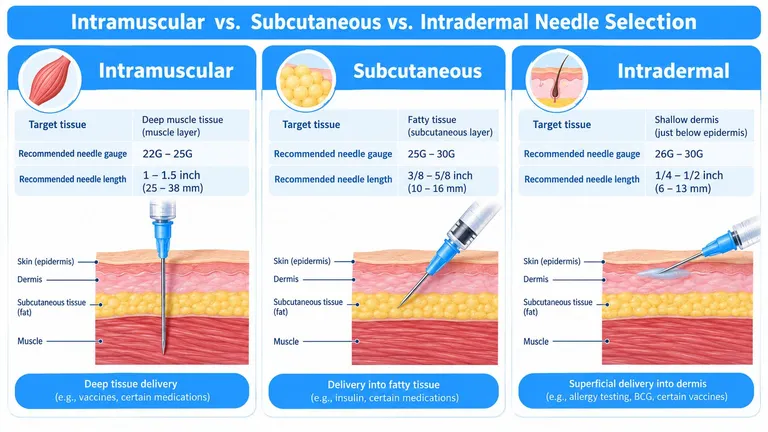
A practical way to read the chart is to trace the decision tree. Deeper tissue asks for more reach. Thicker fluid may need a wider bore to flow smoothly. Lower-volume, shallow delivery usually points toward finer, shorter options.
For readers comparing route-specific planning tools, the PepFlow insulin syringe guide is useful for insulin-related lookup logic, and the ProMD Health Bel Air guide gives a plain-language look at side effects in injection-based care.
Practical rule: Choose by route, tissue depth, and the product you are giving, not by habit.
Peptide Injections and Low Volume Dosing Considerations
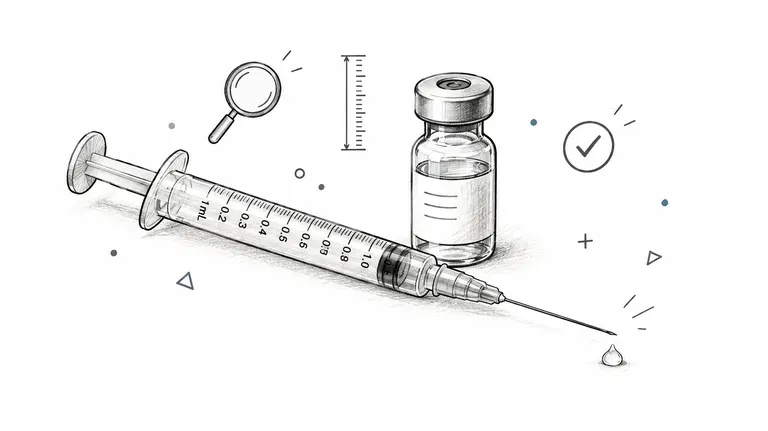
Very small doses expose measurement errors fast. That is why peptide users look more closely at gauge, inner diameter, and dead volume than many other readers do. When the volume is tiny, residue left in the needle matters more than the difference between two syringes that look almost identical.
Why fine gauges change the workflow
Smaller inner diameters raise resistance, so low-volume delivery can feel slower and less predictable. For precision work, the useful chart is not just a gauge list. It also shows diameter, wall thickness, and dead volume, because those details affect how much material remains in the needle after the dose is pushed through.
For a concrete reference point, the manufacturer chart notes that 34G needles have a dead volume on the order of 0.052 µL per 25.4 mm (Hamilton needle gauge chart). That kind of detail matters most when the workflow depends on repeatable, very small injections.
Read the listing like a system, not a single number
A syringe product name often combines barrel size, gauge, and length in one line. For that reason, small-volume buyers usually compare the syringe chart with a dose planner before ordering. In peptide work, the better question is whether the whole setup fits the volume, the route, and the person using it. A finer needle only solves part of the problem if flow, residue, and handling are not considered together.
That is where research peptide measurement helps with the arithmetic side of the workflow, while the PepFlow peptide injection guide gives a clearer overview of syringe categories and planning basics.
Shorter, finer needles are often chosen because they are easier to handle and less intimidating. That choice still depends on where the injection goes, how much volume is involved, and whether the product needs consistent delivery. A practical chart should help the reader match route, dose size, and needle design instead of relying on habit alone.
Practical rule: In very small doses, the right needle is not just the finest one. It is the one that delivers consistently with the least waste.
Pen Needles Versus Traditional Syringe Needles
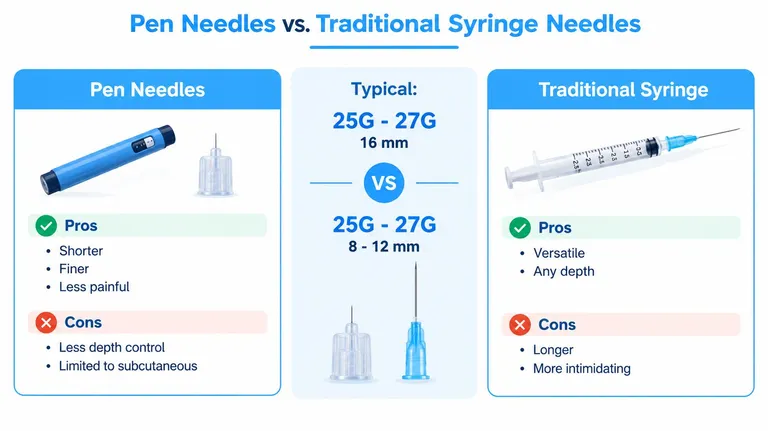
A dose can look simple on a chart and still belong to two different systems. Pen needles and traditional syringe needles may share a gauge range, but they are chosen for different workflows, different devices, and different levels of control. Public-health guidance still places standard subcutaneous injections around 25G to 27G and 16 mm, while current charts increasingly list 31G to 32G, 4 to 6 mm pen needles for subcutaneous use, as noted in the guidance and comparison charts (CDC guidance, donedose needle size chart).
Why both systems still appear
Traditional syringes give more direct control over volume and needle choice. They are the better fit when the user is measuring, drawing, and delivering medication by hand. Pen needles are built around a device, so they focus on convenience, repeat use, and a shorter profile. That makes them a common choice in self-injection settings where the pen handles part of the delivery.
The trade-off is straightforward. A shorter pen needle can feel easier to use and less intimidating, but it does not solve every tissue-depth question by itself. Guidance pages now separate choices by site, body size, and route instead of treating one static chart as enough, which is the better way to read the injection needle size chart because the person and the injection site both matter.
Traditional charts usually describe the needle as part of a syringe system. Pen charts describe the needle as part of a delivery device. That difference sounds small until you compare a refillable workflow with a pen-based one. The same gauge can sit in two different product families, and the handling details are not the same.
Product listings help make that difference visible. A page for sterile medication syringes shows how traditional syringe supplies are usually described, which makes it easier to compare them with pen-based options.
Practical rule: shorter is not a universal upgrade. Needle choice depends on the device, the route, and the person using it.
Safe Handling Site Selection and Disposal Practices
A needle chart can guide size, but safe use depends on what happens around it. Site selection, handling, and disposal work together, because the right gauge and length still fail if the needle is reused, touched carelessly, or matched to the wrong site. Safe practice starts before the cap comes off.
A simple handling checklist
- Match the site to the route: Use the injection site that fits the product and the intended route.
- Keep the needle sterile: Open the package only when you are ready to inject.
- Use it once: Single-use needles are for one injection.
- Limit handling of the tip: Fewer touches mean fewer chances for a needlestick.
- Dispose right away: Place the used needle in a proper sharps container after use.
- Replace damaged items: Bent needles, damaged hubs, or poor packaging mean the product should not be used.
These steps are easy to overlook when the focus stays on gauge and length. They should not be. The chart helps with selection, but it does not make the injection safe by itself.
A written safety checklist keeps the routine consistent. The PepFlow injection safety checklist works well as a compact reminder before and after an injection, especially for people who use the same supplies repeatedly. It keeps the sequence clear without adding extra guesswork.
Site selection also changes how a needle behaves. Body area and tissue depth can make a short needle suitable in one place and too short in another. That is why route-specific guidance belongs beside the chart, not as a note people can miss.
If you are unsure about reuse, disposal, or whether a product fits a specific route, pause and ask a qualified clinician or pharmacist. Needle charts help with preparation. They do not replace local instructions, professional judgment, or product labeling.
Quick Reference Tools Cross References and Next Steps
The fastest way to use a needle chart is to turn it into a decision tree. Start with the route, then move to tissue depth, then confirm gauge and length, then check whether the product is a pen needle or a traditional syringe. That sequence keeps the reader from overvaluing one number and underweighting the rest.
For repeat use, the most useful tools are the ones that separate product format from dose planning. A gauge chart answers, “Which needle type fits the route?” A dose calculator answers, “How much volume does the protocol call for?” A safety checklist answers, “What should happen before, during, and after the injection?” Each one solves a different problem, and they work best together.
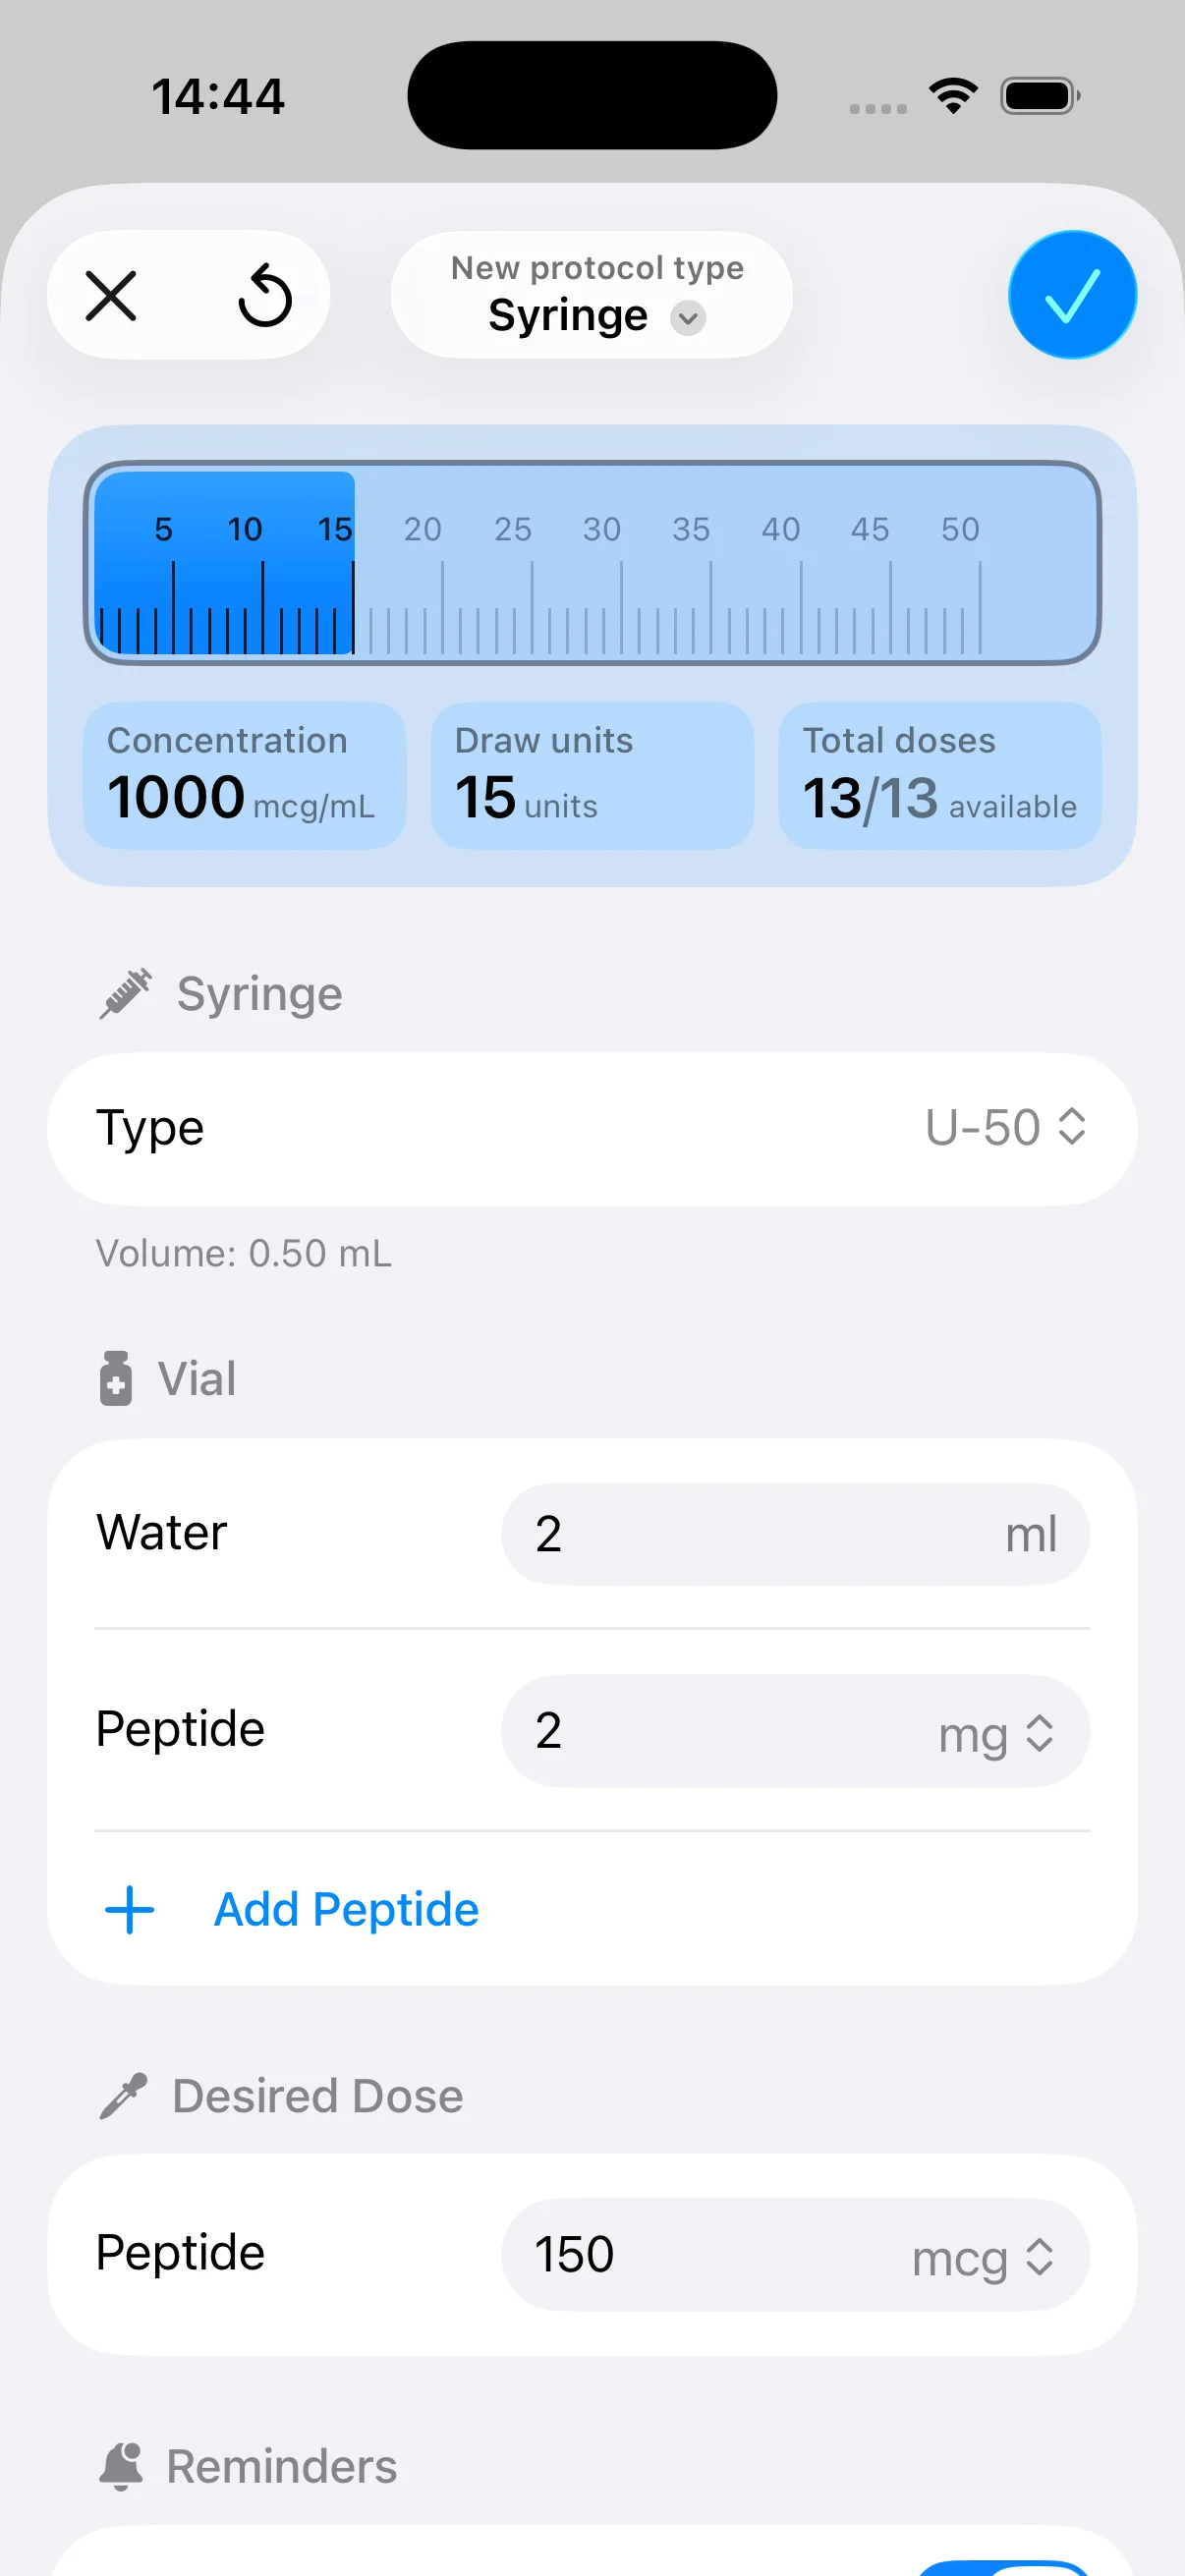
PepFlow fits into that planning layer as one option for converting desired microgram amounts into practical unit measurements, organizing cycled protocols, and logging history so the routine stays consistent over time. If you’re comparing needle choices for peptide work, that kind of planning support pairs well with the chart logic in this guide because it keeps dose math and supply selection in the same workflow.
Fast lookup cues
- If the route is IM: prioritize depth and route-specific guidance first.
- If the route is SC: look for finer gauges and shorter lengths that still match the site.
- If the dose is tiny: check dead volume and the full syringe listing, not just gauge.
- If the product is a pen: use device-specific charts, not legacy syringe tables.
- If the label is unclear: read the package details again before buying or injecting.
The best next step is to keep one chart for size, one note for route, and one checklist for handling. That gives you a simple reference stack you can revisit without starting from scratch each time. For readers building a steady routine, the combination of a chart, a calculator, and a logged protocol is usually more useful than any single table.
If you want a practical way to apply this chart to real dosing and routine planning, visit PepFlow and use it alongside your injection notes. It can help you convert microgram goals into usable unit measurements, keep protocols organized, and make needle selection easier to line up with the route you’re using.