You’ve got a vial of lyophilized peptide in one hand, bacteriostatic water in the other, and a simple question that suddenly doesn’t feel simple at all: how much liquid do you add, and what concentration does that give you?
That’s the moment where people either slow down and calculate carefully or guess and hope the label, syringe, and memory all line up. In practice, concentration errors usually don’t come from advanced chemistry. They come from basic things done too fast: mixing up mg and mcg, forgetting purity, or adding a convenient amount of water instead of the amount that produces the concentration you want.
If you want to learn how to calculate final concentration without getting lost in textbook jargon, the key is to separate three situations that people often blur together. One is making a fresh solution from a dry powder. Another is diluting a stock solution you already have. A third is turning that final concentration into an actual dose volume you can draw up accurately.
Table of Contents
- Why Accurate Concentration Calculations Matter
- The Foundational Formulas for Concentration
- A Worked Example Reconstituting a Peptide Vial
- Calculating Concentration After a Dilution
- Common Pitfalls and How to Verify Your Results
- From Concentration to Dosing with the PepFlow App
Why Accurate Concentration Calculations Matter
A concentration number isn’t just lab math. It decides what every marked unit on your syringe means.
With peptides, that matters immediately. If you reconstitute a vial too weak, you may draw more volume than planned to reach a target dose. If you make it too concentrated, a very small syringe movement can change the dose more than you intended. In both cases, the problem started before the injection. It started when the final concentration was set.
Small setup choices change everything
A simple example shows how much this matters. The amount of bacteriostatic water you add directly changes the final concentration. A 5 mg vial mixed with 2 mL of water gives 2.5 mg/mL, while the same 5 mg vial mixed with 1 mL gives 5 mg/mL, as shown by the Cellgenic peptide calculator example.
That’s why experienced people don’t ask only, “How much water should I add?” They ask, “What concentration do I want the vial to end up at?”
Practical rule: choose the concentration first, then choose the water volume that creates it.
The same logic applies outside peptide use. In a lab, if you prepare a buffer incorrectly, every downstream step inherits that error. In at-home peptide prep, every dose taken from that vial inherits it.
Accuracy protects consistency and material
A vial can be expensive, limited, or difficult to replace. Wasting material because the first mix was wrong is frustrating. Beyond that, it makes your schedule unreliable because one vial no longer behaves like the next.
What works is a repeatable process:
- Pick one target concentration: Don’t improvise at the bench.
- Write units beside every number: mg, mcg, mL, and µL aren’t interchangeable.
- Match your syringe to the volume: The finer the markings, the easier it is to draw consistently.
- Recheck the math before mixing: It’s much easier to fix a calculation than a reconstituted vial.
People often think the hard part is the formula. Usually it isn’t. The hard part is staying disciplined when the calculation looks easy enough to skip.
The Foundational Formulas for Concentration
A concentration formula is only useful if it matches the job in front of you. For peptide reconstitution, the job usually starts with a dry vial and a chosen amount of diluent. In that situation, the core calculation is simple and practical.
Mass per volume
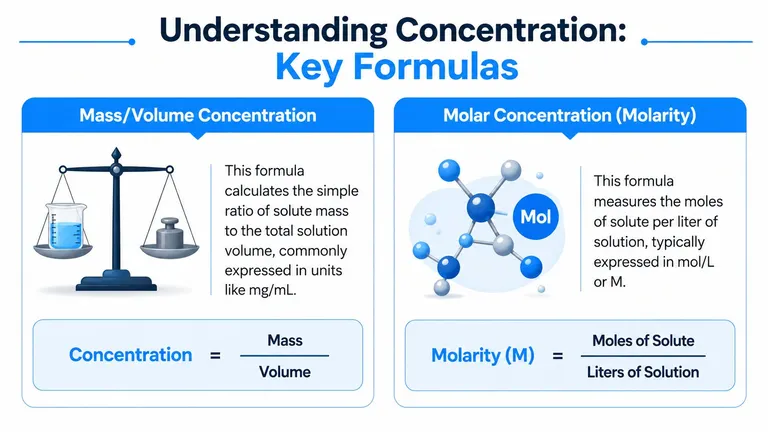
For peptide work, the formula used most often is mass per volume:
Concentration = Mass ÷ Volume
If mass is written in mg and volume in mL, the result is mg/mL. That unit matters because it connects directly to how people draw and measure doses from a reconstituted vial.
A few terms help keep the math straight. The solute is the peptide or compound being dissolved. The solvent is the liquid added, such as bacteriostatic water. The solution is the final mixed liquid. Concentration describes how much solute is present in each unit of that final volume.
Use a real vial example:
- Mass: 5 mg peptide
- Volume: 2 mL bacteriostatic water
- Concentration: 5 mg ÷ 2 mL = 2.5 mg/mL
That means each 1 mL contains 2.5 mg of peptide. If you draw 0.1 mL, you are drawing one tenth of that amount.
People new to peptide prep often get tripped up here because the concentration looks abstract until it reaches the syringe. This guide on converting mcg to mL for peptide dosing helps connect the vial concentration to the actual volume you pull.
Molarity and the dilution equation
Lab manuals often introduce molarity, which is moles of solute per liter of solution. That is useful in chemistry and biology work where molecular relationships matter, especially with reagents prepared to a defined molar strength.
Another common formula is the dilution equation:
C₁V₁ = C₂V₂
This is used when you already have a liquid stock at one concentration and need a weaker working solution. For example, a concentrated buffer, stock reagent, or premixed peptide solution may need to be diluted to a target concentration for a later step.
For at-home peptide reconstitution, molarity is usually not the first tool to reach for. The label on the vial is typically given in mg, and the practical question is how many mL to add so the finished vial is easy to dose accurately. Using molarity for that task often adds extra conversions without improving the result.
Common concentration formulas
| Calculation Type | Formula | When to Use |
|---|---|---|
| Mass/Volume Concentration | Concentration = Mass / Volume | Reconstituting a dry peptide or dissolving a weighed compound |
| Dilution Calculation | C₁V₁ = C₂V₂ | Making a working solution from an existing stock |
| Purity-Adjusted Concentration | Concentration = (Gross weight × Purity × Assay) / Volume | When the labeled amount does not represent pure active material |
The third row matters more in research and compounding settings than in routine home reconstitution, but it is worth recognizing. If a material is not fully pure, the concentration of active compound can differ from the gross amount written on the label. In basic peptide prep, many users work from the labeled vial amount and keep the calculation in mg/mL because that is the cleanest way to stay consistent.
A good rule is simple. If you start with powder, use mass ÷ volume. If you start with a liquid stock, use C₁V₁ = C₂V₂. Matching the formula to the setup avoids the kind of avoidable math errors that show up later as inconsistent dosing.
A Worked Example Reconstituting a Peptide Vial
You’re holding a 5 mg peptide vial and planning doses small enough that syringe markings start to matter. The math decides whether each draw is clean and repeatable or a guessing exercise.
Start with the target concentration
For dry peptides, the core calculation is simple:
Concentration (mg/mL) = peptide mass (mg) ÷ diluent volume (mL)
If the concentration is the goal, solve for volume instead:
Volume = Mass ÷ Target concentration
A practical example makes this easier. Say the vial contains 5 mg of peptide, and you want a final concentration of 1.7 mg/mL because that gives you dose volumes you can measure accurately. The volume to add is:
Volume = 5 mg ÷ 1.7 mg/mL = 2.94 mL
In real handling, that rounds to 3 mL of bacteriostatic water, which matches the peptide reconstitution example from Boreal.
That is the right order of operations for home prep. Pick the concentration first, then calculate the water volume. Randomly adding 1 mL or 2 mL because it feels familiar often creates awkward dose volumes later.
If you’re still deciding what volume makes sense for your vial size and syringe, this guide on how much bacteriostatic water to mix with peptides helps map the concentration to practical dosing.
The handling matters as much as the arithmetic
In peptide work, correct math can still produce a poor vial if the prep is sloppy. The same source notes two common mistakes: rough mixing and using non-sterile water. Both are easy to avoid, and both matter more in at-home reconstitution than many beginners expect.
Use a process you can repeat:
-
Read the vial label carefully
Confirm the peptide amount before you calculate. A 5 mg vial and a 10 mg vial can look nearly identical on the bench. -
Choose a concentration that fits your syringe
Small dose volumes are hard to measure consistently with wide spacing between markings. A slightly lower concentration can be easier to dose accurately, even if it means adding more diluent. -
Calculate the required diluent volume
Divide peptide mass by your target concentration. -
Measure the diluent accurately
If the volume is off, the concentration is off. There is no later step that fixes that. -
Add the liquid gently along the vial wall
Wet the powder without blasting it directly. That reduces foaming and helps fragile material dissolve more cleanly. -
Swirl gently
Avoid aggressive shaking or vortexing unless the product instructions specifically allow it.
I treat this as two separate jobs: calculation and preparation. Beginners often focus on the first one and rush the second.
Convert the vial concentration into something you can dose
After reconstitution, the useful question is no longer “How much water did I add?” It becomes “What does each mL, or each syringe unit, contain?”
If your vial concentration is in mg/mL, convert to mcg/mL by multiplying by 1000.
Using the example above:
- 1.7 mg/mL
- = 1700 mcg/mL
Now the vial is easier to think about in dose terms. If the intended amount is 250 mcg, the draw volume is:
Volume = 250 mcg ÷ 1700 mcg/mL = 0.147 mL
That is a workable calculation, but it also shows a real trade-off. A precise mathematical answer is not always a convenient draw on every syringe. That is why choosing the concentration first matters so much in peptide prep.
Write the full chain out each time:
- peptide in mg
- diluent added in mL
- final concentration in mg/mL
- converted concentration in mcg/mL
- target dose in mcg
- draw volume in mL
That habit catches mistakes before they become dosing mistakes. In home peptide use, that’s the gap between knowing the formula and using it safely and consistently in practice.
Calculating Concentration After a Dilution
You reconstituted a peptide correctly, then later realized the vial is too concentrated for the dose volume you want to measure. That is a dilution problem, not a reconstitution problem. The powder is already in solution. Now the job is to reduce concentration without changing the amount of dissolved material you already have.
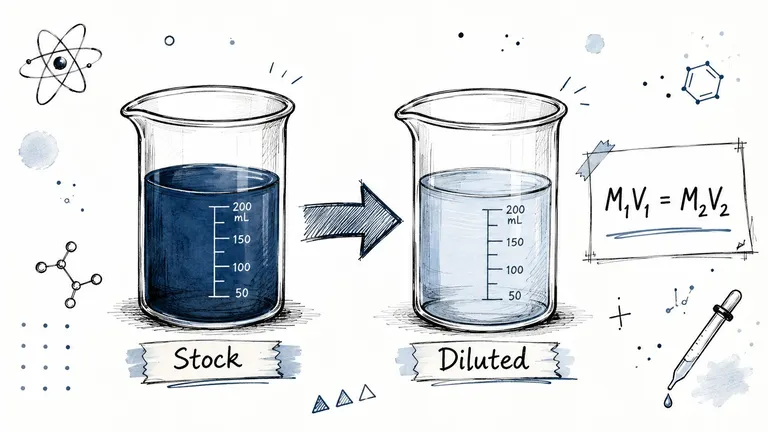
What each part of C1V1 equals C2V2 means
The standard dilution equation is:
C₁V₁ = C₂V₂
Each part has a specific meaning:
- C₁ = starting concentration
- V₁ = volume of the starting solution used
- C₂ = target concentration
- V₂ = final total volume after dilution
The logic is simple. The total amount of peptide or solute stays the same. Only the amount of liquid changes.
A common lab example is turning a 10X stock into a 1X working solution. If the final volume needs to be 1000 mL, use 100 mL of the 10X stock and add diluent until the total volume reaches 1000 mL. The stock contributes the same total amount of dissolved material. It is just spread through a larger volume.
A practical dilution example with a peptide solution
Say a peptide vial has already been reconstituted to 1700 mcg/mL, but the dose you want is awkward to measure on your syringe. You decide to make it easier to draw by diluting the solution to 1000 mcg/mL.
If you want 2 mL of final solution at 1000 mcg/mL, set it up like this:
1700 mcg/mL × V₁ = 1000 mcg/mL × 2 mL
Solve for V₁:
V₁ = 2000 ÷ 1700 = 1.176 mL
So you would use:
- 1.176 mL of the original peptide solution
- enough diluent to bring the final volume to 2 mL
That means adding:
2.000 mL - 1.176 mL = 0.824 mL
Dilution becomes useful for at-home peptide prep. The math is standard chemistry. The reason people use it is practical. A concentration that looks fine on paper can still produce annoying draw volumes in real use.
A simple stock solution example
If you already know the starting concentration, desired concentration, and final total volume, dilution math usually asks for one thing: how much stock solution to use.
For example:
- Starting concentration: 5 mg/mL
- Target concentration: 1 mg/mL
- Final volume: 10 mL
Set up the equation:
5 mg/mL × V₁ = 1 mg/mL × 10 mL
V₁ = 2 mL
So you use 2 mL of stock, then add diluent until the total volume reaches 10 mL.
Here’s a short visual walkthrough:
Applying dilution logic to real lab prep
The same equation works whether you are preparing a buffer, reducing a stock solution for an assay, or adjusting a peptide solution to a more usable strength.
A few habits keep the calculation clean:
- Keep units matched. Use mg with mg, mcg with mcg, mL with mL.
- Treat V₂ as final total volume. It is not just the amount of diluent added.
- Solve for one unknown at a time. Write the equation first, then plug in values.
- Check whether the answer makes physical sense. If you are making a weaker solution, the stock volume must be smaller than the final volume.
That last check catches a lot of home-prep errors.
For peptide users, dilution usually shows up after the initial reconstitution, when the first concentration turns out to be technically correct but inconvenient to dose. In practice, good dilution math helps you choose a solution strength that fits your syringe, your target dose, and the amount of handling you are comfortable doing.
Common Pitfalls and How to Verify Your Results
Most concentration mistakes aren’t caused by difficult math. They come from assumptions that were never checked.
The mistakes that cause bad concentration math
One of the biggest is assuming the labeled mass equals pure active peptide. That isn’t always true. Bachem gives the correction formula as Concentration = (Gross weight × Purity × Assay) / Volume and notes that if a 1 mg final product has 80% content, only 800 μL of solvent is needed to achieve 1 mg/mL, not 1000 μL, as shown in the Bachem peptide content calculator guidance.
That matters because a vial can look straightforward while still being compositionally different from what your rough math assumes.
Other common mistakes are less technical and more procedural:
- Unit confusion: mg, mcg, mL, and µL get swapped mentally.
- Rounding too early: Small volume prep punishes sloppy rounding.
- Using convenience volumes: People add “a nice round amount” of water instead of the amount tied to the target concentration.
- Forgetting final volume logic: Concentration is based on the full final volume of the solution, not just the solvent you thought about first.
Ways to check your work before using the solution
You don’t need advanced instrumentation to catch many errors. A few checks eliminate a lot of bad prep.
| Check | What to Ask |
|---|---|
| Unit check | Are all masses and volumes written in compatible units? |
| Direction check | If I added more solvent, did the concentration decrease as expected? |
| Magnitude check | Does the result fit the starting amount, or is it obviously too strong or too weak? |
| Handling check | Did I actually add the volume I used in the calculation? |
A fast self-audit helps:
- Write the equation first: Don’t calculate in your head.
- Circle the target unit: If you want mg/mL, make sure the inputs produce mg/mL.
- Re-read the vial details: Purity and assay can matter.
- Match the syringe to the task: Fine gradations reduce interpretation errors.
The cleanest verification method is simple: if you repeat the calculation from scratch and get the same answer, your confidence goes up immediately.
When direct measurement matters
In routine prep, math and careful handling are enough. In research settings, direct quantification methods exist when exact concentration must be confirmed experimentally.
For peptides with chromophoric residues such as tryptophan or tyrosine, concentration can be estimated by UV absorbance using Beer-Lambert logic and the extinction coefficients listed by Bio-Synthesis in its peptide concentration FAQ. For peptides lacking those residues, AAT Bioquest describes a 215 nm minus 225 nm absorbance method with the formula mg/mL = (A215 − A225) × df × 0.144 in its final peptide concentration guide.
Those methods are useful to know about even if you never use them at home. They reinforce the same lesson: concentration isn’t a vague estimate. It’s a value you either calculate correctly or verify directly.
From Concentration to Dosing with the PepFlow App
Knowing the final concentration is only half the job. The next question is the one that tends to trip people up in real life: how much volume corresponds to the dose you want today?
Why the last calculation is where people slip
A vial concentration can be correct and still lead to a dosing error if you convert poorly from concentration into draw volume. This usually happens when someone jumps between mg, mcg, mL, and syringe units too quickly.
That’s why many people stop doing the last step manually once they understand the underlying math. They still need to know how concentration works, but they don’t want to redo the same conversion chain every time a new vial or protocol starts.
Using a calculator and schedule tool
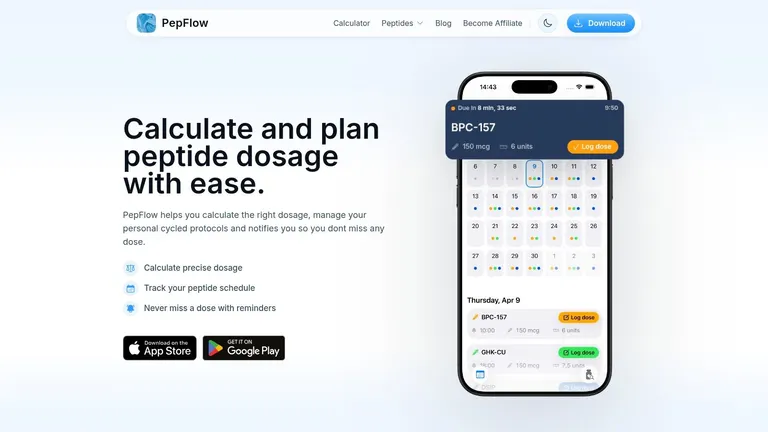
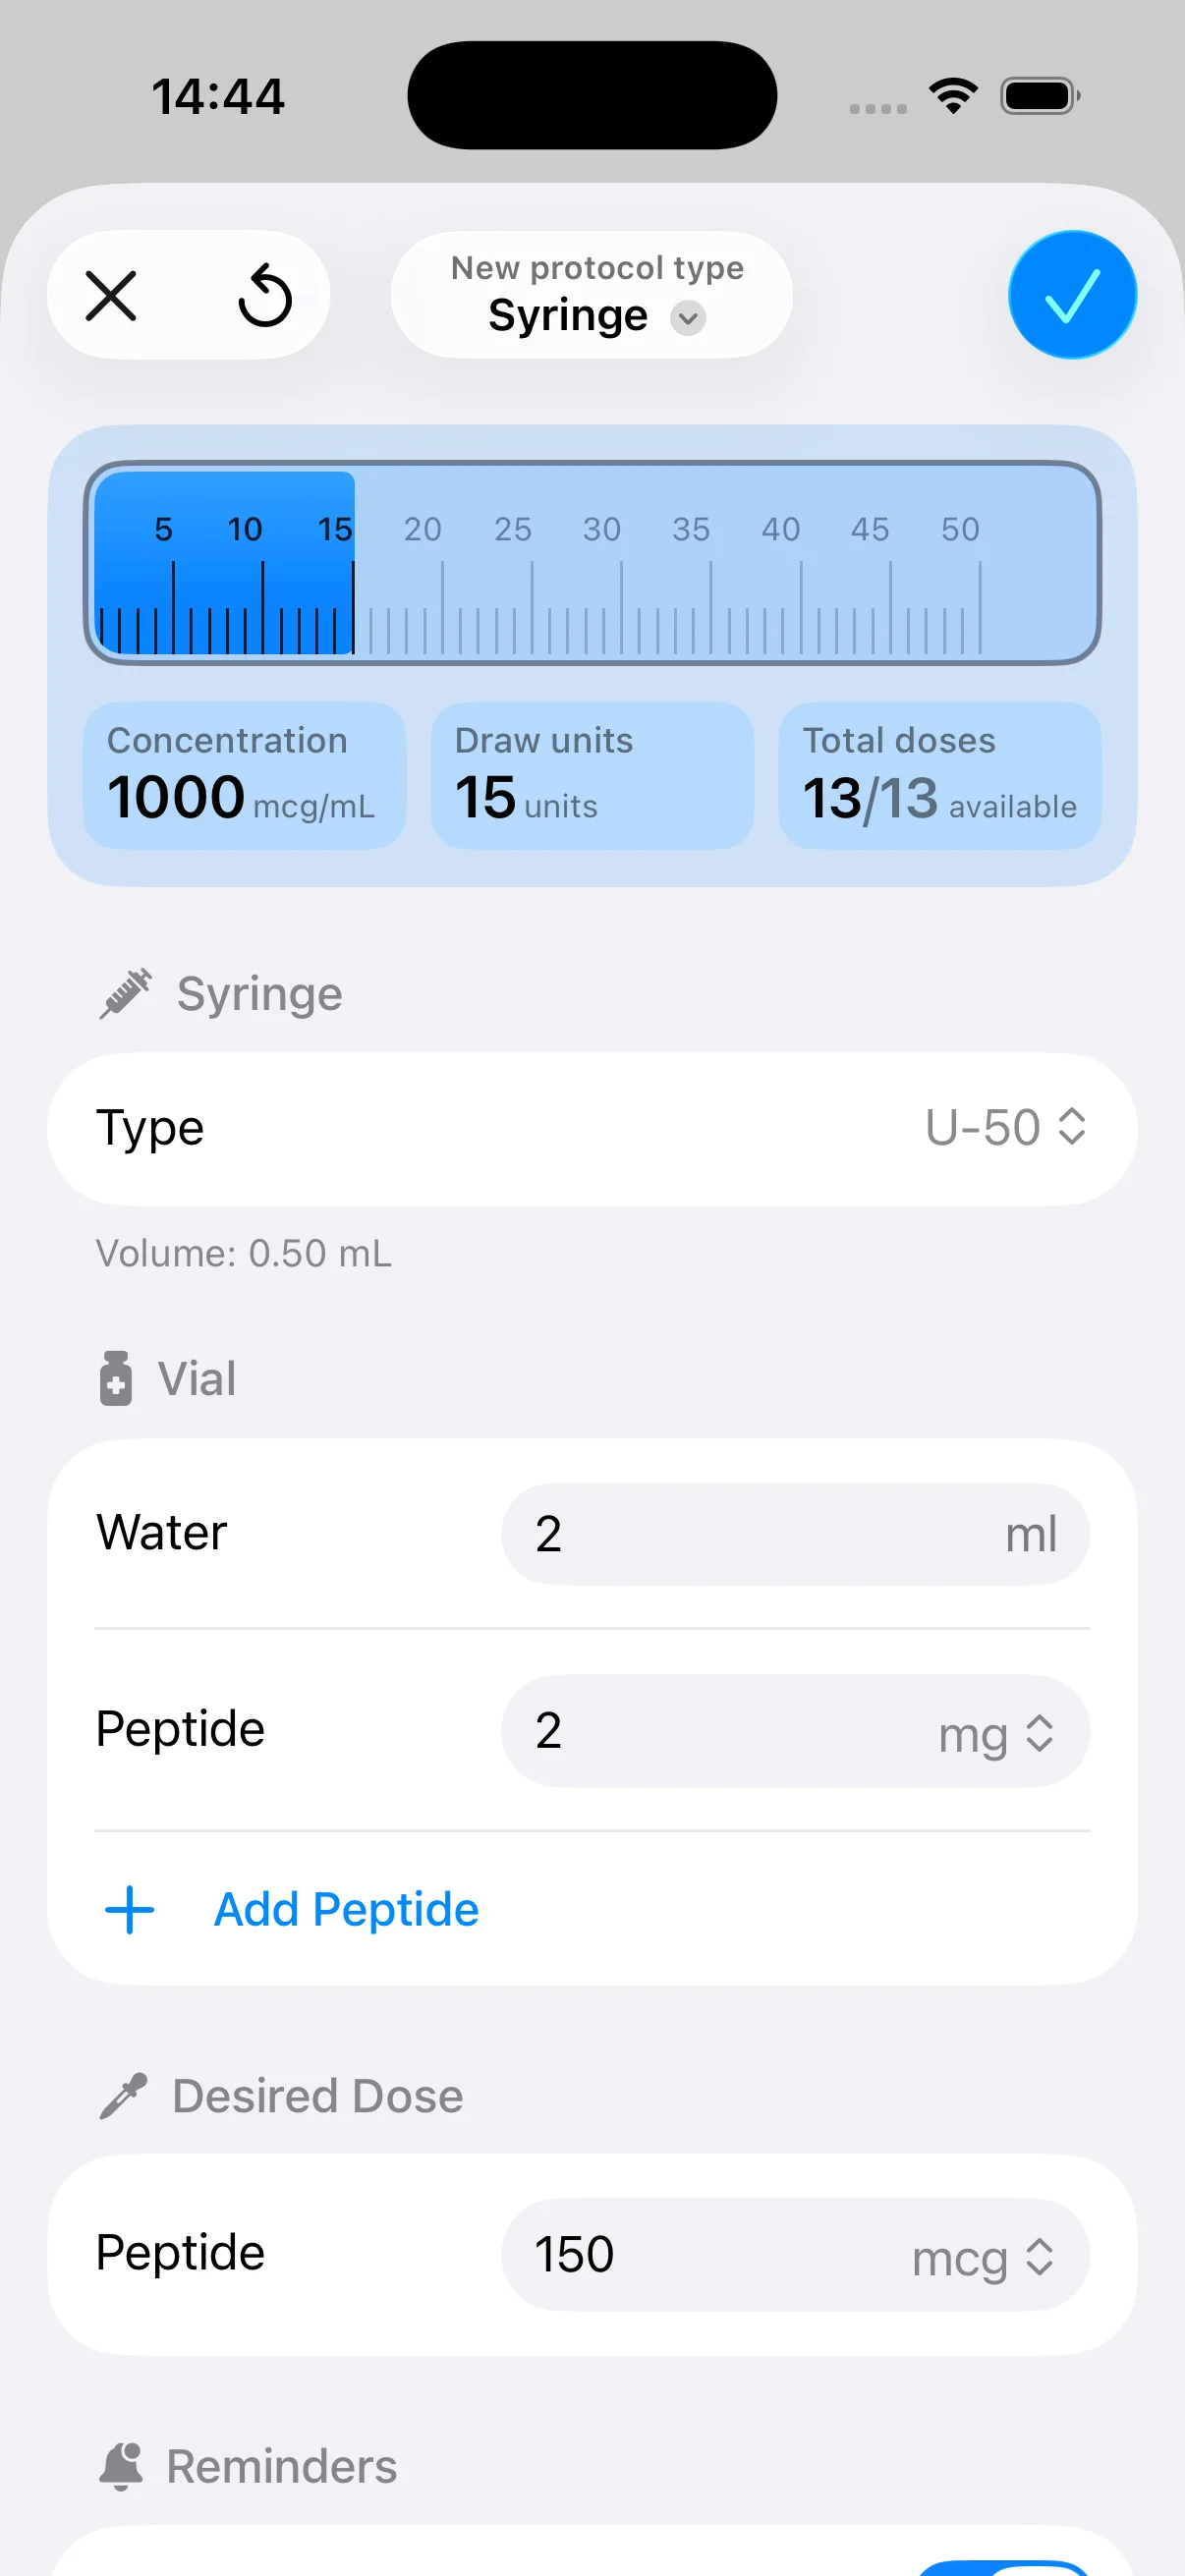
One practical option is PepFlow’s peptide calculator app, which lets users enter vial amount, diluent volume, and desired dose, then displays the resulting concentration and draw amount in a more usable format. That kind of tool is most useful when you already understand the setup choices that create the concentration in the first place.
What tends to work best is a split approach:
- Use manual calculation to understand the system
- Use a calculator to reduce repeat conversion errors
- Track schedules separately from vial math
- Keep each vial configuration recorded so you don’t rely on memory
If you’re handling more than one peptide, cycling protocols, or changing concentrations between vials, organization becomes part of dosing accuracy. The calculation isn’t the only challenge anymore. Consistency is.
If you want a simpler way to turn vial amount, diluent volume, and target dose into a usable dosing plan, PepFlow is built for that workflow. It helps calculate concentration, convert doses into practical draw amounts, and keep peptide schedules organized so you’re not redoing the same math by hand every time.