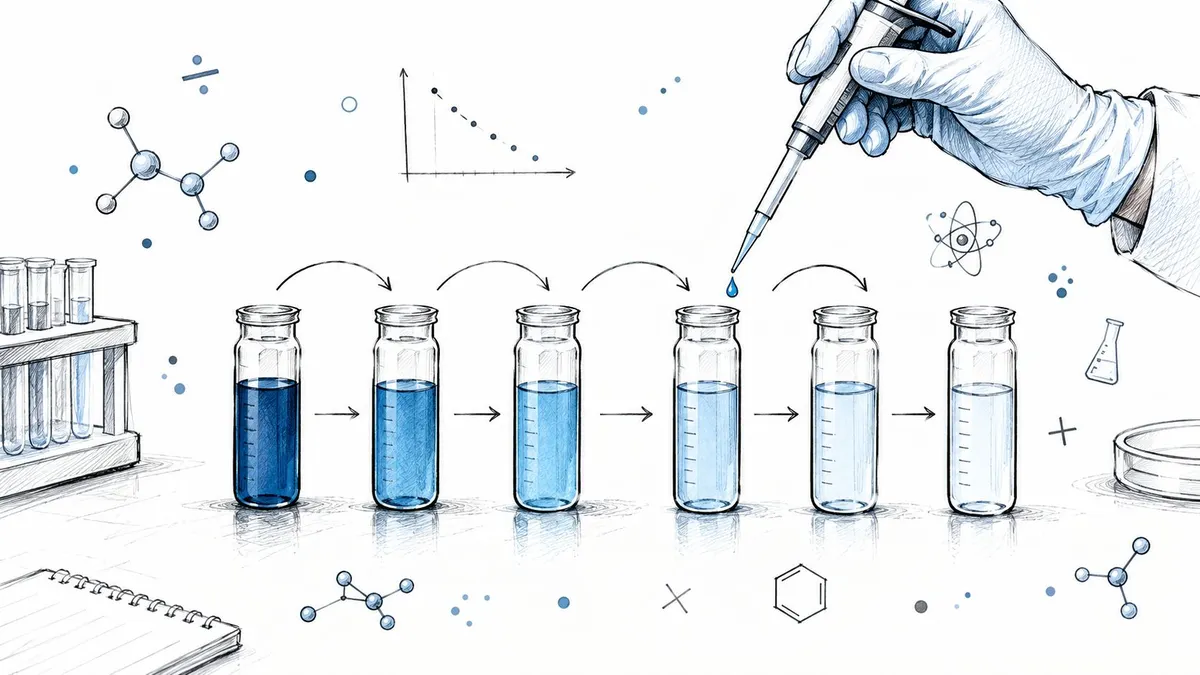
You’re holding a new vial, checking the label, and wondering whether the amount of diluent you’re about to add will produce the concentration you intended. The formula may look simple, but the physical steps matter just as much as the arithmetic. A small mistake in reading a syringe, transferring liquid, or identifying the final concentration can affect the entire preparation.
The dilution process is the controlled act of reducing concentration by adding a suitable diluent. For peptide workflows, that means connecting a target dose to a measurable injection volume while protecting sterility, consistency, and traceability. This guide focuses on the reasoning behind each step, not just the calculation.
Table of Contents
- Why Mastering the Dilution Process Matters
- Understanding Core Dilution Concepts
- The Essential Formula C1V1 Equals C2V2 Explained
- Practical Walkthrough Two Worked Examples
- Safety First Critical Considerations for Preparation
- Streamline Your Workflow with PepFlow
- Dilution Process Frequently Asked Questions
Why Mastering the Dilution Process Matters
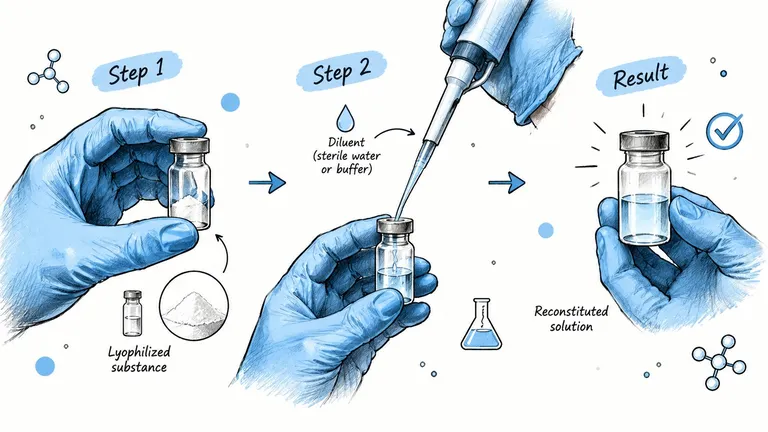
A vial of lyophilized peptide holds a dry substance that must be prepared before it can be measured as a liquid. The preparation is ready only when you know how much diluent to add, what concentration results, and what volume corresponds to the intended dose. Leaving any of these answers uncertain can make the final measurement unreliable.
Dilution therefore requires more than a quick volume-ratio calculation. Concentration controls the relationship between the amount of active substance and the volume you draw. A more concentrated solution delivers the same target amount in a smaller volume. A less concentrated solution requires a larger volume. Either result may be mathematically valid, but the selected concentration must suit the product, route, equipment, and professional instructions.
The laboratory has treated dilution as a quantitative technique for a long time. Serial dilution became a standard laboratory method after German physician Robert Koch described it in 1883, a milestone in microbiology and quantitative laboratory science (INTEGRA Biosciences explains the history and purpose of serial dilution). Researchers use controlled dilution steps to count microorganisms, prepare assay standards, and create reproducible measurement ranges.
Dilution is more than adding water
The vial contains a total amount of solute. The diluent turns that material into a usable liquid volume, while the calculation identifies how much of that liquid represents the intended amount. This connects the abstract formula to the physical preparation in your hands.
Errors enter when someone relies on memory, guesses the concentration, or assumes the label automatically provides an injection volume. A correct-looking syringe doesn’t prove that the underlying concentration is correct.
Practical rule: Never draw a dose until you can state the final concentration and show how the intended dose converts into a volume.
The same principle applies in research, pharmacy, and laboratory work, where substances are diluted to reach measurable or administrable ranges. Pharmaceutical dilution involves adding a suitable diluent, such as normal saline or sterile water, to make medication less concentrated or easier to administer. Aseptic preparation and product-specific targets are formal requirements in injectable-drug guidance. For personal peptide workflows, professional medical guidance remains necessary because arithmetic alone cannot establish whether a product or diluent is suitable. A digital preparation tool such as PepFlow can help reduce calculation and transcription errors, but it does not replace product instructions, sterile technique, or qualified clinical advice.
Understanding Core Dilution Concepts
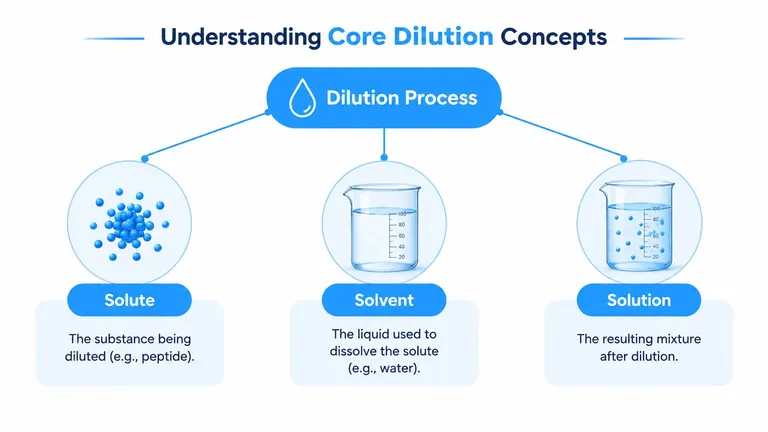
Before using a formula, separate the three parts of the mixture. The solute is the substance being diluted. In a peptide example, it’s the peptide powder or active material in the vial. The solvent, often called the diluent in practical preparation, is the liquid used to dissolve or spread that material. The resulting solution is the uniform mixture you can measure.
The orange juice analogy
Frozen orange concentrate makes the relationship intuitive. The concentrate is the solute. Water is the solvent. Once combined, the drink is the solution. Adding more water doesn’t create more orange concentrate. It spreads the same amount of concentrate through a larger volume, producing a weaker drink.
Dilution works the same way. The amount of solute stays constant while the total volume increases, provided you haven’t lost material during transfer or preparation. The concentration falls because the same substance occupies more liquid space.
This distinction helps resolve a common confusion. Adding diluent doesn’t reduce the total amount of peptide in the vial. It reduces the amount of peptide found in each unit of volume. If the vial contains a fixed total amount, changing the diluent volume changes how much liquid you must draw to obtain a particular amount.
Concentration is the useful middle point
Concentration tells you how much solute exists in a defined volume. For peptide calculations, the units might be milligrams per milliliter, micrograms per milliliter, or another compatible unit. The units must match throughout the calculation.
A solution can be described as:
- More concentrated: More solute exists in each milliliter, so the required dose occupies less liquid.
- Less concentrated: Less solute exists in each milliliter, so the same dose occupies more liquid.
- Uniform: The solute is distributed throughout the solution, making a measured portion representative of the whole.
The aim isn’t to make the solution weaker. The aim is to create a known, usable concentration that can be measured consistently with the available equipment. If you’re comparing supplement or performance-related options separately, a resource such as evaluate creatine forms for performance can help keep that discussion distinct from the mathematics of peptide dilution.
The Essential Formula C1V1 Equals C2V2 Explained
The central equation is:
C1V1 = C2V2
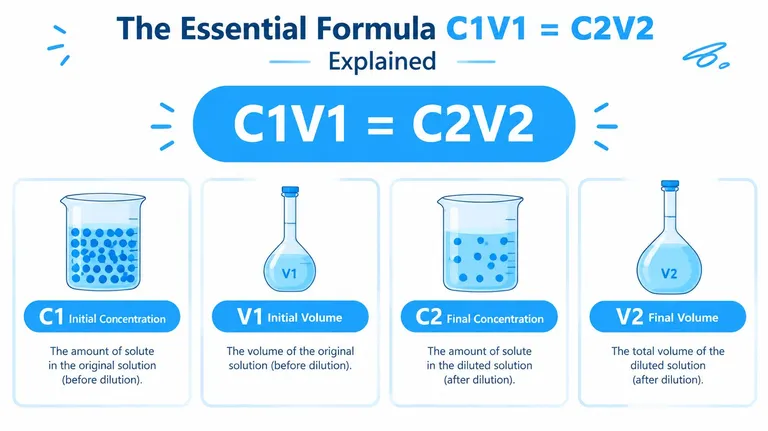
It expresses a conservation relationship. The amount of solute present before dilution equals the amount of solute present after dilution. The letters represent four different values:
| Symbol | Meaning | Practical question |
|---|---|---|
| C1 | Initial concentration | How strong is the starting material? |
| V1 | Initial volume | How much of that starting material are you using? |
| C2 | Final concentration | How strong should the finished solution be? |
| V2 | Final volume | What total volume will the finished solution occupy? |
If you know three values, you can rearrange the equation to find the fourth. For example, to find the starting volume:
V1 = (C2 × V2) ÷ C1
What the equation is really balancing
Suppose a stock solution has a high concentration and you want a weaker final solution. You’re not calculating how much solute to create. You’re calculating how much of the existing stock contains the required amount of solute, then determining the final volume needed to reach the target strength.
A simple dimensional check can catch mistakes. If concentration is expressed as milligrams per milliliter and volume is expressed in milliliters, multiplying them produces milligrams on both sides. If one side uses milligrams and the other uses micrograms without conversion, the result can be wrong even when the algebra looks neat.
Why serial steps deserve caution
A single calculation can be correct while the preparation still misses the target. Every transfer introduces opportunities for a small volume error. Reading the syringe, stopping at the wrong mark, leaving liquid behind, or mixing incompletely can alter the final result.
A source discussing dilution error reports measurement uncertainty increasing from 0.6% in a single step to 0.9% in a serial dilution, which is a 50% relative increase (PubMed record on dilution-related measurement error). The important lesson isn’t that every preparation will have those exact values. It’s that repeated handling can increase uncertainty compared with a single controlled dilution.
Accuracy check: Write the units beside every number, calculate with a calculator, and verify the result by asking whether the final concentration should be stronger or weaker than the starting concentration.
For a separate explanation of percentage-based calculations, use the dilution percentage calculator guide. Treat any digital result as a calculation aid, not permission to bypass product instructions, sterile technique, or professional supervision.
Practical Walkthrough Two Worked Examples
The following examples show the logic of the calculation. They’re educational illustrations, not instructions to use an unapproved product or to choose a personal dose. Product labeling, prescribing instructions, and a qualified clinician must determine whether a peptide, diluent, concentration, and route are appropriate.
Example one calculating a target concentration
Assume, for illustration, that a vial contains 10 mg of dry material and you want a final concentration of 2 mg/mL. To find the final volume required, use the amount of solute as the starting concentration-volume product:
C2 × V2 = total amount
2 mg/mL × V2 = 10 mg
V2 = 5 mL
The arithmetic says that a total liquid volume of 5 mL would produce 2 mg/mL, assuming the entire amount dissolves and the final volume is accurately established. This does not automatically mean you should add that volume. You must first confirm that the product’s instructions permit the diluent, volume, storage conditions, and resulting concentration.
The physical workflow should be controlled:
- Confirm the label and instructions. Verify the total amount, approved diluent, preparation method, and handling requirements.
- Prepare a clean workspace. Use appropriate sterile supplies and avoid touching critical surfaces.
- Measure the diluent carefully. Use equipment suited to the volume. Don’t estimate by eye.
- Introduce the diluent according to the product instructions. Avoid forceful handling if the instructions call for gentle mixing.
- Record the final concentration. Write the amount, diluent volume, date, and any required storage information.
For additional calculation practice, review how to calculate final concentration.
Example two converting a target amount into volume
Now assume the prepared solution is 2 mg/mL, and a clinician has instructed a target amount of 0.2 mg. Convert the concentration into a compatible unit:
2 mg/mL = 2,000 micrograms/mL
Then calculate:
Volume = target amount ÷ concentration
0.2 mg ÷ 2 mg/mL = 0.1 mL
The result is 0.1 mL, provided the stated concentration and target amount are correct. If a syringe uses unit markings, you must confirm how those markings correspond to milliliters for that specific syringe. Never assume that a “unit” has the same meaning across every product or device.
A second-person check is valuable when the dose has serious consequences. Ask someone qualified to independently verify the vial amount, diluent volume, final concentration, target amount, and drawn volume. The safest workflow separates the calculation from the physical draw, so you don’t improvise while holding the syringe.
The video below demonstrates the type of preparation workflow learners may encounter. It isn’t a substitute for product-specific directions or clinical instruction.
Safety First Critical Considerations for Preparation
A correct calculation can still produce an unsafe preparation. For example, a vial may contain the wrong product, the diluent may be incompatible, or the final concentration may never be written down. Treat the formula like a map, then verify that the physical preparation follows the product instructions.
Pharmaceutical guidance describes dilution as a controlled preparation step. It discusses diluents such as normal saline and sterile water, aseptic technique, and product-specific concentration limits, including not greater than 5 mg/mL, 0.4 to 4 mg/mL, and 2 mg/mL for particular products or administration conditions (injectable-drug dilution guidance). These figures are not universal peptide targets. They show why a concentration used for one product cannot be copied automatically for another.
Critical Preparation Checklist
Use a written checklist. It works like a pre-flight check, catching an overlooked detail before the syringe is prepared.
- Product identity: Confirm the vial, total amount, expiration information, and preparation instructions.
- Diluent compatibility: Use only the diluent specified by the product or a qualified professional.
- Aseptic handling: Use sterile supplies and follow the required vial and workspace procedures.
- Concentration label: Record the final concentration immediately after preparation.
- Dose conversion: Express the intended amount in the same units as the concentration.
- Independent verification: Ask a qualified person to check high-risk preparations or any calculation you do not fully understand.
- Stop point: If the label, concentration, or volume is uncertain, pause and seek verification.
Why human factors cause serious errors
A hospital incident review identified dilution-related medication incidents involving morphine, oxycodone, adrenalin, and noradrenalin. One case involved an infant receiving 7 mg instead of 0.7 mg because staff did not know the exact concentration after dilution (European Journal of Hospital Pharmacy incident review).
The failure was a broken link between three pieces of information: the amount in the vial, the final concentration, and the volume drawn into the syringe. A missed dilution step can produce a tenfold overdose, so the final concentration must remain visible and independently verifiable. The calculation should be completed before the physical draw, not improvised while holding the syringe.
Safety boundary: If you cannot identify the final concentration with confidence, stop and ask a pharmacist, prescriber, or other qualified professional to verify the preparation.
Streamline Your Workflow with PepFlow
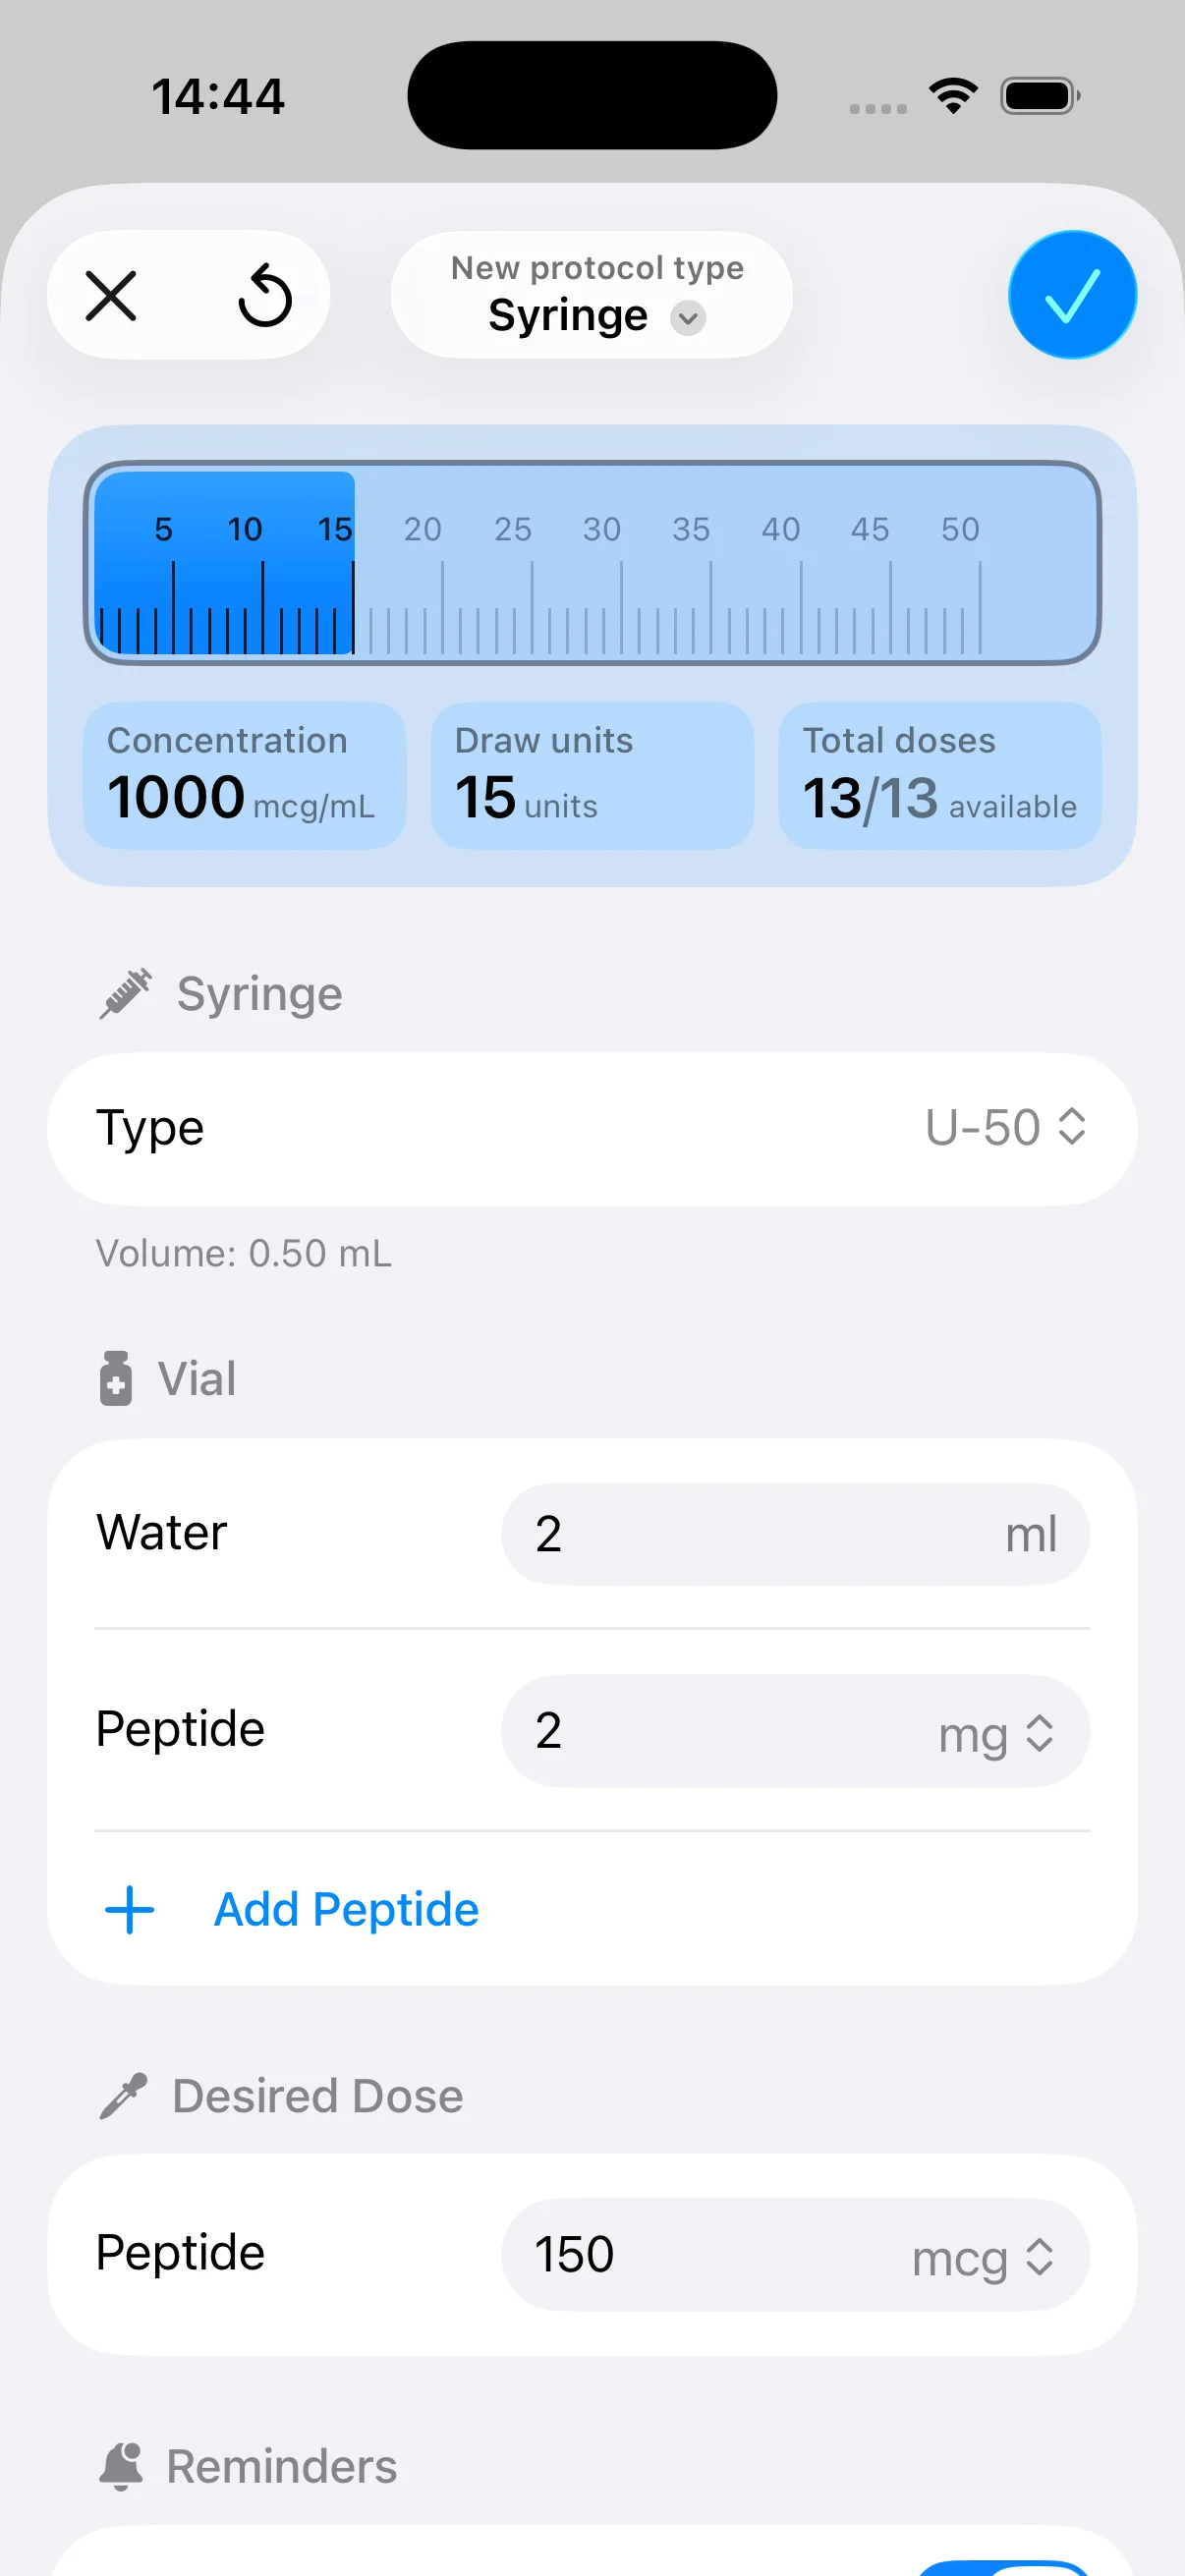
Manual dilution work has two separate tasks. First, you calculate the concentration and volume. Then you remember or record those values well enough to draw the intended amount repeatedly. Errors can occur when either task is rushed, especially when a small volume makes the final concentration difficult to visualize.
PepFlow is designed as a lightweight iOS companion for peptide dosing and scheduling. Its calculator supports vial configuration, concentration, desired microgram amounts, and practical injection-volume conversions. That can reduce the need to repeat C1V1 = C2V2 calculations from memory, while keeping the user responsible for confirming the inputs.

A repeatable record matters
A useful workflow saves the details that people often reconstruct later:
- Vial configuration: Record the total amount in the vial.
- Dilution details: Record the diluent volume and resulting concentration.
- Dose settings: Enter the professionally directed target amount.
- Routine information: Keep protocol dates, frequency, pauses, and reminders together.
- History: Log completed doses so you don’t rely on memory.
The app’s scheduling features are separate from medical judgment. They can help organize a routine, but they can’t determine whether a peptide is suitable, whether a diluent is compatible, or whether a prescribed dose should change. For a broader overview of its functions, see this peptide calculator app guide.
Used properly, a digital tool serves as a second layer of organization. It doesn’t replace label verification, aseptic practice, or professional advice. Its strongest role is helping you preserve the exact configuration you already verified, so the next calculation starts from known information instead of a handwritten guess.
Dilution Process Frequently Asked Questions
What should I do if I add too much or too little diluent?
Stop and don’t estimate the correction. Adding too much changes the final concentration, while adding too little may leave the material more concentrated than intended. Record what happened, keep the vial separate, and ask a pharmacist, prescriber, or qualified professional whether the preparation can be recalculated or must be discarded.
Can I prepare a large batch for future use?
Don’t assume that a larger batch is acceptable. Stability, sterility, storage temperature, container compatibility, beyond-use timing, and handling instructions depend on the specific product and diluent. Only prepare and store a batch when the official instructions and a qualified professional explicitly support that workflow.
How does temperature affect the solution?
Temperature can affect handling, dissolution behavior, and measurement conditions. Follow the product’s storage and preparation instructions rather than trying to compensate with extra diluent or changing the concentration yourself. If the solution has been exposed to an unsuitable condition, seek product-specific advice before using it.
What if the liquid looks unusual?
Don’t rely on appearance alone to approve a preparation. Unexpected cloudiness, particles, discoloration, leakage, or container damage should trigger a pause and professional review. Never use a questionable solution, even if the volume calculation is correct.
What should I record?
Write down the product identity, total vial amount, diluent, diluent volume, calculated concentration, preparation date, storage instructions, and intended dose setting. A complete record lets another person check your work and helps prevent confusion between similarly prepared vials.
PepFlow helps organize verified vial settings, convert directed peptide amounts into practical volumes, and maintain dosing schedules with reminders and history. Visit PepFlow to add a consistent calculation and tracking layer to your dilution workflow, while continuing to rely on product instructions and qualified medical guidance for safety decisions.